Tag Archives: Shell Apps

Overriding Back Button in Xamarin.Forms Shell…

Let me share all about overriding the Back Button navigation in Xamarin.Forms Shell applications, oh and yes! it includes handling the Android on-screen back button as well! 😉

This topic has been quite a confusing and wobbly area in Xamarin.Forms for the longest time, even I remember having to write numerous customer renderers, and hacks to just to get this simple handle done, overriding the back button…

Yes, we got hope!

But with shiny new Xamarin.Forms Shell seems to have provided quite a promising solution for this, out of the box framework itself, without us having to do much work.

I’ve been working on trying to override the back button behavior on Xamairn.Forms Shell recently, both with Navigation bar button and Android hardware back button. So I decided to share my experience with yol and provide a proper solid solution for your worries.

Ways of the Backwards…

Fundamentally there are two ways how a backward navigation could occur, although there could be other ways depending on the flow of our app…

  • Navigation bar Back button (iOS and Android)
  • Android on-screen Back Button

So when we need to consider both those scenarios when taking control of backward navigation.

Investigation…

Since overriding the Backwards Navigation in Xamarin.Forms has always been quite confusing and difficult to handle, when I started off of Xamarin.Forms Shell, I thought of giving it a clean slate and a fresh try from scratch.

Based on that here are the findings I came up with…

Case 1: OnBackButtonPressed()

OnBackButtonPressed() This method has been there for quite a long time in Xamarin.Forms framework right out of the box, I remember using this long time back, but they kept on breaking its behavior during many releases, which was quite troublesome.

This is suppose to let you override the Android on-screen (hardware) back button action, where a developer can override this method and it would intercept that action giving the developer the option whether to allow it or cancel it.

protected override bool OnBackButtonPressed()
{ ... }

You can override this in a ContentPage but surprisingly, it DOES NOT WORK! Now I would argue it makes total sense for it to be used in such context, and if it worked, it would have made things so much easier, but no, unfortunately not. 😦

But in Xamarin.Forms Shell, if you override this in the AppShell class, it does seem to work. It will intercept every time you click the Android Back button in any page.

public partial class AppShell : Xamarin.Forms.Shell
{
	public AppShell() { ... }

	protected override bool OnBackButtonPressed()
	{
		// true or false to disable or enable the action
		return base.OnBackButtonPressed();
	}
}

But the only problem is you need to have it implemented in AppShell class, which calls for some complicated implementation in the code,

  • We have to handle each individual Page behavior in a global context
  • No async context available to perform some awaitable async operation

So that’s double the trouble I wouldn’t want to go down that mess! trust me, I’ve tried lol.

They have several bug tickets open for this issue from “time to time”, here’s one of them: https://github.com/xamarin/Xamarin.Forms/issues/7072

Just an extra, if you need to handle an awaitable operation in a non-async context, here’s a sytarting point: https://forums.xamarin.com/discussion/27752/how-to-await-a-displayalert-from-a-page-without-async-button-event

Case 2: Shell.BackButtonBehavior

Shell.BackButton Now this is something new that was shipped with Xamarin.Forms Shell, which lets you override the Navigation Bar Back button, even allowing you to customize the button appearance with an icon or text.

It allows you to cancel the user invoked backward navigation from the Navigation Bar Back button. You could also subscribe a command that will fire up and let you proceed as you wish.

<Shell.BackButtonBehavior>
    <BackButtonBehavior
        Command="{Binding GoBackCommand}"
        IsEnabled="True"
        TextOverride="Back" />
</Shell.BackButtonBehavior>

Microsoft Docs: https://docs.microsoft.com/en-us/xamarin/xamarin-forms/app-fundamentals/shell/navigation#navigation-events

Do not get this confused with the Android on-screen back button, this does not work for that.

But there’s a small bug in it right now, where as in iOS run time it wouldn’t fire the Command as expected unless you set the TextOverride or IconOverride property. But it works perfectly fine on Android. There’s an active bug on it: https://github.com/xamarin/Xamarin.Forms/issues/8546

Nonetheless this is a good option to keep in mind.

Case 3: Shell.OnNavigating()

Shell.OnNavigating event is also a nifty little feature shipped out with Xamarin.Forms Shell, which allows you to intercept any kind of navigation and override it.

Yes it works on both Android and iOS! allowing you to override any navigation, either forwards or backwards direction. This goes by saying that it supports handling Android on-screen back button navigation as well.

It passes in a parameter, ShellNavigatingEventArgs provides with the following,

  • ShellNavigatingEventArgs.Cancel() allows you to cancel the navigation.
  • ShellNavigatingEventArgs.Source property provides enum ShellNavigationSource, determines the type of navigation.
  • ShellNavigatingEventArgs.Current and ShellNavigatingEventArgs.Target provides the navigation path details, kind of like, from and to path.

Microsoft Docs: https://docs.microsoft.com/en-us/xamarin/xamarin-forms/app-fundamentals/shell/navigation#navigation-events

There are two ways to implement this, you can override OnNavigating() in the AppShell class

public partial class AppShell : Xamarin.Forms.Shell
{
    public AppShell() { ... }
 
    protected override void OnNavigating
                           (ShellNavigatingEventArgs args)
    {
        // implement your logic
        base.OnNavigating(args);
    }
}

or you can subscribe to the Shell.Current.Navigating event of it as follows…

protected override void OnAppearing()
{
	Shell.Current.Navigating += Current_Navigating;
}

private async void Current_Navigating(object sender, 
                           ShellNavigatingEventArgs e)
{
	// implement your logic
}

Also here you need to make sure to unsubscribe from those even handlers once you’re done with the override action, otherwise they will retain in memory and cause all kinds of weird issues in your app.

Given both solutions, I would say the most productive option is to use the event subscription, instead of overriding in a global context. But then again it should depend mostly on your requirement. You need to keep in mind, “With great power comes great responsibility” when implementing this method, you have to make sure you’re properly handling the resources here.

Case 4: Shell.GoToAsync() for backwards!

Shell.GoToAsync() is the method that is provided by Xamarin.Forms Shell for programmatically navigating forward in pages. Until very recently Shell didn’t provide any way to Navigate backwards, but with one of the latest update they now allow it as follows,

await Shell.Current.GoToAsync("..");

Microsoft Docs: https://docs.microsoft.com/en-us/xamarin/xamarin-forms/app-fundamentals/shell/navigation#backwards-navigation

This is quite important hence this fills an important part of the puzzle, where we need to override the backward navigation event, but also forward that action programmatically once we confirm it from our logic.

Alternatively you could also use the synchronous method call, which seem to be an Xamarin.Forms internal method,

Shell.Current.SendBackButtonPressed();
...
// or on Page level
page.SendBackButtonPressed();

https://docs.microsoft.com/en-us/dotnet/api/Xamarin.Forms.Page.OnBackButtonPressed?view=xamarin-forms

But I would not recommend this to be used since its synchrony and its meant for Xamarin.Forms internal framework calls.

Investigation Conclusion:

We need both Navigation Bar back button and Android on-screen Back Button to be handled for a complete solution in this case. Now given all 3 cases, we could derive a solution by using Case 2, Case 3, and Case 4 for a full fledge overriding of the Back Button behavior in Xamarin.Forms Shell. So that’s what we’re going to explore next..

Sneak Peek!

Before I get into the actual solution that I built up, let more share a little magic here!

So that’s the awesomeness I’m going to share with you guys! Let me explain…

The Solution…

Just like I explained in my little investigation conclusion, we’re going to make use of both Shell.BackButtonBehavior and Shell.OnNavigating counterparts to implement our overriding of the Back button in Xamarin.Forms Shell. This will take care of both App Navigation Bar back button and Android on-screen back button events.

Navigation bar Back Button: We shall implement the Shell.BackButtonBehavior in the Page with a Command handler attached to it, which will override the Navigation bar back button event, and hold that flow asynchronously until we get a confirmation from an Alert dialog. Once we got the confirmation, we will forward that backward navigation event using GoToAsync(“..”) execution.

Android on-screen Back Button: We could implement the Shell.OnNavigating event subscription to handle the Android back button navigation. This implementation will need a bit of work, hence we’re going to subscribe to the Shell.OnNavigating event upon the Page OnAppearing event and unsubscribe from it upon OnDisappearing event for cleaning up the event handlers. Once we get a hold of the back button event, we will asynchronously await for the Alert dialog confirmation and forward the navigation using GoToAsync(“..”), same as the previous execution.

Keep in mind that I will be showcasing how to handle both these scenarios at once, in perfect synchronous harmony with a beautiful non-conflict implementation. 😉

Additionally I will include them separately as well in my demo project for you to explore them separately as well just in case if you had such requirement. I have published this up in my Github repo, if you’re interested in taking a peak,

hosted on github:
github.com/UdaraAlwis/XFShellBackButtonOverride

Alright then, on ahead…

Before I begin, make sure to update the installed Xamarin.Forms version in your project, whereas for this demo I’m using version 4.6.0.847, so I would recommend using the same or newer version.

Let the coding begin!

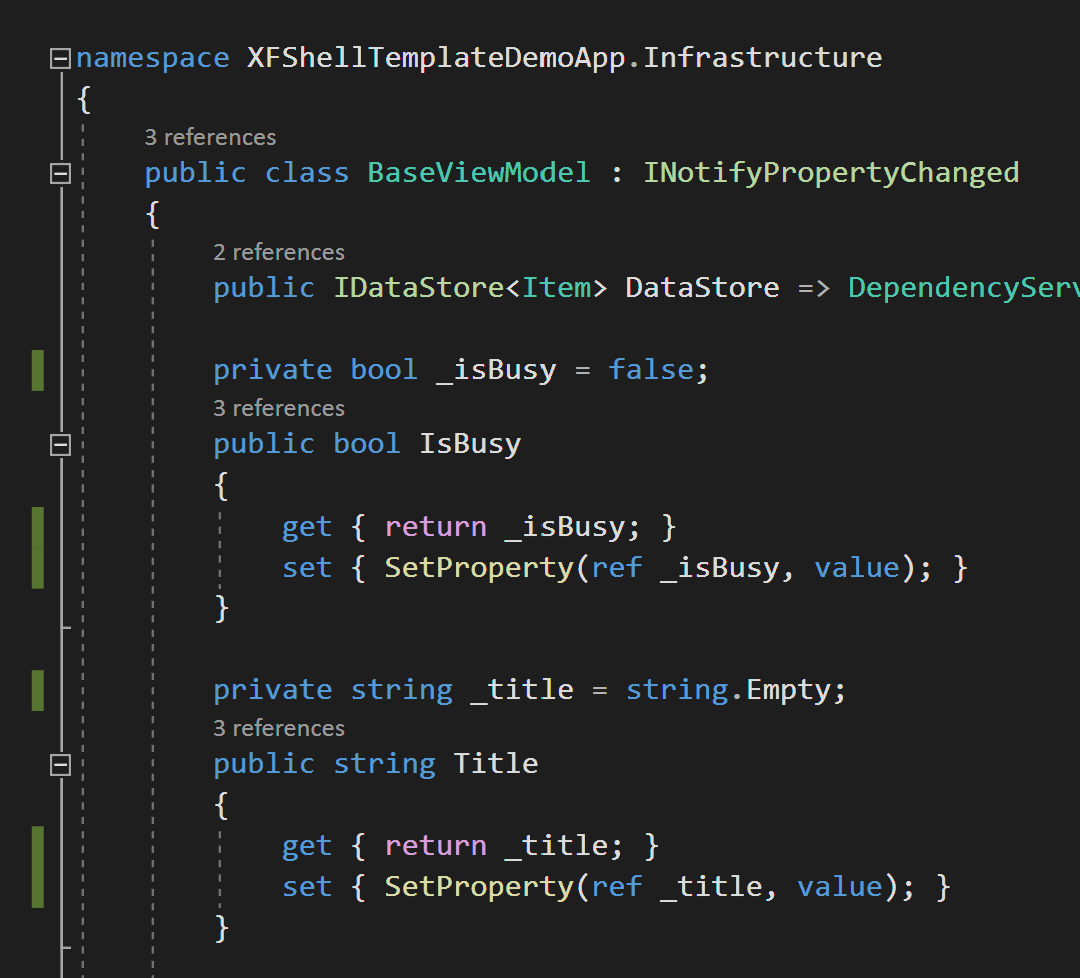
Given that you have prepared your Xamarin.Forms Shell project solution, and ready to go, let me recap some basics I’ve set up this project with. I’m using pure out of the box Xamarin.Forms Shell project, with no additional libraries or dependencies. I have set it up accordingly to MVVM architecture with appropriate BindingContext set up for each XAML Page.

Let’s begin with our Navigation bar Back button override implementation, by adding Shell.BackButtonBehavior set up in our XAML Page.

<ContentPage
    ... >
 
    <Shell.BackButtonBehavior>
        <BackButtonBehavior Command="{Binding GoBackCommand}">
            <BackButtonBehavior.TextOverride>
                <OnPlatform x:TypeArguments="x:String">
                    <OnPlatform.Platforms>
                        <On Platform="iOS" Value="Go Back" />
                    </OnPlatform.Platforms>
                </OnPlatform>
            </BackButtonBehavior.TextOverride>
        </BackButtonBehavior>
    </Shell.BackButtonBehavior>
 
    <ContentPage.Content>
        ...
    </ContentPage.Content>
</ContentPage>

Remember the Xamarin.Forms Shell bug I mentioned earlier regarding the iOS run time? So here I’ve come up with a workaround for it by setting TextOverride property for iOS platform. You could even use the IconOverride property as well if it fits your requirement.

Now let’s wire up that Command, GoBackCommand in our ViewModel…

public class TestPageViewModel : BaseViewModel
{
	public Command GoBackCommand { get; set; }

	public TestPageViewModel()
	{
		...
		GoBackCommand = new Command(async () => await GoBack());
	}

	private async Task GoBack()
	{
		var result = await Shell.Current.DisplayAlert(
			"Going Back?",
			"Are you sure you want to go back?",
			"Yes, Please!", "Nope!");

		if (result)
		{
			await Shell.Current.GoToAsync("..", true);
		}
	}
}

As you can see I’ve wired up the Command to the GoBack() async method, where I’ve fired up an Alert dialog for the user awaiting confirmation asynchronously. Then once we get the go ahead confirmation we perform the backward navigation programmatically using GoToAsync(“..”) method.

Now that bit is completed, it should let you handle the Navigation Bar back button event as you wish! 😉

Next let’s take care of the Android on-screen Back button override implementation, by making sure we have hooked into the OnAppearing and OnDisappearing events in our Page, which could differ based on the MVVM library you use. But if you’re using pure Xamarin.Forms here like me, then you can hook up to them as follows…

public partial class TestPage : ContentPage
{
	public TestPage(){ ... } 

	protected override void OnAppearing()
	{
		base.OnAppearing();

		// execute OnAppearingCommand
		// informing ViewModel
		((TestPageViewModel)this.BindingContext)
				.OnAppearingCommand.Execute(null);
	}

	protected override void OnDisappearing()
	{
		base.OnDisappearing();

		// execute OnDisappearingCommand		
		// informing ViewModel
	}
}

The idea here is to inform our ViewModel that the Page is Appearing or Disappearing and based on that we subscribe or unsubscribe from Shell.OnNavigating event as follows…

public class TestPageViewModel : BaseViewModel
{
    ...
    public Command OnAppearingCommand { get; set; }
    ...
  
    public TestPageViewModel()
    {
        ... 
        OnAppearingCommand 
                = new Command(() => OnAppearing());
        ...
    }
 
    private void OnAppearing()
    {
        Shell.Current.Navigating += Current_Navigating;
    }
 
    private void OnDisappearing()
    {
        Shell.Current.Navigating -= Current_Navigating;
    }
 
    private async void Current_Navigating(object sender, 
                                ShellNavigatingEventArgs e)
    {
        if (e.CanCancel)
        {
            e.Cancel();
            await GoBack();
        }
    }
 
    private async Task GoBack()
    {
        // display Alert for confirmation
        ...
 
        if (result)
        {
            Shell.Current.Navigating -= Current_Navigating;
            await Shell.Current.GoToAsync("..", true);
        }
    }
}

As you can see we’re subscribing to Shell.Current.Navigating event based on Appearing and Disappearing events of the page, making sure that we’re cleaning up the event handlers as I explained before.

Here we’re intercepting the Navigation in the Current_Navigating() method, and we immediately cancel it and call up on awaitable GoBack() method, where we do the Alert confirmation for the user. Then from there, based on the confirmation, we perform go back or cancellation, and additionally we’re unsubscribing from the Shell.Current.Navigating event there itself, for preventing circular event.

Here I am unsubscribing from Shell.Current.Navigating in both GoBack() and OnDisappearing() is for safety, but you could handle this according to your own requirement as well.

Afterthought…

You can only keep the 2nd implementation and still have the Navigation Bar back button overridden, this is due to Shell.OnNavigating firing up for any kind of navigation happening in Shell. So you don’t really need to have the Shell.BackButtonBehavior implementation, but you could keep both in case if you need to implement any extra features, or for safe keeping of the navigation state. 😉 Your choice!

Also since the Android on-screen Back Button handling is only required on Android, you could restrict that code logic to be registered only for Android run time using Device.RuntimePlatform == Device.Android flag of Xamarin.Forms framework.

No! I don’t want both!?

Now having both the above implementation will let you override Navigation Bar and Android on-screen back button actions. But what if I only want to override one of them? Good question!

In that case you could only have one of the above implementation up on your choice, but if you want to keep both and dynamically switch between the options, you could easily do that by introducing a simple flag property in your ViewModel such as follows,

public class TestPageViewModel : BaseViewModel
{
    public bool IsBackwardNavAllowed { get; set; } = false;
 
    public TestPageViewModel()
    {
        ...
        NavBarBackButtonCommand = new Command(async () => 
        {
            IsBackwardNavAllowed = true;
            await Shell.Current.GoToAsync("..", true);
        });
        ...
    }
 
    ...
 
    private async void Current_Navigating(object sender, ShellNavigatingEventArgs e)
    {
        if (e.CanCancel && !IsBackwardNavAllowed)
        {
            e.Cancel();
            await GoBack();
        }
    }

    ...
}

Here I have the IsBackwardNavAllowed flag, where I use to allow backward navigation originated from NavBarBackButtonCommand which is bound to Shell.BackButtonBehavior, but I still override the Android on-screen back button navigation event. 😉

Little demo awesomeness!

So in my little demo app, I have implemented 3 separate scenarios of overriding the Back Button Navigation in Xamarin.Forms Shell!

You can take a look at each XAML Page and their ViewModel counter parts to see how I have implemented this awesomeness. Alright then without further a due, let’s see it in action!

Fire it up!

Here in our 1st Page we have Android and iOS side by side both with Navigation Bar Back Button overridden successfully… 😀

You can see here on Android we have the default Back button in the Navigation bar, but on iOS we have the Text overridden back button due workaround I used for fixing the iOS bug I mentioned earlier.

Then in our 2nd Page we have Android on-screen Back button overridden successfully, in which case there wouldn’t be any response to show on iOS obviously…

As you can see I’ve deliberately disabled the overriding of the Navigation Bar Back button action using the implementation that I discussed earlier, hence we’re nicely overriding only the Android on-screen Back Button action.

Finally in our 3rd Page we have Android and iOS side by side with both Navigation Bar Back Button and Android on-screen Back Button overridden successfully…

There you go, Navigation bar back button events are overridden in both Android and iOS, while also overriding the Android on-screen back button event as well! 😉 This this implementation you don’t have to deal with the iOS bug of Shell.BackButtonBehavior…

Oh look at that beauty eh! 😉

hosted on github:
github.com/UdaraAlwis/XFShellBackButtonOverride

Once again feel free to check out the code on github! 😀

Conclusion…

The whole idea of overriding backward navigation in classic Xamarin.Forms was quite tedious, having to implement custom renderers and all kinds of platform specific hacks. But with Xamarin.Forms Shell it seems to be made easier, but still need a bit of work, and few pending bugs needs fixing from Microsofts.

So using the awesomeness of Xamarin.Forms Shell we explored how to override the Navigation Bar Back Button and Android on-screen Back Button events, with multiple customization possibilities for catering to your specific requirements.

Hope this was helpful for any of my fellow devs out there!

Share the love! 😀 Cheers yol!

Restructuring the Xamarin.Forms Shell Default App Template…

Let’s restructure the default project Template for Xamarin.Forms Shell Apps provided by Visual Studio 2019, clean it up, optimize it for the best use of Shell features. 😉

To be more detailed when you create a fresh Xamarin.Forms Shell app, in Visual Studio 2019, you get a certain default template app project provided by VS2019, let me show you how to restructure it in a clean and optimized manner for best use of features, performance and code structure.

Xamarin.Forms Shell is Awesome…

but I had quite a bit confusion understand the reason behind it and the bells and whistles of it, let me explain! So I’ve been working extensively with Xamarin framework for over 4 years now, and I’m confident to say that I have expertized myself on the best use of it. 😀

The way Xamarin.Forms Shell was marketed for was to provide a better alternative for dealing with Master Detailed or Tab Page based Xamarin.Forms Apps. This really made sense to me, since I knew how troublesome or the complexity we have to deal with in those scenarios.

Template Project mess?!

I went through the documentation, followed up on some demo code the community had shared, and once I was confident, it was time to get my hands dirty. So I created a fresh new Xamarin.Forms Shell project in Visual Studio 2019, and started going through the code.

It was a messy chaos! Since the first line of code, it was confusing, with many different Xamairn.Forms implementation practices all over the place in both UI and C# code behind, Xamarin.Forms Classic and Shell navigation mixed up in all over the project and so on. Took me quite a while to get a hold of it. 😦

This is quite a bad set up for a Template project, could be very disorienting for anyone who’s fresh starting off with Xamarin.Forms Shell, let alone Xamarin.Forms itself.

But why?

My best bet is that they wanted to give the perception to the developer that you can interchange and mix up as you like, Xamarin.Forms Classic bits and Shell bits. This is probably in a good intention, but for anyone who’s just starting to grasp it, could be very confusing, mixing up everything together in a template project.

Sure Xamarin.Forms Classic and Shell are completely interchangeable elements, but for a template, you need to give a clear, straight forward way to get started for anyone.

Ze Solution!

So my solution, is to adopt only Xamarin.Forms Shell related implementation, features, and practices into the default Template, so it gives a clear, easy to understand, straight forward view of using Xamairn.Forms Shell to build apps. Thinking in terms of simplest terms, decoupled components with clean and readable code, we need to reflect the best practices of Xamarin.Forms in the Template. 😉

So here I am sharing my journey of restructuring the default project Template for Xamarin.Forms Shell Apps step by step… Also I would like to share this as a guide to fixing up an existing messy project, with all the good coding practices in mind when it comes to Xamarin.Forms! 😀

Default Template Project…

Let’s take a proper look at the what you get fresh out of the box when you create a new Xamarin.Forms Shell project in VS2019 as of now,

So as you can see it promotes MVVM structure in the project, with Models, Views, and ViewModels separated, while also having a separate DataStore service. The basic functionality of this app is to Write text note items with a Title and Description and save them in the memory.

The app consists of ItemsPage where it shows all the text notes added, then ItemDetailsPage where you can view each of the notes, then the NewItemPage which is a modal page allowing you to add new text items, finally a simple AboutPage with a little intro to the Xamarin.Forms Shell.

Issues need Fixes…

Now let me walk you through some of the main problematic bits I found in this template project, one by one…

BindingContext init() inconsistent…

The BindingContext initialization with the ViewModel instance it all over the place, while some pages having it in code behind in the constructor.

And others having it in the XAML itself as shown below..

This should be unified either to code behind Constructor or the other only.

NewItemsPage, no ViewModel!?

For the NewItemsPage, there’s no ViewModel available, and it sets the BindingContext to itself as shown below…

This needs to be modified with its own ViewModel class, and move these data functions into it.

Missing Shell  Query Parameters…

The recommended way to pass data between pages in Xamarin.Forms Shell is to use Query Parameter strings, but this is not reflected in the Template project at all. As you can see below, it uses a tightly coupled Constructor parameter object passing instead.

This needs to be changed to use Xamarin.Forms Shell query parameters, as recommended.

Need to unify Color Resources…

Apart from the global Colors and Styles resources defined in the App.xaml, there are page level resources added as well in some pages.

This should be removed and switched to use global context Colors for better re-usability and reduce repetition of code.

Classic Xamarin.Forms Navigation!? Why!?

Now this was a serious WHY? moment I had when I first saw this, no where in the template project is using actual Xamarin.Forms Shell Route based navigation.

All over the project you will see the Classic Xamarin.Forms Navigation being used.

This needs to be changed to use the actual Shell Route based navigation.

To make it worse, for Modal pages, it implements a very bad practice of forcefully pushing the Navigation Bar on top of it. 😮

Now you can see why I have complained it’s a messy mix of everything, which needs cleaning up with a proper project structure.

Let the Restructuring begin!

Let me walk yol through the whole restructuring process I did step by step, so that you get a clear idea how to make changes in your own projects. Also have pushed this up in my Github repo, if you’re interested in taking a peek.

hosted on github:
github.com/UdaraAlwis/XFShellTemplateDemoApp

Alright then let’s on ahead…

Step 1: Cleaning up Colors and Styles…

Let’s get rid of the page level Color values and move them to the App.xaml, allowing them to be shared on an app global context, increasing re-usability and removing redundancy.

<!--
	Application Styles and Resources
-->
<Application.Resources>
	<ResourceDictionary>
		<Color x:Key="Primary">#2196F3</Color>
		<Color x:Key="Accent">#96d1ff</Color>
		<Color x:Key="LightTextColor">#999999</Color>
	</ResourceDictionary>
</Application.Resources>

Make sure to keep one key for each color value, and share that in all the required elements. Now we have a much cleaner XAML! 😉

Step 2: BaseViewModel to Infrastructure!

The BaseViewModel.cs class is not actively being instantiated but provides a base for the ViewModels of the project, so it would make sense to move out the BaseViewModel.cs class into a separate folder called, Infrastructure.

Also let’s do a bit of code refactoring inside the BaseViewModel, with the field naming, such as private fields, by adding _fieldName format as a good C# code standard.

Step 3: BindingContext in the Constructor()

Let’s have the ViewModel instantiation and its assigning to the Page.BindingContext, inside the Constructor() of each page. Yep, and don’t forget to remove the XAML set up added in the default template. 😉

public partial class ItemsPage : ContentPage
{
    private readonly ItemsViewModel _viewModel;

    public ItemsPage()
    {
        InitializeComponent();

        BindingContext = _viewModel = new ItemsViewModel();
    }
    
    ...
}

This would give better control over the ViewModel’s object instance. The private field will be named accordingly with the “_” prefix, and kept as a private readonly field, since its only going to be instantiated once in the Constructor itself. Make sure to propagate the same for all the Pages in the project.

Step 4: Clean up ItemDetailViewModel!

We need to clean up the ItemDetailViewModel, to be stand-alone and loosely coupled. This will also help us in implementing a proper Shell Route based navigation later.

Let’s convert the Item property into a full fledged property with a private backing field, GETter and SETter. 😉 In the constructor, get rid of the parameter passed in, and let’s assign a dummy value to it as default value.

public class ItemDetailViewModel : BaseViewModel
{
	private Item _item;

	public Item Item
	{
		get => _item;
		private set
		{
			SetProperty(ref _item, value);
			Title = _item?.Text;
		}
	}

	public Command LoadItemCommand { get; set; }

	public ItemDetailViewModel()
	{
		var item = new Item
		{       
                        Id = Guid.NewGuid().ToString(),
			Text = "Sample Item",
			Description = "This is an item description."
		};

		Item = item;

		LoadItemCommand = new Command<string>(async (itemId) => await LoadItem(itemId));
	}

	private async Task LoadItem(string itemId)
	{
		Item = await DataStore.GetItemAsync(itemId);
	}
}

Apart from the Item property, I have added a new Command, which will load the Item details object from the DataStore service.

Now that a well structured, clean ViewModel eh! Next let’s handle the parameter that we’re suppose to pass from ItemsPage to ItemDetailPage…

Step 5: Setting up Query Parameters…

As a part of the previous step, we need to handle the selected Item object that’s being passed into the ItemDetailPage. We’re going to handle this properly with Xamarin.Forms Shell Query parameters. So let’s pass the Id value of the selected Item object, as a query parameter into the page as follows, with the QueryProperty attribute.

[QueryProperty(nameof(ItemId), "itemid")]
public partial class ItemDetailPage : ContentPage
{
	private readonly ItemDetailViewModel _viewModel;
	private string _itemId;

	public string ItemId
	{
		get => _itemId;
		set => _itemId = Uri.UnescapeDataString(value);
	}
	
	...
}

Here we’re maintaining ItemId string property in the Page, where Shell we set the query value into during the navigation.

Do not forget to fire up the LoadItemCommand in the ViewModel of the page, with the ItemId that we acquired during navigation.

...
public partial class ItemDetailPage : ContentPage
{	
	...	
	protected override void OnAppearing()
	{
		base.OnAppearing();

		_viewModel.LoadItemCommand.Execute(ItemId);
	}
}

Alright, then let’s fix the navigation bits next…

Step 6: Use proper Shell Navigation!

Instead of using Xamarin.Forms Classic navigation, let’s migrate all the Navigation bits to proper Xamarin.Forms Shell Route based Navigation yeah!

Let’s start by registering the Page routes, that we use for navigation. Preferably using lower case letters for all the routes.

public partial class AppShell : Xamarin.Forms.Shell
{
	public AppShell()
	{
		InitializeComponent();

		Routing.RegisterRoute("itemdetailpage", typeof(ItemDetailPage));
		Routing.RegisterRoute("newitempage", typeof(NewItemPage));
	}
}

Then update all the navigation bits to use Shell route based navigation…

...
public partial class ItemsPage : ContentPage
{    
    ...
    private async void OnItemSelected(object sender, SelectedItemChangedEventArgs args)
    {
        ...

        await Shell.Current.
                    GoToAsync($"/itemdetailpage?itemid={item.Id.ToString()}");
        ...
    }
}

Now, that’s a proper Shell Navigation in action!

Step 7: Set up NewItemViewModel!

NewItemPage does not have a ViewModel created against it, in order to maintain a proper MVVM structure we need to move all the code behind bits in NewItemPage.xaml.cs into the NewItemViewModel as follows…

public class NewItemViewModel : BaseViewModel
{
    private Item _item;

    public Item Item
    {
        get => _item;
        set
        {
            SetProperty(ref _item, value);
        }
    }

    public NewItemViewModel()
    {
        var item = new Item
        {
           ...
        };

        Item = item;
    }
}

The in the page constructor we assign the instance of this ViewModel to the BindingContext, and you’re done..

Step 8: Use proper Modal Navigation!

The NewItemPage is treated as a Modal page, we should use Shell.PresentationMode instead of classic Navigation.PushModalAsync() for navigating to Modal pages.

First of all make sure we’re navigating to the NewItemPage properly using Shell Route navigation as follows,

...
public partial class ItemsPage : ContentPage
{    
    ...
    private async void AddItem_Clicked(object sender, EventArgs e)
    {
        await Shell.Current.GoToAsync($"/newitempage");
    }
}

Next we set up Shell.PresentationMode property in the NewItemPage to render the page navigation as the Modal page we expect it to be, using ModalAnimated value.

<ContentPage
    x:Class="XFShellTemplateDemoApp.Views.NewItemPage"
    xmlns:ios="clr-namespace:Xamarin.Forms.PlatformConfiguration.iOSSpecific;assembly=Xamarin.Forms.Core"
    ios:Page.UseSafeArea="true"
    Shell.PresentationMode="ModalAnimated">

	<!--  Content of the Page  -->
	
	... 

</ContentPage>

Also we should set up the UseSafeArea property for iOS to ignore the iPhone notch, since Modal page overlays the whole app window.

Finally, let’s get rid of the NavigationBar based buttons and use Page Content based Buttons, and modify the UI layout accordingly.

<ContentPage
    x:Class="XFShellTemplateDemoApp.Views.NewItemPage"
    Shell.PresentationMode="ModalAnimated">

    <ContentPage.Content>
        <Grid Margin="0" Padding="0">

            ...

            <StackLayout Padding="15" Orientation="Horizontal">
                <Button
                    BackgroundColor="{StaticResource Primary}"
                    Clicked="Cancel_Clicked"
                    HorizontalOptions="FillAndExpand"
                    Text="Cancel"
                    TextColor="White" />
                <Button
                    BackgroundColor="{StaticResource Primary}"
                    Clicked="Save_Clicked"
                    HorizontalOptions="FillAndExpand"
                    Text="Save"
                    TextColor="White" />
            </StackLayout>

            ...

        </Grid>
    </ContentPage.Content>
</ContentPage>

I have created separate Cancel and Save Buttons which is inside a StackLayout, which in return is inside in the parent Grid Layout where rest of the content resides.

...
public partial class NewItemPage : ContentPage
{    
    ...
    private async void Cancel_Clicked(object sender, EventArgs e)
    {
        await Shell.Current.Navigation.PopModalAsync();
    }
}

For dismissing the page we can stick to PopModalAsync() call in the Navigation stack, since Shell doesn’t have it’s own for that.

Step 9: Overall code quality clean up…

Apart from all these structural changes, another aspect I heavily focused on was, the readability of the code and maintaining proper coding standards, down to the variable naming.

It’s important to properly write the code with all these little details in mind so that its easy to read and understandable by anyone who try to understand the code.

Alright then, with that I conclude the restructuring!

Restructured Template Project…

Aaand let’s take a proper look at what we got at the end after the extensive restructuring of the Xamarin.Forms Shell Template project in VS2019,

Here’s it in action in iOS!

in Android!

Once again you may find the whole project code is hosted on my Github repo,

hosted on github:
github.com/UdaraAlwis/XFShellTemplateDemoApp

Feel free to fork it out and use it as anyway you wish, may be even for a starter pack for your Xamarin.Forms Shell App development journey! 😉

Conclusion!

Well that concludes my journey of restructuring the Xamarin.Forms Shell default project template in VS2019, for the best use of Shell features, performance and optimized clean code.

Xamarin.Forms Shell is actually an awesome new paradigm to build Xamarin.Forms app, but honestly the VS2019 Template project could really use some proper restructuring for making it easier and straight forward for the beginners to start off. 😉

Share the love! 😀 Cheers yol!

Stunning app Themes in Xamarin.Forms Shell projects!

Wanna build some awesome themes into your Xamarin.Forms Shell project? Change the App themes during the run time dynamically? Save the theme properties in User Settings? Then you’re at the right place! 😉

Themes in Xamarin.Forms Apps…

Given Xamarin.Forms is such an incredible cross platform mobile framework, it provides a lot of awesome features out of the box, but unfortunately it doesn’t straight away provide App Theme feature in your face. 😛  but…

It’s got all the bells and whistles you need to implement an awesome App Theme set up with ease, in combination of awesome Dynamic Binding, Static Binding and Style Properties giving you full control of how to handle implementing Themed Styles into your app. You just gotta put together all those bits and you can easily build App Themes functionality into the app.

This is actually quite powerful given the cross platform nature of Xamarin.Forms! Now there are plenty of documentation, articles and sample demos regarding this, so I’m not going to be repeating on that topic, but if you’re interested try out this office doc article from Microsoft: Theming a Xamarin.Forms Application Now that gives a very good step by step explanation on the topic for anyone to easily get started, but anyhow focusing back on this article…

Enters, Xamarin.Forms Shell Apps…

Then enters the recently introduced Xamarin.Forms Shell, a new paradigm of Xamarin.Forms App development. Now when I got started with this new awesomeness, I couldn’t find any direct articles or samples on how to implement App Themes in a Xamarin.Forms Shell projects.

So I had to figure it out myself, and that’s why I thought of sharing my experience with you guys. Now now, don’t get me wrong, since we’re still in the same context of Xamarin.Forms, the App Theming strategy is still the same as the official doc I shared about, but I may have found a better way and a bit of improvements on top of that. 😉

So let’s get started… Stunning app Themes in Xamarin.Forms Shell projects!

How to? in a nutshell!

Basically in a nutshell we’re going to define a set of Themes with Color Properties inside them that holds Color values unique to each Theme. Then we will build all a complete collection of Styles targeting all the components in our app such as Button, Labels and so on. Now in this case we need to stick to Dynamic Binding since we’re going to be switching between Themes during run time, so use of Xamarin.Forms DynamicResource binding all the way ah! 😉

Next we make sure all our UI elements are bounded to those Styles that we created before and still making sure to stick to Dynamic Binding. Now that we have established the binding chain from Theme Properties to Styles to UI Elements, we need to set up the default Theme to load in the ApplicationResources XAML node.

Once all that’s set up we shall be implementing a simple mechanism  to save the User’s App Theme preferences, with features such as Saving and Reloading those preferences on demand.

And that’s it! 😀

Sneak Peak!

Here’s a little sneaky peaky demo magic on Android and iOS.. 😉

If you’d like a sneak peak into the code before I get into the code details, you can find the whole demo project here in my github repo: https://github.com/UdaraAlwis/XFShellAdvThemeing

So in my demo code, I have used the default out of the box Xamarin.Forms Shell project template you get in Visual Studio 2019 latest update, so that you can easily familiarize yourself with the code and adopt the same implementation in your own code.

Set up of the project!

Let’s get started with the set up of the Project, but first should take a look into the structure we’re going to be implementing, where we need to first focus on the following aspects.

  • List of Themes for the App
  • List of properties in a given Theme
  • Styles built using the properties of Themes
  • Helper extension to change App Theme
  • Saving the User’s App Theme preferences

Now keeping those main aspects in mine, I’m going to assume that you have already set up your basic Xamarin.Forms Shell app project. I’m going to name my little demo as XFShellAdvThemeing, denoting Xamarin.Forms Shell Advanced Theme-ing! 😉

Alright there goes our Xamarin.Forms Shell App project, with strong base of MVVM baked in! You may have noticed I have added “Themes” folder, which will hold the App Themes that we’re going to create. And then a “Helpers” which will hold a simple extension method that we’re going to built for switching the App Theme selection by the user during run time.

Building the App Themes…

Time to define the App Themes, so first of all we need to be specific about what properties we are going to be using to each Theme, be it colors, fonts, images and so on, you need to be specific, and make sure all the Theme definitions follow the exact same format.

on github: /XFShellAdvThemeing/Models/Theme.cs

Here I have defined the list of Themes that I’m going to include in my App, and as for having the type of Enum, is for to be used later in the code to populate the data to the User. So make sure to add a record here every time you add a new Theme to your app.

This step is very crucial because you shouldn’t neglect this and try to change the app theme properties half way into the app development. If you’re working with a team,

…you need to define with the team designers together how the Themes of the app should behave, and what elements should be controlled over them.

For this demo I’m going to define the following list of properties inside each Theme.

  • Main Colors:
    • Primary Color
    • Accent Color
    • Secondary Color
  • Page Colors:
    • Page Background Color
    • Navigation Bar Color
  • Text Colors
    • Primary Text Color
    • Secondary Text Color
    • Tertiary Text Color

As you can see I have taken into consideration of having 3 set of main Colors, and as a back up since I’m going to be using native Navigation bar, a property to control its colors and the Page background as they render next to each other. Then finally the Colors for the Text inside the app.

Its very crucial you develop this kind of design centric thinking when you’re developing any mobile app…

So let’s create our beautiful little XAML snippets inside the Themes folder that are going to hold all the properties of each App Theme.

Just simply add a XAML page into the Themes folder and rename the parent node to ResourceDictionary of type and update the same in the code behind as well.

on github: /XFShellAdvThemeing/Themes/DarkTheme.xaml

There my first theme, LightTheme which holds the color values I need to customize in my app for Theme-ing! 😉 Feel free to add as many themes as you like following the same structure.

Defining the Styles…

Now these bits are the middle man between your UI elements and the Theme definitions. As I explained before we are going to create Styles targeting all the types of UI Elements that we’re using in the app, so that we can “Style” them with those! 😉 get it!? lol

on github: /XFShellAdvThemeing/App.xaml

You can define these Styles as a Global App resources or in Page levels as you wish, but I have added them into my App.xaml for this demo, such as Styles targeting Buttons, Labels, etc.

As you can see we are using DynamicResource binding to hold on to the Theme property values, so that we can update our Style property values dynamically in run time.

Now you might wonder why I have referenced Themes/LightTheme.xaml in the  global Resource Dictionary, well… that is to set the default theme as the Light App Theme that I just defined above. You can keep it as it is or watch me switch the App Theme dynamically during run time below… 😉

You also need to directly reference your Shell bound UI Elements using the Theme properties we defined earlier. Here I have added to to the same App.xaml global scope instead of keeping it in the AppShell.xaml scope, just for organizing the styles in one place.

Switching App Theme Dynamically…

Now of course we need to allow our App to be able to switch the Theme dynamically during run time according to User’s choice or some configuration built in. We can easily do this in Xamarin.Forms, using MergedDictionaries property by removing the existing Theme in memory Resources and switching to our choice of Theme Resources.

I have created a simple Helper extension, with the method SetAppTheme() which accepts the type of Them Enum value you need to use and returns the boolean result.

on github: /XFShellAdvThemeing/Helpers/ThemeHelper.cs

Like I said before this is where out little Helper extension comes into play, so just add this little snippet into your Helpers folder.

Based on the Theme Enum identifier value, we will be instantiating the Theme object, assigning it to the Resources in memory as you see above.

Now that’s all cool and stuff, but how about persisting this preferred theme selection?

Saving to User Preferences!

This can easily be done with the help of Xamarin.Essentials, which allows us to save Application context key values pairs using the Preferences API. Now I believe in Visual Studio when you create a new Xamarin.Forms Shell project by default it comes pre-installed with Xamarin.Essentials, otherwise make sure to add it to your project from nuget.

We are going to save the Selected App Theme settings with the key name “CurrentAppTheme” as below.

on github: /XFShellAdvThemeing/Views/ThemeSelectionPage.xaml.cs

And make sure to load it back to the app during the App’s launch event and call up on our little magic extension ThemeHelper.SetAppTheme() as shown here..

on github: /XFShellAdvThemeing/App.xaml.cs

You need to call that in the App() constructor invoke, so that we can load the saved App Theme settings instead of loading the default one that we set up in App.xaml resources.


Bingo! nice little App Theme Selection Page to our Xamarin.Forms Shell App! 🙂

Time for some action!

Here it is side by side iOS and Android,


Themes with more than Colors?

Now our App Themes aren’t always going to be as simple as a bunch of Color properties right?! It could even contain Fonts, Text Sizes, Images, Icons and so on. But if you’re wondering if that’s even possible in Xamarin.Forms, yes absolutely you can!

It’s basically no different than defining a Color property in your Theme.xaml file, just add the XAML node to the file and you’re good to go!

Make sure to give it a Key name value though, and reference it in your Styles as usual where applicable.

You can follow the same pattern for any kind of Theme property you want to add and basically you’re good to go! 😉

Github Repo: github.com/UdaraAlwis/XFShellAdvThemeing

Any property that you can reference usually from your XAML, you can easily include them in your App Theme and link the binding through Styles to your UI elements straight away.

Some Tips!

Here are some tips and tricks that might come in handy for you, during the whole shabang of “Theme-ing” your Xamarin.Forms Shell app projects.

More Unification! Less Repetition!

Make sure to avoid adding repetitive theme properties into the Theme XAML definitions, by unifying the Colors, Fonts, Icons you use in your app. As an example if you define a Text Color property in your Theme, make sure to use that only for Text Coloring Elements and Styles, try not to use them for other aspects.

So you can easily manage those properties in future and they’d be easy to understand for anyone to extend the properties. This is quite crucial when you maintain massive App Projects, and it wouldn’t affect the capability to grow the App code altogether.

Stubborn Native Elements?! Yikes!

Now as you probably know or don’t Xamarin.Forms doesn’t let you change the color values of your App’s few very native elements during run time. Such as,

– iOS/Android System Status Bar Colors

– Android UI Elements that contains horizontal bar such as Entry, Picker, etc. (Unless you’re using Xamarin.Forms Material Visual)

They require native Android/iOS level access to change during run time. So you need to have Custom Renderers or Native Bound Services that can be communicated through Xamarin.Forms layer during run time. Well that’s a blog post for another time! 😉

So here’s how it could be easily solved as you can see below,

My suggestion would be to maintain values of those UI elements as compatible as possible that could be matched with the Theme Colors you currently use. Such as light Gray, White or Black mostly.

You can easily set them up from Resources/values/styles.xml in your Android project.

And on iOS project’s Info.plist configuration.

And that’s pretty much it!

Share the love! 😀 Cheers!