Tag Archives: Animation Rendering

Cool Animating Dots Control from Xamarin.Forms Animations!

Three dots, blinking and pulsating sequentially made with pure Xamarin.Forms Animations! (no third party elements, heck not even any images used)

A little fun experimental-implementation I did a while back, actually based on something I did long time ago for an office project, but then figured out I could make it much better in a later time, so thought of working on it and putting it out there.

So basically we needed to have a Loading screen or Activity indicator screen with cool three dots animating sequentially, instead of using a GIF, I wanted to do this purely from Xamarin.Forms without any use of a 3rd party component, not even any image or icon.

Yes, I ended up hacking my way to get this done!

Here’s that interesting journey unfolding…

Xamarin.Forms.Animations is awesome!

This is something I need to get out of my chest. No one would actual believe this, but there’s so many awesome stuff you could do with the built in Animations of Xamarin.Forms right out of the box.

Surprisingly it’s super simple as well!

Sneak Peak!

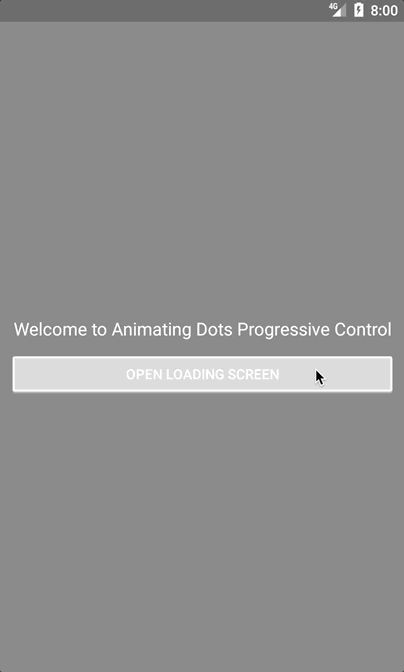
So here’s what I’ve built and what you’re gonna get! 😉

TADAAA! pretty cool eh!

Let’s get started…

So before I get started, the requirement here is to build a reusable “Control” that we can embed into a ContentPage that we would be using as a “Loading Screen” or an Activity Indicator screen as some might call it. So this is going to be a separate reusable View which you can embed anywhere you want to and use it right away, which will be independent of it own, yes even the whole Animation sequence is self sustained by itself. 😉 Oh yeah! Cool stuff ahead! 😀

Building the UI..

First of all let’s go on create a ContentView control, let’s name it, AnimatingDotsControl!

What we need here is just simple “three dots”, but like I said in the beginning I don’t want to use any third party components or even external Image to emulate “a dot” element.

So what am I going to use for “a dot”? Xamarin.Forms.Frame! MIND BLOWN!

Let the Hack-be-unfolded!

Right on fellas, just another Xamarin.Forms hack of my own, Frame View has this awesome property called CornerRadius, which we are going to use for our advantage here, when its sufficiently set properly to the proportion of the width and height of it, voila! you render a circle or a dot in this case.

So let’s go on add three Frame elements horizontally inside a Grid view. And also to emulate the blinking, “on” and “off” state of a dot, we need to maintain two Frame elements to represent one dot each. We’re going stack them on top of each other, so when the first one goes to off state the second one in the background will come to visibility and emulate the off state. So for the ease of use let’s call our tiny little Frame elements, Dot1, Dot2 and Dot3 and lay them out nicely as we discussed.

<?xml version="1.0" encoding="UTF-8" ?>
<ContentView
    x:Class="XFAnimatingDotsControl.AnimatingDotsControl"
    xmlns="http://xamarin.com/schemas/2014/forms"
    xmlns:x="http://schemas.microsoft.com/winfx/2009/xaml">
    <ContentView.Resources>
        <ResourceDictionary>
            <Style x:Key="AnimatingDotsStyle" TargetType="Frame">
                <Setter Property="Padding" Value="5" />
                <Setter Property="BackgroundColor" Value="White" />
                <Setter Property="CornerRadius" Value="6" />
                <Setter Property="HasShadow" Value="False" />
                <Setter Property="HorizontalOptions" Value="Center" />
                <Setter Property="VerticalOptions" Value="Center" />
                <Setter Property="HeightRequest" Value="4" />
                <Setter Property="WidthRequest" Value="4" />
            </Style>

            <Style
                x:Key="BackgroundDotsStyle"
                BasedOn="{StaticResource AnimatingDotsStyle}"
                TargetType="Frame">
                <Setter Property="BackgroundColor" Value="DimGray" />
            </Style>
        </ResourceDictionary>
    </ContentView.Resources>
    <ContentView.Content>
        <Grid ColumnSpacing="2" HorizontalOptions="Center">
            <Grid.ColumnDefinitions>
                <ColumnDefinition Width="25" />
                <ColumnDefinition Width="25" />
                <ColumnDefinition Width="25" />
            </Grid.ColumnDefinitions>

            <!--  Background Dots  -->
            <Frame Grid.Column="0" Style="{StaticResource BackgroundDotsStyle}" />
            <Frame Grid.Column="1" Style="{StaticResource BackgroundDotsStyle}" />
            <Frame Grid.Column="2" Style="{StaticResource BackgroundDotsStyle}" />

            <!--  Animating Dots  -->
            <Frame
                x:Name="Dot1"
                Grid.Column="0"
                Style="{StaticResource AnimatingDotsStyle}" />
            <Frame
                x:Name="Dot2"
                Grid.Column="1"
                Style="{StaticResource AnimatingDotsStyle}" />
            <Frame
                x:Name="Dot3"
                Grid.Column="2"
                Style="{StaticResource AnimatingDotsStyle}" />
        </Grid>
    </ContentView.Content>
</ContentView>


There you go. Just like we discussed we have our UI set up in a reusable ContentView control, just like we discussed above. Oh and don’t be worried by the use of Styles, I just like to make my XAML look neat and clean. 😉

Building the Animation!

Here’s the golden part of the whole post, the actual Animation magic brewed purely with Xamarin.Forms! Most people are aware only of the Xamarin.Forms Animation Extension methods, the typical FadeTo(), ScaleTo(), etc whatnot. But that’s just the tip of the ice berg I tell you! 😀

Here’s a little heads up if you’re not aware: Xamarin.Forms.Animation!
The whole Xamarin.Forms.Animation class itself has many more awesomeness possibilities, it allows us to create our own Animation sequences. Oh yeah! how cool is that eh!

These custom Animation objects can be attached to any Xamain.Forms.View and make them dance like whatever the ways we want, as in to animate any of its properties as we wish. They can sequentially change value of any property for any given period of time, even repeatedly. That is the whole bread and butter of this implementation. The Animation object constructor allows us to execute a sequential loop of an action with any given value, incremented or decremented, with the Easing properties, and finishing it with another action. Let’s use this for our advantage…

new Animation(alpha => Dot1.Opacity = alpha, 1, 0, Easing.CubicOut, () => Dot1.FadeTo(1))


So we’re going to using the Opacity property of our Frame view, and change its value from 1 to 0 in a loop, with an CubitOut Easing behavior, and reversing it back in the end of the execution, thus creating the blinking effect! 😀

And here’s the coolest part, you can actually attach an Animation object into another Animation object, and so on, so that you can execute a bunch animations sequentially across multiple views. Animation.Add() method gives you this awesomeness, where as you can define a starting point of the timeline and ending point for that specific animation object, in the whole animation sequence. So given our three animating elements, let’s break our timeline into 3 time chunks, giving each element a time span of 0.33 milliseconds.

var pulseAnimation1 = new Animation();

pulseAnimation1.Add(0, 0.33, new Animation(alpha => Dot1.Opacity = alpha, 1, 0, Easing.CubicOut, () => Dot1.FadeTo(1)));


So using that we’re going to animate three of our “dot views”, Dot1, Dot2 and Dot3, by attaching their own animation objects to a single Animation. We’re going to repeat the same above Add() call to Dot2 and Dot3 in the next step.

Before I get into the full animation code, the way we actually run this animation sequence is by calling the Animation.Commit() method, passing the parent View and some useful bits we could use to customize the animation sequence altogether.

private void RunAnimations()
{
	var pulseAnimation1 = new Animation();

	pulseAnimation1.Add(0, 0.33, new Animation(alpha => Dot1.Opacity = alpha, 1, 0, Easing.CubicOut, () => Dot1.FadeTo(1)));
	pulseAnimation1.Add(0.33, 0.66, new Animation(alpha => Dot2.Opacity = alpha, 1, 0, Easing.CubicOut, () => Dot2.FadeTo(1)));
	pulseAnimation1.Add(0.66, 0.99, new Animation(alpha => Dot3.Opacity = alpha, 1, 0, Easing.CubicOut, () => Dot3.FadeTo(1)));
	
	pulseAnimation1.Commit(this, 
		"loadingIndicatorPulseAnimation",
				10, 1100, null, null, () => true);            
}


So you can see how we have allocated each animation chunk 0.33 milliseconds and most importantly at the end the Commit() call, passing in the current view we’re attaching this animation to, the time in milliseconds between frames, the allocated time in milliseconds  for the whole animation sequence, and the null for easing and finishing action, since I’ve already defined them in the child animations themselves, and the last parameter, enabling the repeating functionality. So the animation will keep running forever as long as its active.

Now we have a self sustaining animation that runs repeatedly, but what if we want to stop it and discard it, in the case of the disposing or removing the View? that’s where AbortAnimation() call comes in.

// abort the animation on element disposing
this.AbortAnimation("loadingIndicatorPulseAnimation");


Remember we gave a little name to our animation? yeah that’s what we’re going to use and such a simple call the animation will stop and discard itself.

A true self sustaining Animation Control!

Alright! So now we have our full Animation implemented, the next thing we need to do is to make sure its self sustaining, since we’re going to use it inside an independent control.

So whenever the Control is attached to the UI or made visible, we need to make sure to start the Animation and when the Control is removed from UI or disposed, then we should stop the animation and dispose itself.

In order to do this we need to look into the life cycle of a Xamarin.Forms.View!

Let the Hack-be-unfolded!

So this is a little hacking around I came up with myself after overriding a bunch of methods and debugging the run time of Xamarin.Forms, where as when any given View gets attached to a parent or becomes visible, there’s an internal property that gets fired, which is called “Renderer”, even at the time of View goes out of visibility or removed from parent, the same property will get fired. I’m presuming this to a call to the native renderer of the View itself back and forth at runtime. I’m going to use this as Entry and Exit points for managing our Animation.

We shall override the OnPropertyChanged event of our ContentView and watch out for the “Renderer” property change, maintain a little flag to mark down our Animation started and ended state.

public partial class AnimatingDotsControl : ContentView
{
     public AnimatingDotsControl()
     {
          InitializeComponent();
     }

     private bool _animationStarted;
     
     protected override void 
          OnPropertyChanged(
               [CallerMemberName] string propertyName = null)
     {
          base.OnPropertyChanged(propertyName);

          if (propertyName == "Renderer")
          {
               if (!_animationStarted)
               {
                    // start the animation on element rendering
                    _animationStarted = true;

                    RunAnimations();
               }
               else
               {
                    // abort the animation on element disposing
                    this.AbortAnimation(
                            "loadingIndicatorPulseAnimation");
               }
          }
     }

     private void RunAnimations()
     {
          ...    
     }
}


There you go, now we have a fully self sustaining animation which will start on its own when the Control is attached to a parent or made visible, and then dispose itself when the Control is removed from parent or made out of visibility! 😀

Let’s consume it!

No more waiting, let’s consume this bad boy!

<?xml version="1.0" encoding="utf-8" ?>
<ContentPage
    x:Class="XFAnimatingDotsControl.LoadingScreen"
    xmlns="http://xamarin.com/schemas/2014/forms"
    xmlns:x="http://schemas.microsoft.com/winfx/2009/xaml"
    xmlns:xfAnimatingDotsControl="clr-namespace:XFAnimatingDotsControl;assembly=XFAnimatingDotsControl"
    BackgroundColor="Gray">

    <Frame
        BackgroundColor="Transparent"
        HasShadow="False"
        HorizontalOptions="Center"
        OutlineColor="Transparent"
        VerticalOptions="Center">
        <StackLayout
           BackgroundColor="Transparent"
           Orientation="Vertical">
            <Label
                FontAttributes="Bold"
                FontSize="23"
                HorizontalOptions="Center"
                HorizontalTextAlignment="Center"
                Text="Loading"
                TextColor="White" />
            <!--  Embedding our Animating Dots Control  -->
            <xfAnimatingDotsControl:
                 AnimatingDotsControl HorizontalOptions="Center" />
        </StackLayout>
    </Frame>

</ContentPage>


There we have embeded our own AnimatingDotsControl into a ContentPage that we would be using as a “Loading Screen” or an Activity Indicator screen as some might call it. Then you could use that page as a Modal Page and make it visible or discard whenever you wish so. 😉

You can attach our little awesome Animation dots control anywhere as you wish and it will work out nicely like a charm, while behaving and maintaining itself.


That’s our bad boy in action on iOS and Android! 😀

Github it if yo lazy!

So all of this is hosted on my git repo: https://github.com/XFAnimatingDotsControl

Feel free to grab your copy if you’re too lazy to DIY! 😛

Imagination and creativity is your weapon against the odds, keep on pushing the limits and hacking your way through my fellow developer! That’s what makes us the “Developers”, we build cool stuff yol!

That’s it for today.

Cheers all! 😀 Share the love!

Ze Flippable View in Xamarin.Forms with Native Animations…

Let’s blend some Native Animation goodness to our Flippin’ Flipity Flippable View in Xamarin.Forms…

So I hop yol’ remember my previous post, It’s a Flippin’ Flipity Flippable View in Xamarin.Forms! where I showcased my awesome control built right from Xamarin.Forms without any native code implementation. 😉


But you may have noticed a slight issue in the Flip Animation, specially on Android and iOS as well (slightly though), where Flip animation moves the View out of it’s bounds.

^As you can see above, in the animation screenshots… 😮

Some improvement needed…

If you look closely, during the flip rotation, the View sort of scales up itself and moves out of the bounds of itself and scales back and revert back to the normal bounds.

This was kind of annoying me from a personal perspective, so that’s why I thought of finding a solution by trying to render the whole animation natively for Android and iOS separately. 😀

Behold ze Native Animation…

So basically the whole logic of the FlipViewControl is going to be the same, only the animation part would be executed natively. Let’s discuss how we could implement a native animation for each Android and iOS below. 😀

As of Android…

As of Android, the reason why the View scales out of bounds during the flip animation is because that is the default behavior of Flip Animation in Android. Since Xamarin.Forms Aniamtions binds to the native default behavior you could definitely expect it to behave that way. There’s an aspect called Camera View distance perspective for any given view, by default during any animation the Camera View aspect doesn’t change, thus causing the overblown effect of the Flip Animation.

So by implementing a native animation what we could achieve is to control the Camera View Distance value for each animation frame manually, also something to keep in mind this needs to be done according to the Screen density. I found this solution thanks to this forum post:  https://forums.xamarin.com/discussion/49978/changing-default-perspective-after-rotation

As of iOS…

Here for the iOS its not much of an issue, but you do see a bit of the View scaling out of the boundary. So let’s dive into the iOS native flip animation.

We’ll be using a CATransform3D to maintain the transformation of the View’s Layer and execute the animation using UIView.Animate(), we will be using two CATransform3D objects to make sure the View doesn’t scale beyond the boundaries during the animation. This whole awesome solution I found via a random snippet search https://gist.github.com/aloisdeniel/3c8b82ca4babb1d79b29

Time for some coding…

Let’s get started off with the subclassed custom control, naming it XNFlipView and the implementation is actually same as our previous XFFlipView control implementation, but the only difference is there’s no Xamarin.Forms Animation implementation, or handling of the IsFlipped property in the PCL code, since it will be handled in the Renderer level.

public class XNFlipView : ContentView
{
	public XNFlipView()
	{
		...
	}

	public static readonly BindableProperty FrontViewProperty
	...

	public static readonly BindableProperty BackViewProperty
	...
	
	// Everything else is same as XFFlipView implementation

	public static readonly BindableProperty IsFlippedProperty =
	BindableProperty.Create(
		nameof(IsFlipped),
		typeof(bool),
		typeof(XNFlipView),
		false,
		BindingMode.Default,
		null);

	/// <summary>
	/// Gets or Sets whether the view is already flipped
	/// ex : 
	/// </summary>
	public bool IsFlipped
	{
		get { return(bool)this.GetValue(IsFlippedProperty);}
		set { this.SetValue(IsFlippedProperty, value); }
	}
	
	...
}


You can take a look at the full class implementation in the github repo file: XFFlipViewControl/XNFlipView.cs

Native Renderers implementation…

Since the animations are going to be handled natively, we need to create the Custom Renderers for our XNFlipView for Android and iOS separately, so let’s get started…

Android Custom Renderer

Alright then let’s go ahead and create the XNFlipViewRenderer  extending from ViewRenderer, as of Xamarin.Forms 2.5 and later we have to pass the Context in the Custom Renderer’s constructor, so let’s begin with that.

public class XNFlipViewRenderer : ViewRenderer
{
	private float _cameraDistance;

	private readonly ObjectAnimator _animateYAxis0To90;
	private readonly ObjectAnimator _animateYAxis90To180;

	public XNFlipViewRenderer(Context context) : base(context)
	{
		...
		//Animation Initialization
		...
	}

	protected override void 
		OnElementChanged(ElementChangedEventArgs<Xamarin.Forms.View> e)
	{
		base.OnElementChanged(e);

		if (((XNFlipView)e.NewElement) != null)
		{
			// Calculating Camera Distance 
                        //to be used at Animation Runtime
			// https://forums.xamarin.com/discussion/49978/changing-default-perspective-after-rotation
			var distance = 8000;
			_cameraDistance = Context.Resources.DisplayMetrics.Density * distance;
		}
	}

	protected override void 
		OnElementPropertyChanged(object sender, PropertyChangedEventArgs e)
	{
		base.OnElementPropertyChanged(sender, e);

		if (e.PropertyName == XNFlipView.IsFlippedProperty.PropertyName)
		{
			if (!((XNFlipView)sender).IsFlipped)
			{
				this.RotationY = 0;
			}

			AnimateFlipHorizontally();
		}
	}

	private void AnimateFlipHorizontally()
	{
		SetCameraDistance(_cameraDistance);

		_animateYAxis0To90.Start();
	}
}


Now as you can see above in the constructor we’re initializing the ObjectAnimator objects _animateYAxis0To90 and _animateYAxis90To180 which will be executing the native Flip Animation.

Then in the Renderer’s OnElementChanged we’re calculating the Camera distance value to be used during the Animations execution as we explained before in the concept.

Also you can see how we’re listening to the XNFlipView.IsFlipped value change and executing Animations.

Next let’s take a look into the Animation execution implementation which goes inside the Constructor as you can see in the previous code snippet…

// Initiating the first half of the animation
_animateYAxis0To90 = ObjectAnimator.OfFloat(this, "RotationY", 0.0f, -90f);
_animateYAxis0To90.SetDuration(500);
_animateYAxis0To90.Update += (sender, args) =>
{
	// On every animation Frame we have to update the Camera Distance since Xamarin overrides it somewhere
	SetCameraDistance(_cameraDistance);
};
_animateYAxis0To90.AnimationEnd += (sender, args) =>
{
	if (((XNFlipView)Element).IsFlipped)
	{
		// Change the visible content
		((XNFlipView)Element).FrontView.IsVisible = false;
		((XNFlipView)Element).BackView.IsVisible = true;
	}
	else
	{
		// Change the visible content
		((XNFlipView)Element).BackView.IsVisible = false;
		((XNFlipView)Element).FrontView.IsVisible = true;
	}

	this.RotationY = -270;

	_animateYAxis90To180.Start();
};

// Initiating the second half of the animation
_animateYAxis90To180 = ObjectAnimator.OfFloat(this, "RotationY", -270f, -360f);
_animateYAxis90To180.SetDuration(500);
_animateYAxis90To180.Update += (sender1, args1) =>
{
	// On every animation Frame we have to update the Camera Distance since Xamarin overrides it somewhere
	SetCameraDistance(_cameraDistance);
};


As you can see we’re instantiating the animation objects accordingly to the degree angle of the Y Axis they’re suppose to animate the view. Also something very important is that in each animation frame we’re also updating the Camera View Distance, as we discussed earlier this to prevent the View from scaling beyond it’s boundaries. That SetCameraDistance() call takes of it with the previous calculated value. 😉

You can also change the speed of the animation by changing the SetDuration() parameters, which currently I’ve set to 1 second.

You could take a look at the full implementation of the android custom renderer in the github file: XFFlipViewControl.Android/XNFlipViewRenderer.cs

iOS Custom Renderer

Alright then let’s move to the iOS Custom Renderer…

public class XNFlipViewRenderer : ViewRenderer

   protected override void
       OnElementPropertyChanged(object sender, PropertyChangedEventArgs e)
   {
       base.OnElementPropertyChanged(sender, e);

       if (e.PropertyName == XNFlipView.IsFlippedProperty.PropertyName)
       {
           if (((XNFlipView)sender).IsFlipped)
           {
             AnimateFlipHorizontally(NativeView, false, 0.5, () =>
             {
                 // Change the visible content
                 ((XNFlipView)sender).FrontView.IsVisible = false;
                 ((XNFlipView)sender).BackView.IsVisible = true;

                 AnimateFlipHorizontally
                           (NativeView, true, 0.5, null);
             });
           }
           else
           {
             AnimateFlipHorizontally(NativeView, false, 0.5, () =>
             {
                 // Change the visible content
                 ((XNFlipView)sender).FrontView.IsVisible = true;
                 ((XNFlipView)sender).BackView.IsVisible = false;

                 AnimateFlipHorizontally
                             (NativeView, true, 0.5, null);
             });
           }
       }
   }
   
   public void AnimateFlipHorizontally(...)
   {
       ...
   }


So here in iOS Renderer, it seems a bit straight forward as we’re simply listening to the IsFlipped property change and directly executing the animation.

Next let’s see the Animation implementation…

//https://gist.github.com/aloisdeniel/3c8b82ca4babb1d79b29
public void AnimateFlipHorizontally
	(UIView view, bool isIn, 
		double duration = 0.3, Action onFinished = null)
{
	var m34 = (nfloat)(-1 * 0.001);

	var minTransform = CATransform3D.Identity;
	minTransform.m34 = m34;
	minTransform = minTransform.
		Rotate((nfloat)((isIn ? 1 : -1) * Math.PI * 0.5),
			(nfloat)0.0f, (nfloat)1.0f, (nfloat)0.0f);
	var maxTransform = CATransform3D.Identity;
	maxTransform.m34 = m34;

	view.Layer.Transform = isIn ? minTransform : maxTransform;
	UIView.Animate(duration, 0, UIViewAnimationOptions.CurveEaseInOut,
		() => {
			view.Layer.AnchorPoint = new CGPoint((nfloat)0.5, (nfloat)0.5f);
			view.Layer.Transform = isIn ? maxTransform : minTransform;
		},
		onFinished
	);
}


So that’s basically the animation implementation code, which I have extracted from the given gist link at the top, which I have explained in the concept description as well.

You can change the speed of the flip animation by changing the duration.

You could take a look at the full implementation of the android custom renderer in the github file: XFFlipViewControl.iOS/XNFlipViewRenderer.cs

Try it out eh! 😀

Well its use is exactly same as our previous XFFlipView Control. As of an example you could take a look here in my github file: XNFlipViewDemoPage.xaml

So now to execute the awesome Flip Animation, simply change the value of the IsFlipped as follows.

XNFlipViewControl1.IsFlipped = !XNFlipViewControl1.IsFlipped;


As you can see in code behind, we’re changing the value of the control’s IsFlipped property, Simples eh! 😀 This is fully bindable as well, so you can directly bind this to a ViewModel property as well.

...
<xfFlipViewControl:XNFlipView 
     x:Name="XNFlipViewControl1" 
          IsFlipped="{Binding IsViewFlipped}">
...

</xfFlipViewControl:XNFlipView>


So you can directly use this in your beautifully crafted MVVM Xamarin.Forms app as well. 😀

Some Live Action…

Here we go baby! iOS and Android running side by side…


Woot!

Look at that the Flip Animation maintains the Bounds of the View nicely during the animation in both Android and iOS! 😉

This whole awesome project i hosted up in my Github repo : https://github.com/UdaraAlwis/XFFlipViewControl 

Cheers! 😀 Keep on going my fellow devs!

Spread the love…

It’s a Flippin’ Flipity Flippable View in Xamarin.Forms!

Something that Flips! Flipity Flippy Flippin’ Flip View right out of Xamarin.Forms yol! 😀

Sometime back while I was trying to push the limits of Xamarin.Forms Views, I came across this requirement of Flipping a View with a cool animation. So let me share the story of it right here as usual…

I wanted to create a control that would have a Front View and a Back View, whilst being able to switch between those two Views in with a cool Flip animation!

Behold ze me effortz… 😀


TADAAA! 😀 How cool it is eh! 😉

And its all pure Xamarin.Forms, without a single line of native code… Say whuut! 😀 lol

So yeah let’s see how I did it.

The Golden Recipe…

So the solution here is to simply use a View which can hold two layouts (where we will be placing out child elements in) on top of each other, and rotate the View with the easy use of  Xamarin.Forms Animations, whitest swapping the two layouts on top of each other accordingly.

Ok so let me elaborate step by step.

  • Prepare a MainLayout View to hold two child Layouts (FrontView and BackView) in it
  • Add the FrontView and BackView on top of each other inside the MainLayout  View
  • Rotate the MainLayout 90 degrees using Xamarin.Forms Animations API
  • Swap the FrontView and BackView 
  • Then Rotate the MainLayout another 90 degrees
  • And Repeat the same…

That’s it!

The Golden Control…

Alright let’s start of with creating a custom control, which we shall call the golden XFFlipView which would derive from a ContentView. Then myself be using a RelativeLayout as the Parent Layout View of this control,

I’m using bindable FrontViewProperty and BackViewProperty inside the XFFlipView control to hold the reference of the two child Layout Views that we are going to be using as FrontView and BackView of this Flippin’ Flippity Flippy thing! 😀

Additionally we are going to use a bindable boolean, IsFlippedProperty to handle the flipping of this flip view 😉

Well why all the “bindable properties” you might ask? Oh come on, why not silly! So we can monitor the changes of those properties at run time and react accordingly, such as the IsFlipped property, whereas whenever the value changes we shall be activating the Flip View animation functionality.

public class XFFlipView : ContentView
{
	private readonly RelativeLayout _contentHolder;
	
	public XFFlipView()
	{
		_contentHolder = new RelativeLayout();
		Content = _contentHolder;
	}

	public static readonly BindableProperty FrontViewProperty =
	BindableProperty.Create(...);

	public static readonly BindableProperty BackViewProperty =
	BindableProperty.Create(...);

	public static readonly BindableProperty IsFlippedProperty =
	BindableProperty.Create(...);

	private static void IsFlippedPropertyChanged(BindableObject bindable, object oldValue, object newValue)
	{
		if ((bool)newValue)
		{
			((XFFlipView)bindable).FlipFromFrontToBack();
		}
		else
		{
			((XFFlipView)bindable).FlipFromBackToFront();
		}
	}
	
	/// <summary>
	/// Performs the flip
	/// </summary>
	private async void FlipFromFrontToBack()
	{
		...
	}

	/// <summary>
	/// Performs the flip
	/// </summary>
	private async void FlipFromBackToFront()
	{
		...
	}
}


There you have it as we just discussed earlier. Ops I may have forgotten about those two methods at the bottom, so those are the methods we are going to use the actual Flip Animation logic, as you can see they’re are being called every time the IsFlipped property is changed.

Oh for them lazy fellas, here grab the full implementation above on my github: XFFlipView.cs

Ze Animationalization…

Alright time for the reveal of the animation thingy, which has been completely done through the easy to use Xamarin.Forms Animations API. Surprise!!?? 😛

...
private async void FlipFromFrontToBack()
{
	await FrontToBackRotate();

	// Change the visible content
	this.FrontView.IsVisible = false;
	this.BackView.IsVisible = true;

	await BackToFrontRotate();
}
...

So basically that’s the implementation of the above said mystery two methods, as you can clearly see, inside there I’m calling another method called FrontToBackRotate() which is the actual method that performs the animation. And right after that we are swapping the Visibility of the FrontView and BackView. Then continue with the rest of animation in BackToFrontRotate() call, just like how we discussed at the beginning.

Let’s see the actual animation implementation, shall we…

#region Animation Stuff

private async Task<bool> FrontToBackRotate()
{
	ViewExtensions.CancelAnimations(this);

	this.RotationY = 360;

	await this.RotateYTo(270, 500, Easing.Linear);

	return true;
}

private async Task<bool> BackToFrontRotate()
{
	ViewExtensions.CancelAnimations(this);

	this.RotationY = 90;

	await this.RotateYTo(0, 500, Easing.Linear);

	return true;
}

#endregion


Oh look at that simplicity eh! Thank you Xamarin.Forms animation! 😀 lol

So what happen over there is first we cancel any pending animation and the do initial Y axis rotate property of the parent View and then actually call on the RotateYTo() of Xamarin.Forms Animations, causing it the parent Layout to rotate around the Y Axis with the given value of degrees.

Then when the parent View is flipping from Back To Front View, the same process’s opposite will be executed. 😀 Simples!

Try it out eh! 😀

Since its full on Xamarin.Forms without a single line of native Xamarin code, you could straightaway use this in your XAML or C# code behind anywhere in your PCL.

<xfFlipViewControl:XFFlipView 
        x:Name="XFFlipViewControl1">

    <xfFlipViewControl:XFFlipView.FrontView>
        <Frame
            Margin="10"
            Padding="0"
            BackgroundColor="#0080ff"
            CornerRadius="10"
            HasShadow="True">
            <Grid>
                <Label
                 Grid.Row="0"
                 FontAttributes="Bold"
                 FontSize="Large"
                 HorizontalTextAlignment="Center"
                 Text="this is front view"
                 TextColor="White"
                 VerticalTextAlignment="Center" />
            </Grid>
        </Frame>
    </xfFlipViewControl:XFFlipView.FrontView>

    <xfFlipViewControl:XFFlipView.BackView>
        <Frame
            Margin="10"
            Padding="0"
            BackgroundColor="#ff0080"
            CornerRadius="10"
            HasShadow="True">
            <Grid>
                <Label
                 Grid.Row="0"
                 FontAttributes="Bold"
                 FontSize="Large"
                 HorizontalTextAlignment="Center"
                 Text="this is back view"
                 TextColor="White"
                 VerticalTextAlignment="Center" />
            </Grid>
        </Frame>
    </xfFlipViewControl:XFFlipView.BackView>

</xfFlipViewControl:XFFlipView>


Woot! Such simplicity! 😀 So you can see how I have directly used our awesome XFFlipView control right inside XAML and defined the Front and Back Views. Also I have used a Frame View to make it look cooler 😉 lol

So now to execute the awesome Flip Animation, simply change the value of the IsFlipped as follows.

XFFlipViewControl1.IsFlipped = !XFFlipViewControl1.IsFlipped;


As you can see in code behind, we’re changing the value of the control’s IsFlipped property, Simples eh! 😀 This is fully bindable as well, so you can directly bind this to a ViewModel property as well.

...
<xfFlipViewControl:XFFlipView 
     x:Name="XFFlipViewControl1" 
          IsFlipped="{Binding IsViewFlipped}">
...

</xfFlipViewControl:XFFlipView>


So you can directly use this in your beautifully crafted MVVM Xamarin.Forms app as well. 😀

Some Live Action…

Here we go baby! iOS and Android running side by side…


Oh hold on… there’s more coolness… 😀


Ohhh! Eye Candy! 😀

And the craziest thing about it is that, all of this awesomeness is right from Xamarin.Forms, without a single line of native Xamarin code. 😉

Woot!

This whole awesome project i hosted up in my Github repo : https://github.com/UdaraAlwis/XFFlipViewControl 

Oh BTW, you might ask me why on Android during the Animation, the view seem to be expanding out of the view? Yes its basically how the Android native flip animation executes, since Xamarin.Forms directly maps its Animation rendering calls down to native level. But we could easily tweak it up by implementing our own native renderer for the Animation, which we will be looking into in the next post. 🙂

Cheers! 😀 Keep on going my fellow devs!

Spread the love…

I’m building an Atom Simulation with SkiaSharp and Xamarin.Forms!

So lately I’ve been on quite a bunch of adventures with SkiaSharp in Xamarin.Forms! 😀 You know how it is for me, pushing the limits of the framework as usual for the fun 😉 And this right here is one of those adventures I’m going to share with you all…

Little Backstory…

I’ve always been fascinated by the Atom’s graphical structure being the science nerd back in school days. I’ve always loved the simulation of the Electrons circulating around the atom’s core filled with Neutrons and Protons. 😀 So while reminiscing those memories, I was thinking of ways to play around with SkiaSharp framework, and suddenly, AHA! A light bulb lit-up on my head! 😀

I’ve decided to build an Atom Simulation in SkiaSharp, with Xamarin.Forms! 😉

A sneak peek!


TADAAA! 😀

So where is it going?

Haven’t you ever thought those animated atom structure simulation they show on TV was very very cool? Well I’m thinking of building a similar simulation with SkiaSharp on top of Xamarin.Forms! 😀

And this is going to be a step by step process, where I shall begin with the basic 2D structure and slowly moving towards the complex animated simulation!

Well I’ve already started developing this some time back, and I’ve made quite a bit of progress.

I have hosted this on Github: github.com/UdaraAlwis/SkiaSharpAtomStructureSo that anyone can try it out or add improvements to it, and yes I’m open for pull requests! 😉

Code behind tech bits?

Well basically as you may have already figured out, it’s a Xamarin.Forms project, and I’m using the awesome SkiaSharp for rendering the graphics.

And to be specific with SkiaSharp I’m using the following to render the cool stuff:

  • 2D Shapes Drawing
  • Canvas Translations and Rotations
  • Continuous Animation Rendering
  • Gradient Shading
  • Touch handling

Pretty cool set of features right there, out of the box with SkiaSharp eh! 😉

Progress so far…

I’ve broken the progressive steps to several Pages in the project for clear distinction between the code behind.

I will be updating this post as the project moves forward with improvements and new progression steps.

And here they are…

1. Atom Silhouette


So the first step was to simply build a silhouette of the atom structure. There you have the core with Neutrons and Protons, and the Electrons around it in their own orbits.

Basically I’m using the SkCanvas.DrawCircle() to draw the center core and then SkCanvas.DrawOval() to draw the Oval Orbits around the core. 😉

Then I’m drawing the “Electron dot” for each orbit using the corner most point of the Oval Orbit, which is basically the width of the Oval. Tricky yeah!

You might think how about the angles of the oval? Oh yeah I’m using Canvas Rotation for each orbit draw cycle, SkCanvas.RotateDegrees(xx degrees)! 😀

And there’s a simple +/- increment mechanism for increasing and decreasing the number of electrons around the orbit!

You can take a look at the implementation: AtomSilhouettePage.xaml.cs

2. Atom Orbital Paths


Here’s a little improvement for the previous step, where as I’ve added some gradient effect for the drawing of the Oval path with the same SkCanvas.DrawOval() call.

The CreateSweepGradient() is one of the way to create a gradient color effect in SkiaSharp, whereas we’ve used white and dark gray as the color here.

Oh Gradients are always cool yeah! 😉

You can take a look at the implementation: AtomOrbitalPathsPage.xaml.cs

3. Atom Orbital Paths Uneven


Now we know in reality the Atom’s electron orbit is not a nice even orbit, so we’re going to reflect just that in this progress step! 😀

So basically I’m randomly generating the Oval’s supposed width for each orbit, thus giving the above output!

You can take a look at the implementation: AtomOrbitalPathsUnevenPage.xaml.cs

4. Atom Animated Silhouette


This is the step where I kick it up a notch, with the Animation rendering using SkiaSharp!

So as we all know there’s no direct animation rendering support with SkiaSharp, since its a on demand 2D vector graphics rendering system.

What I’m doing here to get the electron dot’s to movement on the oval orbit, is I’m rendering it’s each 360 degrees positions continuously on a timer loop. Might sound pretty complex, but its actually simple! 😉

You can take a look at the implementation: AtomAnimatedPage.xaml.cs

5. A cool touch feature!

I’ve added something cool for the number of displayed Electron’s incremental mechanism!


I’ve added a touch handling feature to the atom’s electron incremental mechanism, so now basically you can swipe up or down the screen to increase or decrease the number of electron orbits of the Atom! 😉 Now instead of clicking on the +/- buttons, rather you could swipe up or down to increase or decrease the electron orbits.

This was done simply using the SkiaSharp’s built in touch event handler, and calculating the touch movement direction, thus determining up or down direction! 😀

6. Atom Animated Uneven Orbits


So here’s the next progression step, with uneven orbits animation! I’m using a gradient oval drawing for each orbit, similar to what I’ve explained above in one of the previous steps. And I’m generating the Orbits Width upon a given random value.

You can take a look at the implementation: AtomAnimatedUnevnOrbitsPage.xaml.cs

7. ….T B C…..

This will be the next progression step. Since this post will be a continuously updated post along with every progression step I make in this fun project! 😀 So stay tuned!


That’s all for now!

So like I said at the beginning, this is a continuous fun protect, which I’ll keep on improving step by step. And once again, I will be accepting your pull requests for any improvements you suggest, or just drop a comment or message me of your suggestions. 😀

Don’t forget, feel free to try this project from my Github repo: github.com/UdaraAlwis/SkiaSharpAtomStructure 

I will be updating this post as the project progresses on hopefully! 😉