
Let me share the journey of me publishing the Nuget Package of my interactive Color Picker Control for Xamarin.Forms that I built using SkiaSharp.
So some time back I built an Interactive and responsive Color Picker Control for Xamarin.Forms (Android, iOS, UWP) with a whole bunch of awesome features. On a Canvas with a beautiful Color spectrum similar to a rainbow gradient effect spreading across, drag, drop, swipe and pan over the Canvas to pick the Color you need easily, in a fun-to-use interactive experience. Built from pure Xamarin.Forms based on SkiaSharp, lightweight and fast!
Backstory…
In my previous blog post I shared with you guys how I built my interactive Color Picker Control for Xamarin.Forms, https://theconfuzedsourcecode.wordpress.com/2020/02/26/i-built-an-interactive-color-picker-control-for-xamarin-forms/
Since then I had been adding a whole bunch of extra feature to this Color Picker Control I built, so I thought it was a good idea to publish it as a Nuget Package and share with everyone! 😀


So this time, let me share my journey of implementing more advanced features and publishing the Nuget Package of my Color Picker Control for Xamarin.Forms! 😉
Some thought…
So before I isolated my Color Picker Control into a stand alone reusable package, I wanted to make sure that I maintain my philosophy of building Plugins. This would definitely have a big impact on your Users who will will be using these Plugins to build their apps, therefore I’ll share the tick list that I consider as important as follows…
Plug and Play: The plugin should easy to set up with. Do not force Devs to set up any dependencies or property values by themselves. The properties and behaviors of the Plugin should have default values assigned to them.
Customization: It should be easy and straight forward for the Devs to customize the appearance or the behaviors of the Plugin. In some case this might be limited, but you must build the Plugin in a way it make it easy as much as possible.
Embedded: In the case of UI Element Plugins, you should make it easy to be embedded into any Layout structure, being able to inherit the Parent Layout’s behaviors and values, without overriding or disrupting them.
Keep it Light: Make the Plugin as lightweight as possible, give the Dev the chance to choose which assemblies to be included in the plugin. Remove unnecessary references or dependencies from your Plugin core, so it’s light weight as possible.
Performance First: It shouldn’t cause any performance bottleneck, therefore from scratch you must build the Plugin with performance in mind. Constantly check for performance improvements during the development of your Plugin.
So may be go over this list before you build or release a Plugin for the public! 😉 Alright, with all those principles in mind, let’s move ahead…
The Features!
So here are the features that are already available in the Color Picker Control that I built which I had shared from my previous blog post…
- Picked Color: The Property that allows Users to retrieve the Color values that’s selected from the Color Picker. This value is only a Get Property.
- Picked Color Changed Event: The Event that fires up every time the PickedColor Value is changed during Color selection. You can subscribe to this event and observe the behavior.
Since my venture into this Color Picker Plugin I had a few ideas in mind as improvements or rather add as extra features, rather than just being a UI Element which allows you to pick a color on a beautiful spectrum! 😉 So here are the extra features that I’ll be building up into it..
- Change the Available Base Colors List: You can set the primary list of Colors where the gradient spectrum will be rendered from. So choose the base colors you want to be populated as you wish and it will be rendered on the Color Picker.
- Change the Color List Flow Direction: You will be able to change the direction of the flow of the colors on the canvas, where it be Horizontal flow or a Vertical flow of the color spectrum. Further more Horizontally being starting off the flow from left to right, and Vertically being top to bottom.
- Change the Color Spectrum Style: You will be able to change the style of the Color Spectrum gradient, the rendering combination of base colors (Hue), or lighter colors (Tint) or darker colors (Shade). You’ll be able to set it with different order as well, ex: Hue Colors, Shade Colors, Tint Colors or Tint Colors, Hue Colors, Shade Colors, etc..
- Change the Appearance of the Pointer: The white color circle that is used as the Picker Pointer on the Canvas, should be able to customized based on its Diameter or Thickness of the Circle border. Another nice addition would be to allow user to set the position of the Pointer as they wish.
Alright, now that we listed down the new intended feature set that I’m planning to ship out with my Color Picker Control, let’s get down to building it… 😀
Sneak Peek!
Just to give a little glimpse of the awesomeness I ended up building and publishing… 😀 behold the Color Picker Control for Xamarin.Forms!


Pretty awesome eh! 😉 I have moved out of my previous repo to a new standalone repo in github, since I’m publishing this as a package. Therefore all the new development will be done in this repository.
Project hosted on github:
https://github.com/UdaraAlwis/XFColorPickerControl
So feel free to take a look in there before we continue… 😉
Time to Build!
Since I already explained in my previous blog post how I built my Color Picker Control from scratch step by step, I won’t be repeatedly going through same code bits in this post, but rather focus on the new changes and features only.
If you haven’t read that one yet, then I would recommend you take a peek there first, I built an Interactive Color Picker Control for Xamarin.Forms! And continue here…
I named the Solution as Udara.Plugin.XFColorPickerControl, and in return I intend to keep the Package reference with the same naming. I am using Visual Studio 2019 on Windows 10 here as my development environment.

I have created a VS Solution with a .NET Standard 2.0 Library which will hold the UI Control in place, with the naming ColorPicker. You can see I have added the dependencies of the Plugin, with Xamarin.Forms and SkiaSharp.Views.Forms packages. 😉
Notice the pure Xamarin.Forms DemoApp project inside the Demo folder that I have added to the same solution? That is for testing and showcasing the Plugin’s use, also as a reference point for anyone who wants to learn how to use the Plugin in many different ways, this attached DemoApp could come handy. 😀
The ColorPicker.xaml is the UI Element that users will be using under the namespace Udara.Plugin.XFColorPickerControl.ColorPicker in their XAML or C# code for building the UI. Here’s base skeleton implementation of the ColorPicker.xaml.cs, which all the core implementation will be taking place…
namespace Udara.Plugin.XFColorPickerControl
{
    [XamlCompilation(XamlCompilationOptions.Compile)]
    public partial class ColorPicker : ContentView
    {
        public ColorPicker()
        {
            InitializeComponent();
        }

        // Implementation goes here
    }
}
Next let’s get into the implementation of Features one by one as I discussed before…
Building the Features!
So I’m going to use the same code for the two features that I already implemented in my previous blog post, Picked Color and Picked Color Changed Event feature that’s represented by PickedColor Property and PickedColorChanged Event Handler.
[XamlCompilation(XamlCompilationOptions.Compile)]
public partial class ColorPicker : ContentView
{
	/// <summary>
	/// Occurs when the Picked Color changes
	/// </summary>
	public event EventHandler<Color> PickedColorChanged;

	public static readonly BindableProperty PickedColorProperty
		= BindableProperty.Create(
			nameof(PickedColor),
			typeof(Color),
			typeof(ColorPicker));

	/// <summary>
	/// Get the current Picked Color
	/// </summary>
	public Color PickedColor
	{
		get { return (Color)GetValue(PickedColorProperty); }
		private set { SetValue(PickedColorProperty, value); }
	}

	...
}
Now considering the rest of the features that I discussed in the beginning, all those features can be implemented and exposed via Bendable Properties, and handling the Property Changed events internally to react for any changes requested during run time.
[XamlCompilation(XamlCompilationOptions.Compile)]
public partial class ColorPicker : ContentView
{
    ...

    public static readonly BindableProperty PropertyNameProperty
        = BindableProperty.Create(
        ...

            validateValue: (bindable, value) =>
            {
                // validate value
                return (..);
            },

            propertyChanged: (bindable, value, newValue) =>
            {
                if (newValue != null)
                    // action on value change
                else
                    // handling null values
                    ((ColorPicker)bindable).PropertyNameProperty = default;
            });
        );

    public type PropertyName
    { ... }

    ...
}
All the Bindable Properties are safeguarded with validations as you see above. I have added an extra layer of protection against unnecessary null values being set up, by defaulting the property value to default of itself. You can check the full implementation of each of these Properties on the github repo itself. github.com/UdaraAlwis/XFColorPickerControl Let’s begin..
Feature: BaseColorList
Bindable Property, BaseColorList: Change the available base Colors on the Color Spectrum, of the Color Picker. This will take a List of strings of Color names or Hex values, which is held in an IEnumerable as show here, also I have set up the fallback default values with the rainbow color spectrum.
[XamlCompilation(XamlCompilationOptions.Compile)]
public partial class ColorPicker : ContentView
{
    ...

    public static readonly BindableProperty BaseColorListProperty
        = BindableProperty.Create( ... );

    public IEnumerable BaseColorList
    { ... }

    ...
}
This Property is then consumed during the SkiaSharp rendering cycle as follows, where as we’re using the Xamarin.Forms built in ColorTypeConverter to parse the string color values to actual Color objects and then to SKColor objects, which is then used to render the render the color spectrum on the Color Picker Control. 😀
...
    private void SkCanvasView_OnPaintSurface
                   (object sender, SKPaintSurfaceEventArgs  e)
    {
        ...

        // Draw gradient rainbow Color spectrum
        using (var paint = new SKPaint())
        {
            paint.IsAntialias = true;

            // Initiate the base Color list
            ColorTypeConverter converter = new ColorTypeConverter();
            System.Collections.Generic.List<SKColor> colors =
                new System.Collections.Generic.List<SKColor>();
            foreach (var color in BaseColorList)
                colors.Add(((Color)converter.
		          ConvertFromInvariantString(color.ToString())).ToSKColor());

            ...
        }
    }
...
Pretty straight forward eh! Let’s see how you could use this as a developer.
How to use?
You can easily use this feature in XAML as follows, by accessing ColorPicker.BaseColorList property and setting up the list of color values you prefer as hex values or with pre-defined color value names.
<xfColorPickerControl:ColorPicker
	x:Name="ColorPicker"
	...	>
	<xfColorPickerControl:ColorPicker.BaseColorList>
		<x:Array Type="{x:Type x:String}">
			<!--  Yellow  -->
			<x:String>#ffff00</x:String>
			<!--  Aqua  -->
			<x:String>#00ffff</x:String>
			<!--  Fuchsia  -->
			<x:String>#ff00ff</x:String>
			<!--  Yellow  -->
			<x:String>#ffff00</x:String>
		</x:Array>
	</xfColorPickerControl:ColorPicker.BaseColorList>
</xfColorPickerControl:ColorPicker>
If you prefer in C# code, you can easily do as as well, a list of string values of the colors…
ColorPicker.BaseColorList = new List<string>()
{
	"#00bfff",
	"#0040ff",
	"#8000ff",
	"#ff00ff",
	"#ff0000",
};
Here’s some action…


Feature: ColorFlowDirection
The Bindable Property, ColorFlowDirection: Change the direction in which the Colors are flowing through on the Color Spectrum, of the Color Picker. This will allow you to set whether the Colors are flowing through from left to right, Horizontally or top to bottom, Vertically. I have defined an Enum type which will represent this type of course.
namespace Udara.Plugin.XFColorPickerControl
{
    public enum ColorFlowDirection
    {
        Horizontal,
        Vertical
    }
}
Let’s create our ColorFlowDirection Bindable Property based on that,
[XamlCompilation(XamlCompilationOptions.Compile)]
public partial class ColorPicker : ContentView
{
    ...

    public static readonly BindableProperty ColorFlowDirectionProperty
        = BindableProperty.Create( ... );

    public ColorFlowDirection ColorFlowDirection
    { ... }

    ...
}
The default value will be set as ColorFlowDirection.Horizontal, and if the User changes value during run time, it will fire up a new SkiaSharp rendering cycle of the Canvas, effectively rendering the spectrum accordingly to the new color value, which is handled in the rendering logic as below…
...
    private void SkCanvasView_OnPaintSurface
                   (object sender, SKPaintSurfaceEventArgs  e)
    {
        ...

            // create the gradient shader between base Colors
            using (var shader = SKShader.CreateLinearGradient(
                new SKPoint(0, 0),
                ColorFlowDirection == ColorFlowDirection.Horizontal ?
                    new SKPoint(skCanvasWidth, 0) :
                    new SKPoint(0, skCanvasHeight),
                colors.ToArray(),
                null,
                SKShaderTileMode.Clamp))
            {
                paint.Shader = shader;
                skCanvas.DrawPaint(paint);
            }

        ...
    }
...
The trick here is to configure the SKShader.CreateLinearGradient() method’s start and end coordinate parameters, which governs the direction in which the gradient effect will be drawn with the list of colors, thus rendering the color list from left to right or top to bottom. As you can see for Horizontal effect, we use SKPoint (0,0) to SKPoint(<canvasWidth>, 0) by using the corner most value on the X axis for the end coordinates, the same pattern is used for Vertical effect with bottom most value on the Y axis.
Here how to consume this feature as a developer…
How to use?
You can easily use this feature in XAML, by accessing ColorPicker.ColorFlowDirection property and setting Horizontal or Vertical option as you prefer…
<xfColorPickerControl:ColorPicker
	x:Name="ColorPicker"
	ColorFlowDirection="Horizontal"
	...	>
</xfColorPickerControl:ColorPicker>
If you prefer in C# code, use the ColorFlowDirection.Horizontal or Vertical option…
ColorPicker.ColorFlowDirection =
	Udara.Plugin.XFColorPickerControl.ColorFlowDirection.Horizontal;
Here’s some action…


Feature: ColorSpectrumStyle
The Bindable Property, ColorSpectrumStyle: Change the Color Spectrum gradient style, with the rendering combination of base colors (Hue), or lighter colors (Tint) or darker colors (Shade). If you’re not familiar with these technical terms, here’s a clear illustration of comparison of Hue, Shade, and Tint of Colors.

We need to make sure our Color Picker is able to deliver to this kind of requirement, having darker or lighter colors of the given base colors on the Color Picker Spectrum. So I’ve created an Enum type which will consist of all the possible combinations of Hue, Shade and Tint colors based on the available Base Colors, that would facilitate this feature.
namespace Udara.Plugin.XFColorPickerControl
{
    public enum ColorSpectrumStyle
    {
        HueOnlyStyle,
        HueToShadeStyle,
        ShadeToHueStyle,
        HueToTintStyle,
        TintToHueStyle,
        TintToHueToShadeStyle,
        ShadeToHueToTintStyle
    }
}
Let’s create our ColorSpectrumStyle Bindable Property based on that,
[XamlCompilation(XamlCompilationOptions.Compile)]
public partial class ColorPicker : ContentView
{
    ...

    public static readonly BindableProperty ColorSpectrumStyleProperty
        = BindableProperty.Create( ... );

    public ColorSpectrumStyle ColorSpectrumStyle
    { ... }

    ...
}
I will be setting ColorSpectrumStyle.HueToShadeStyle as the default value for this property, any changes to this value during run time will kick start a new refresh draw on the Color Spectrum, which is handled in the rendering logic as below…
...
    private void SkCanvasView_OnPaintSurface
                   (object sender, SKPaintSurfaceEventArgs  e)
    {
        ...

        // Draw secondary gradient color spectrum
        using (var paint = new SKPaint())
        {
            paint.IsAntialias = true;

            // Initiate gradient color spectrum style layer
            var colors = GetSecondaryLayerColors(ColorSpectrumStyle);

            ...
        }
    }
...
Over here, we’re retrieving the list of colors based on the ColorSpectrumStyle value, which is a combination of Transparent, Black and White colors, which will be used to draw the secondary gradient layer. GetSecondaryLayerColors() will be returning the appropriate list of secondary colors that matches the ColorSpectrumStyle requested as follows.
...
    private SKColor[] GetSecondaryLayerColors(ColorSpectrumStyle colorSpectrumStyle)
    {
        ...

        if (colorSpectrumStyle == GradientColorStyle.DarkToColorsToLightStyle)
        {
            return new SKColor[]
            {
                SKColors.Black,
                SKColors.Transparent,
                SKColors.White
            };
        }

        ...
    }
...
I’m maintaining a simple If-else block chain which will check for the ColorSpectrumStyle value available and return the appropriate list of colors back. Quite straight forward! 😉
Now here’s how you use this awesome feature…
How to use?
You can easily use this feature in XAML, by accessing ColorPicker.ColorSpectrumStyle property and setting the appropriate Style option as you prefer…
<xfColorPickerControl:ColorPicker
	x:Name="ColorPicker"
	ColorSpectrumStyle="TintToHueToShadeStyle"
	...	>
</xfColorPickerControl:ColorPicker>
If you prefer in C# code…
ColorPicker.ColorSpectrumStyle =
	Udara.Plugin.XFColorPickerControl.ColorSpectrumStyle.TintToHueToShadeStyle;
Here’s some action…


Feature: PointerRing Styling
As you can see there’s a pretty neat Pointer Ring that’s pointing the picked color position on the Color Picker, it would be nice to be able to customized this too eh! 😉
Therefore I have introduced four features for this,
- PointerRingDiameterUnits
- PointerRingBorderUnits
- PointerRingPositionXUnits
- PointerRingPositionYUnits
Alright, let’s walk through them one by one..
Feature: PointerRingDiameterUnits
The Bindable Property, PointerRingDiameter: Changes the Diameter size of the Pointer Ring on the Color Picker. It accepts values between 0 and 1, as a representation of numerical units which is compared to the 1/10th of the longest length of the Color Picker Canvas. By default this value is set to 0.6 units.
[XamlCompilation(XamlCompilationOptions.Compile)]
public partial class ColorPicker : ContentView
{
    ...

    public static readonly BindableProperty PointerRingDiameterUnitsProperty
        = BindableProperty.Create( ... );

    public double PointerRingDiameterUnits
    { ... }

    ...
}
This will be calculated against the longest length of Color Picker’s Canvas, whether it be Width or Height. The reason for adding another 1/10th of the value is to maintain the maximum size of the Pointer Ring, avoiding ridiculous sizing of the element. lol So the Precise calculation is as, Canvas Size (Height or Width) x PointerRingDiameterUnits x (1/10)
This value will render exactly to the same proportion against different screen sizes and DPs.
...
    private void SkCanvasView_OnPaintSurface
                   (object sender, SKPaintSurfaceEventArgs  e)
    {
        ...

        // Painting the Touch point
        using (var paint = new SKPaint())
        {
            ...

            var canvasLongestLength = (skCanvasWidth > skCanvasHeight)
                    ? skCanvasWidth : skCanvasHeight;

            // Calculate 1/10th of the units value for scaling
            var pointerRingDiameterUnitsScaled = (float)PointerRingDiameterUnits / 10f;
            // Calculate against Longest Length of Canvas
            var pointerRingDiameter = (float)canvasLongestLength
                                                    * pointerRingDiameterUnitsScaled;

            // Outer circle of the Pointer (Ring)
            skCanvas.DrawCircle(
                _lastTouchPoint.X,
                _lastTouchPoint.Y,
                (pointerRingDiameter / 2), paintTouchPoint);

            ...
        }
    }
...
I’ve set up the skCanvas.DrawCircle() with the (pointerRingDiameter / 2) since it accepts radius value only for drawing the circle.
How to use?
You can easily use this feature in XAML, by accessing ColorPicker.PointerRingDiameterUnits property and setting the value against your Color Picker’s Width and Height.
<xfColorPickerControl:ColorPicker
    x:Name="ColorPicker"
    PointerRingDiameterUnits="0.6"
    ...    >
</xfColorPickerControl:ColorPicker>
If you prefer in C# code…
ColorPicker.PointerRingDiameterUnits = 0.6;
Here’s some action…


Feature: PointerRingBorderUnits
The Bindable Property, PointerRingBorderUnits: Changes the Border Thickness size of the Pointer Ring on the Color Picker. It accepts values between 0 and 1, as a representation of numerical units which is calculated against the diameter of the Pointer Ring. By default this value is set to 0.3 units.
[XamlCompilation(XamlCompilationOptions.Compile)]
public partial class ColorPicker : ContentView
{
    ...

    public static readonly BindableProperty PointerRingBorderUnitsProperty
        = BindableProperty.Create( ... );

    public double PointerRingBorderUnits
    { ... }

    ...
}
This calculation executes against the Pointer Ring’s pixel diameter value as, (Pointer Ring Diameter in Pixels) x PointerRingBorderUnits, since this is dependent on the Pointer Ring’s diameter, we thickens the border inside that circle only. Basic technique here is to draw a Circle inside the Parent Circle, with the picked pixel point’s color, emulating the visual of a Ring.
...
    private void SkCanvasView_OnPaintSurface
                   (object sender, SKPaintSurfaceEventArgs  e)
    {
        ...

        // Painting the Touch point
        using (var paint = new SKPaint())
        {
            ...

            // Draw inner circle with picked color
            paintTouchPoint.Color = touchPointColor;

            // Calculate against Pointer Circle
            var pointerRingInnerCircleDiameter
                          = (float)pointerRingDiameter
                              * (float)PointerRingBorderUnits;

            // Inner circle of the Pointer (Ring)
            skCanvas.DrawCircle(
                _lastTouchPoint.X,
                _lastTouchPoint.Y,
                ((pointerRingDiameter
                        - pointerRingInnerCircleDiameter) / 2), paintTouchPoint);
            ...
        }
    }
...
I’ve set up the skCanvas.DrawCircle() with the calculation, ((pointerRingDiameter – pointerRingInnerCircleDiameter) / 2) since it accepts radius value only for drawing the circle.
How to use?
You can easily use this feature in XAML, by accessing ColorPicker.PointerRingBorderUnits property and setting the value against PointerRingDiameterUnits you have used.
<xfColorPickerControl:ColorPicker
    x:Name="ColorPicker"
    PointerRingBorderUnits="0.3"
    ...    >
</xfColorPickerControl:ColorPicker>
If you prefer in C# code…
ColorPicker.PointerRingBorderUnits = 0.3;
Here’s some action…


Feature: PointerRingPosition<X,Y>Units
The Bindable Property, PointerRingPosition<X,Y>Units: Changes the Pointer Ring’s position on the Color Picker Canvas programmatically. There are of two bindable properties PointerRingPositionXUnits and PointerRingPositionYUnits, which represents X and Y coordinates on the Color Picker Canvas. It accepts values between 0 and 1, as a presentation of numerical units which is calculated against the Color Picker Canvas’s actual pixel Width and Height. By default both the values are set to 0.5 units, which positions the Pointer Ring in the center of the Color Picker.
[XamlCompilation(XamlCompilationOptions.Compile)]
public partial class ColorPicker : ContentView
{
    ...

    public static readonly BindableProperty PointerRingPositionXUnitsProperty
        = BindableProperty.Create( ... );

    public double PointerRingPositionXUnits
    { ... }

    public static readonly BindableProperty PointerRingPositionYUnitsProperty
        = BindableProperty.Create( ... );

    public double PointerRingPositionYUnits
    { ... }

    ...
}
This calculation executes against the Color Picker Canvas’s actual pixel Width and Height as, (Color Picker Canvas Width in Pixels) x PointerRingPositionXUnits and (Color Picker Canvas Height in Pixels) x PointerRingPositionYUnits
Up on invoke of the PropertyChanged on those Properties, we make a call to the following SetPointerRingPosition() with the new X and Y position units requested from User.
...
    private void SetPointerRingPosition
                      (double xPositionUnits, double yPositionUnits)
    {
        // Calculate actual X Position
        var xPosition = SkCanvasView.CanvasSize.Width
                                 * xPositionUnits;
        // Calculate actual Y Position
        var yPosition = SkCanvasView.CanvasSize.Height
                                 * yPositionUnits;

        // Update as last touch Position on Canvas
        _lastTouchPoint = new SKPoint(Convert.ToSingle(xPosition), Convert.ToSingle(yPosition));
        SkCanvasView.InvalidateSurface();
    }
...
We’re calculating the actual X and Y coordinates against the Canvas pixel size and setting up the _lastTouchPoint with those values, for keeping the Pointer Ring position on canvas in sync with touch inputs positioning and programmatical positioning, then at the end we fire up the SkiaSharp rendering cycle with SkCanvasView.InvalidateSurface();
Handling Pointer Ring Position on Initialization!
We need to handle the positioning of the Pointer Ring on the initialisation or on the rendering of the element during run time. We can achieve this by a one-time execution with a boolean flag, that executes this logic. So upon the first SkiaSharp canvas rendering cycle, we hook up to the PointerRingPositionXUnits and PointerRingPositionYUnits properties and render the Pointer Ring Position to the set value.
...
    private bool _checkPointerInitPositionDone = false;

...
    private void SkCanvasView_OnPaintSurface
                   (object sender, SKPaintSurfaceEventArgs  e)
    {
        ...

        if (!_checkPointerInitPositionDone)
        {
            var x = ((float)skCanvasWidth * (float)PointerRingPositionXUnits);
            var y = ((float)skCanvasHeight * (float)PointerRingPositionYUnits);

            _lastTouchPoint = new SKPoint(x, y);

            _checkPointerInitPositionDone = true;
        }
    }
...
We use _lastTouchPoint variable which is used by the drawing functions for rendering the Pointer Ring on Color Picker’s Canvas.
How to use?
You can easily use this feature in XAML, by accessing ColorPicker.PointerRingPositionXUnits property and ColorPicker.PointerRingPositionYUnits setting the values against your Color Picker’s Width and Height.
<xfColorPickerControl:ColorPicker
    x:Name="ColorPicker"
    PointerRingPositionXUnits="0.3"
    PointerRingPositionYUnits="0.7"
    ...    >
</xfColorPickerControl:ColorPicker>
If you prefer in C# code…
ColorPicker.PointerRingPositionXUnits = 0.3;
ColorPicker.PointerRingPositionYUnits = 0.7;
Here’s some action…


UWP Bug Fix!
One issue I noticed was on UWP run time, where the SkiaSharp’s Canvas touch event behaves differently than iOS and Android. The touch event would get activated even if you hover over the canvas using your mouse pointer, and this was causing the PickedColor property to fire up.
The Touch event should occur only if you actually click on the canvas and drag and drop on the Canvas, so in order to fix this I used the InContact property SKTouchEventArgs inside the touch event to validate on UWP run time.
...
    private void SkCanvasView_OnTouch
                (object sender, SKTouchEventArgs e)
    {
        // to fix the UWP touch behavior
        if (Device.RuntimePlatform == Device.UWP)
        {
            // avoid mouse over touch events
            if (!e.InContact)
                return;
        }

        _lastTouchPoint = e.Location;

        ...
    }
...
This fixed the bug on UWP, making sure the touch event is validated before executing the rest of the logic.
Nugetizing!
Alright then, its time to set up our beautiful Color Picker Control for Xamarin.Forms as a Nuget Package using Visual Studio. I’m going first set the Nuget package properties first, then build the package, and finally publish it to Nuget, allowing it to be shared with everyone out there! 😀
Set up package properties…
You could do this straight from Visual Studio Project Properties, or directly from a Nuspec file added to the project itself. For now I would prefer setting up properties in VS Project -> Properties – Package tab, making sure to add all the necessary properties and information about the package as shown below…

Make sure to click on “Generate Nuget package on build” tick, which will enable all the property fields. You could also do this by editing .csproj file of the package project as well, if you require any fine tuned editing…

Now we’re ready to build the package of our Udara.Plugin.XFColorPicker library.
Building the Package…
We need to create the Publish Profile for the package.
Right click on Library project node -> Publish

If this was your first time, it will navigate you to create new Publish Profile tab as shown below…
It is easier to set up a Publish Profile, since you don’t have to manually change your build configuration to Release and then launch a build. Therefore I have set it up now, and next time I publish it will straightaway handle all the configuration for you! 😀

Click Publish, and it nicely builds…

Once we navigate to the folder location mentioned in the above build output…
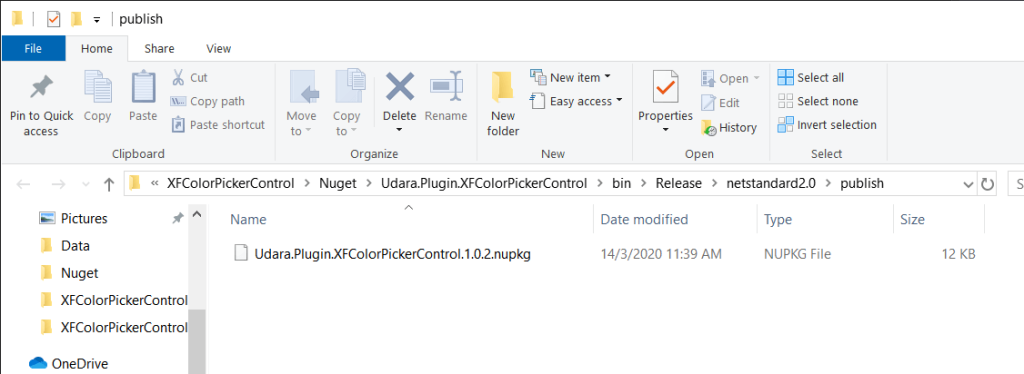
There we have our nupkg package file, which we can then use to directly upload to Nuget!
Upload to Nuget…
Grab that nupkg file and drag and drop into the upload page of nuget.org and you’re done!

Here you’ll be able to add a short marked down documentation for the users, I would highly recommend you do that since it will increase the support and visibility.

Well that’s all it takes, and the package will be available in a few hours on Nuget!
Updating Package…
Now how do we update our package? if you have noticed around nuget, there’s no update option in in the page where you manage the package. You can update your package by using the NuGet command-line utility or directly uploading an increment build, in which I have opted for the end option to keep it easy.
So when you want to push an update to your package, make sure to update the package properties in Visual Studio to reflect the next immediate version, as shown below where I’m updating from version 1.0.2 to version 1.0.3…

Also do no forget the assembly versioning as well…

Now build your package and directly go to nuget upload page, drag and drop the file…

Make sure to add the nuget documentation and Submit!

Done and dusted, just like that, the updating is done! 😀
Published on nuget:
nuget.org/Udara.Plugin.XFColorPickerControl/
Now anyone can use my Color Picker Control for Xamarin.Forms by setting up this nuget package in their project…
Demoing it up!
As you saw at the beginning I have attached a Demo project into the same parent Solution of Udara.Plugin.XFColorPickerControl, which I have used for testing during development, and to maintain as a demonstration of all the awesome features this plugin provides! 😉
Since this plugin is meant to be compatible on a cross platform environment its impeccable do continuous testing on all the platforms. Anyhow here’s a sneak peek of the demo app…


I have created separate pages to demonstrate awesomeness of each special feature…
BaseColorList Demo:


Android, UWP and iOS…
ColorFlowDirection Demo:


Android, UWP and iOS…
ColorSpectrumStyle Demo:


Android, UWP and iOS…
PointerRingStyling Demo:


Android, UWP and iOS…
Since it’s a pure Xamarin.Forms and can be deployed directly to all three platforms, Android, iOS and Windows UWP, you can do the same with my plugin. Feel free to take a look at the demo app in case if you need trouble shooting.
Conclusion!
There you have it my Color Picker Control for Xamarin.Forms, now published to nuget as a package, with a whole bunch of awesome features, and anyone can easily use it in their own Xamarin.Forms projects! 😀 Pheww… What a joy! Sharing something you’ve been working so hard for a long time. So feel free to give a try, contribute, and any feedback is always welcome…
hosted on github:
github.com/UdaraAlwis/XFColorPickerControlpublished on nuget:
nuget.org/Udara.Plugin.XFColorPickerControl/
Well that was fun! So keep in mind I’m going to be implementing more and more features for this plugin in future, and might end up changing some of those features or implementations as well. This blog post will not be constantly updated against them, so many sure to keep in touch with the docs in the github repo itself for future references.
Imagination is the limit yol! 😉
Share the love! 😀 Cheers!
UPDATE: Guess what yol? My little Color Picker Control got featured at the .NET Conf: Focus on Xamarin event by Microsoft!
WOOT! WOOT! Thanks @James Montemagno!


