Let’s Parameterize our SSRS RDL Reports!

Let me show you, how to add parameters to SSRS RDL Reports, while populating the reporting data based on those parameters dynamically!

You can add any number and any type of parameters into your Reports, so that during the execution users can easy load different sets of data into the Reports for analysis.

Backstory…

Since my last few posts I’ve been revealing to you guys that I’ve been working with Microsoft Dynamics 365, where I built those Reports using SQL Server Reporting Services RDL Reports, where those RDL files are uploaded to the Dynamics 365, allowing use to execute them directly from there.

In those Reports, I’ve added a bunch of Parameters where they can load different sets of data into the Reports through those reports for different analytics of the data. Yeah sounds pretty cool eh! 😉 So I thought of sharing this experience with you all, how I added the feature of passing Parameters into my RDL Reports for Microsoft Dynamics 365!

the Set up!

So my set up was on Visual Studio 2015 with SSRS in order to build Reports using fetchXML based data sources that pulls data from Microsoft Dynamics 365 cloud, which was a helpless requirement specifically with the Report Authoring Extension. Let’s set up Microsoft Dynamics 365 Fetch Extension in VS2015!

Although I believe the process of adding parameters any SSRS RDL Report is the same, so you should be able to follow along despite your targeted deployment source. 🙂

Parameters for Reports!

So you need to add Parameters for your RDL Report eh, which means you’ll be passing a bunch of data values into the filtering pipeline of the Report and repopulate its results based on it.

So how do we add those Parameters? We need to build each one of those Parameters in our SSRS project. This is where you configure what is the type of the parameter, whether its Text, Date, Boolean, and so on, you can even define your own set of data values available for this parameter, which the user will choose from during execution. It also facilitates you to define the data source in which those values will be loaded from.

Then you add those Parameters into the Report, by adding a dependency between them. Once they are set you need to determine the refresh cycle for re-loading the data based on the new parameters given. 😉

Now as you can see there’s all kinds of cool stuff you can do with it, even though the set up seem a bit complicated, its actually quite straight forward! 😀

We need to get started by defining the Parameters in our Report! So go ahead and open up your RDL Report with Design View…

Let’s get Started!

In order to add any Parameter, you need to first define it in your project, so first make sure you have the “Report Data” View is opened up.

To open up the Report Data View if not visible on your Visual Studio 2015 solution, go to View -> Report Data or hit the short cut keys, Ctrl + Alt + D on your keyboard! 😉

Let’s dive right into it by, Right click on the Parameters -> Add Parameters

This will open up the dialog to create a new Parameter to be added to your Report…

Now this let’s you define your Parameter with the properties you want to set for, starting from the values available in it, to the refresh action up on the user’s selection. As you can see I have here “ReportParameter1” which is labeled as “Report Parameter 1 :” for the display fields in the Report. You can choose the type of data this parameter represents and the type of inputs it accepts from the user.

So let’s go over each section you need to consider when you’re creating a Parameter.

Parameter: Available Values!

This allows you to determine the set of values available for your Parameter, that is presented to the user during execution. You can also leave this in the “None” option which will let the user type in the value they prefer.

If you want to load a specific list of values in to this parameter, then you can select “Specify values”, which will allow you to build the list of data values with their representing label value as shown before. This will provide the user with a drop down list of data using this source.

If you’d like to populate the data for this Parameter using a data query source that you can build, then feel free to select the “Get values from a query” option, in which case the list of data will be loaded from this dataset source based on the query defined in it, and be presented to the user accordingly with the Labeled values.

I will get in to this query based data loading into the Parameter, later in this article 😉

Then the next section you need to consider is the Default Values…

Parameter: Default Values!

This is where you define the default value that’s loaded into your Parameter during the execution, in which case you could also leave it with the “No default value” option selection if you don’t want to have any pre-selected values for loading of the data.

If you select “Specify values” option here, it will allow you to choose the default value to be loaded from the list of data that you defined in the “Available Values” section as I’ve shown before.

Now the same way you could populate your default values based on Expressions as well, in a situation like setting the default value for a Date type parameter can easily be done as below…

But if you’ve defined a data source based on a query, then you can select the data from that source to be loaded here as well from the option “Get values from a query“. You need to make sure to select the same dataset that you selected in “Available Values” section here as well.

Next the final section you need to consider when building your Parameter, “Advanced” section!

Parameter: Advanced!

This is where you define the refresh action based on the selection of a new value for the Parameter from the user during execution. Simply put let report refresh its data every time a user selects a new parameter value, or let the user refresh manually to see the results once change the selection.

Now that’s quite straight forward eh! So those are key sections you need to focus on when building any Parameter for your RDL Report.

Next let’s deep a little more into loading values from query into your Parameter… 😀

Let’s get Values from a Query!

As I’ve shown earlier you can load data into your Parameter from a dataset source based on a query. Let me show you how easy it is to set this up! 😉

Let’s get started by creating the dataset that will handle loading the data from the data source that we target. Right click on the “Datasets” section -> Add Dataset… option.

Create a new dataset using an existing shared dataset, or using an existing data source by accessing the data through the preferred query type.

As you can see below here in my example, I’m using a fetchXML query to be execute through my TestDataSource which is a MS Dynamics 365 data source. So you need to build your own query based on your data source here.

Once the dataset is defined, you need to make sure the Fields are properly loaded as expected. You can check this in the dataset property window itself and even after click “OK” and save it under the dataset you just created as shown below.

Now that we have set up our Dataset Source, then we can map this into our Parameter to load these data during the execution.

First thing, you need to make sure to set up the type of the Parameter, accordingly to the type of values that you’re loading from the dataset. In this example, “Text” would preferred.

So now, you can set up the Available Values with the “Get values from a query” option. You just have to select the dataset that you created as shown below.

Here you got Value field, which refers to the actual value that’ll be passed into the Report up on selection from the User. And then the Label field, that represents the display value of your dataset items, as you may have noticed in the previous steps.

Finally you set up the Default Values with the same set up, which will load the first item provided by the dataset query during execution into the Parameter, which will then trigger the loading of the Report data based on that.

Here make sure to set the same Value field selection as you set up on Available Value sections. 😉

Once the set up is done, you may see your Parameters now visible in the Design View of your RDL Report as shown below… 😀

You still need to set up the those Parameters as dependencies for your Report, which we will discuss next…

Let’s tie up Parameters with Report!

Here’s the final step fellas! 😀 Let’s open up the properties dialog of the dataset that you’re using to populate your Report,

Go to the Parameters section, and add the Parameters you just created in the previous step!

Yep it’s that simple! 😀 as you can see I have added the ReportParameter1 that I have created here, where as Parameter Name is set up as it is, and then the Parameter Value field is set up as [@ReportParameter1], which is how you address the Parameters you have defined in the Report. Subsequently you can add any number of Parameters following the same.

Notice how each Parameter set up has the Expression button next to it? that is to allow you to modify the value coming in from the Parameter using Expressions, if you wish to! 😉

Next you have to set up the Filter based on the Parameters that you just registered, so go to the Filters section, and add the filtering logic you require based on those parameter value for the repopulating of the Report data.

Right here you need to pay extra attention to details, where you need to consider which field in your data set you want to set up the parameters against for filtering, and what type of operator you need for this logic. You need to make sure both values you’re comparing are of the same type, and also you can modify their values based on Expressions before they’re applied for the filter.

As you can see above I’m using the DataField1 text field’s value to check whether its equal to the value given in the ReportParameter1 for each data row.

If I’m to show another example, take a look at below, I have added a second parameter which is type of Date/Time, which then compares itself with the value of DataField2 date/time field in the report dataset.

Now both those filters will act as an AND junction and filter out the data based on the combined logic. Save it up, you’re all set! 😀

Well… that’s how you tie up your Parameters with the Report’s dataset! 😉

You can now run this Report and see the beauty in action! 😉

Conclusion

Microsoft SQL Server Reporting Services – RDL Reports allows you to add Parameters to them, so that you could allow Users to filter the data according to different business logic for ease of analysis. You can add many different types of Parameters which could be used to filter the report data in kinds of different ways, using Expressions.

  • Define your Parameters in the RDL Report
  • Set up the available values for your Parameters
    • load data into Parameters based on specific list of values, or
    • load data into Parameters from a query based data set
  • Set up the Refresh action event
  • Add them as dependencies for your Report
  • Set up Report data filtering based on Parameters

This will allowing the Report data to be filtered dynamically based on the Parameter values that are passed in by the selections from the User. Well it is quite straight forward as you can see… 😉

Hope this little step by step guide helped someone, somewhere in the world… happy building my fellow devs! 😀

Share the love! 😀 Cheers!

Data formatting in SSRS RDL Reports with Field Expressions…

Let me share some exciting ways of formatting data with Field Expressions in SSRS RDL based Reports that I discovered during my Microsoft Dynamics 365 adventures! 😉

Using the Expression Builder in Visual Studio Report Designer, you can add all kinds of interesting ways of formatting your data for RDL Report projects. You can set custom expressions to these data fields to format and manipulate them easily.

This is where the magic happens, as you can see there’s a whole collection of library for formatting data with Expressions…

Backstory…

So I happened to be embarked on a Microsoft Dynamics 365 CRM data Reporting project, where I was tasked built a bunch of SSRS RDL based reports, that pulls data from CRM and format it based on the custom business logic before displaying to the user.

This involved writing a whole bunch of custom expressions on each field in those reports, where I came across all these interesting ways of formatting and manipulating data.

So here I am sharing some interesting field expression formatting that I discovered during that adventure… 😉

Formatting Fields with Expressions!

Opening up the Expression editor dialog you can see the long list of available syntaxes with their respective functionality description. It gives a good head start for whatever the function you’re looking to implement to format your data.

Alright then let me share some awesome stuff you can do with these data formatting functions available through expressions… 😀

– Lower case and Upper case…

=UCase(Fields!mytestfield.Value))

or for lower case,

=LCase(Fields!mytestfield.Value))

– Multiple fields into a Single field…

= Fields!mytestfield1.Value + " - " + Fields!mytestfield2.Value

You can pull data from multiple fields into a single field, and concatenate those field values using “+” operator, even add string chars in the middle as you wish.

– Check for null…

ISNOTHING(Fields!mytestfield.Value)

This will return a True or False boolean value based the value in the field.

– If conditions…

=IIf(ISNOTHING(Fields!mytestfield.Value),
" - ",
"DC-" + UCase(Fields!mytestfield.Value)))

As shown above this will check if “mytestfield” no value, then return ” – “, otherwise return the Upper-cased, custom value of “mytestfield” as “DC-XXXXX”…

– Switch statements…

=Switch(
Fields!mytestfield.Value = "1", "Monkey",
Fields!mytestfield.Value = "2", "Rabbit",
Fields!mytestfield.Value = "3", "Penguin")

Based on the value present in “mytestfield”, we return the response value.

– Text Trimming…

=RTrim(UCase(Fields!mytestfield.Value))

No trailing spaces (RTrim) at the end or similarly no leading spaces (LTrim) in the beginning of the value, or for both function in the same time use (Trim).

– To Date object…

=CDate(Fields!mytestfield.Value)

This will return a date object from the value present in “mytestfield”…

– Formatting a value…

=Format(CDate(Fields!mytestfield.Value), "dd/MM/yyyy")

This formats the value accordingly to the given date format, similarly this applies to any type..

– Format and Concat multiple fields into a single value…

= Format(Fields!mytestfield1.Value, "yy") + 
Format(Fields!mytestfield2.Value, "MM") + 
Format(Fields!mytestfield3.Value, "dd")

This format those different field values and merge them into a single field…

– Yesterday, Today, or Tomorrow…

=DateAdd("d",-1,Today())
=Today()
=DateAdd("d",1,Today())

First expression, gets the Yesterday’s date, second get the Today’s date, third expression gets the Tomorrow’s date…

You can also format is similarly,

=Format((DateAdd("d",-1,Today())), "dd/MM/yyyy")

Since it returns a date object no need to convert the value before formatting…

– Convert UTC date time object to local time…

=Format(
System.TimeZone.CurrentTimeZone.
ToLocalTime(Fields!mytesttimefield.Value), "hh:mm tt")

Here “mytesttimefield” carries a date time object with UTC time, and we’re now converting that to the local system time, whichever the timezone set up in the client environment…

– Extract Date object segments…

=Year(CDate(Fields!mytestfield.Value))
=Month(CDate(Fields!mytestfield.Value))
=Day(CDate(Fields!mytestfield.Value))

Three options, extract Year, Month and Date values from a given Date object…

– Build a Date object…

=DateSerial("2020", "06", "18")

Now that builds a date object by year, month, and date segments. If I’m to spice it up…

=Format(
   DateSerial(
   Year(CDate(Fields!mytestfield.Value)),
   Month(CDate(Fields!mytestfield.Value)),
   "1").AddMonths(1).AddDays(-1),
"dd/MM/yyyy")

You can also add extra values after build the date object as shown there.

Well that’s it for now… 😀

Conclusion

It’s actually quite fun to work with formatting or manipulating data using Expressions in SSRS RDL Reports, while the Expression editor window follows a great editing tool with descriptions of each function available.

There’s many awesome functions available in the Expression editor to format our data fields before presentation to the user during execution. You could build all kinds of custom formatted data values even by merging multiple fields. All this is quite straight forward and easy to use.

Share the love! 😀 Cheers!

Let’s set up Microsoft Dynamics 365 Fetch Extension in VS2015!

Let’s install Microsoft Dynamics 365 Fetch extension in Visual Studio 2015 for SQL Server Reporting Services, on Windows 10, out here in the year of 2020!

This is also known as Microsoft Dynamics 365 Report Authoring Extension, which is used for building data sources, for Reporting Projects, where it helps you establish the connection to the Dynamics 365 instance you require.

Backstory…

So recently I found myself working on a Dynamics 365 Reporting project module, where I had to pull data from the Dynamics 365 cloud, using a FetchXML query, process it through a set of business logic and then display to the user in a nice looking Report Layout.

This can nicely be done in a Report Server project in Visual Studio, but you need to have both the SQL Server Data Tools and Microsoft Dynamics 365 Report Authoring Extension (Microsoft Dynamics 365 Fetch Extension) set up installed in your Visual Studio.

But this whole environment set up is very much tricky these days, due to incompatibilities with latest versions of Visual Studio. So I had to go through a long roller coaster ride to figure this out, trying out different versions of the extensions and Visual Studio to get it to work.

So to save others from this painful roller coaster ride in a year like 2020, I’m documenting this process step by step for my fellow devs… 😉

Dynamics 365 Fetch Extension!

As I mentioned before, this also known as Microsoft Dynamics 365 Report Authoring Extension, is required for creating Data Sources in Report Server Projects, which is absolutely required for building Report Layout (RDL layout report). Since you need to define a valid data source before hand creating any Reports in your project.

Only for Visual Studio 2015!

The unfortunate situation is that this extension is only supported in Visual Studio 2015, quite surprisingly also there’s no support for this extension in any VS version beyond that.

Although there are some indirect hack ways to install this on VS 2017, it still doesn’t justify having to downgrade your whole Visual Studio Setup. So we might as well do a clean installation of Visual Studio 2015, and install this extension on top of it.

The Set up?!

So assuming you’re currently on latest Visual Studio version probably VS 2019 or beyond, the best choice would be to create a Virtual Machine on your Windows, and do a clean VS 2015 installation there and proceed with the extension set up.

If you don’t have resources to create a separate VM on your Windows, you could also resort to doing a fresh installation of VS 2015 in your dev environment, side by side with VS 2019. I’ve personally tried this method, since I was running Windows on Parallels in an Apple iMac.

So either choice is up to you, then let me get into the step by step walk through of this installation set up…

Let’s begin with VS 2015!

So let’s first go ahead with downloading VS 2015 from Microsoft Visual Studio older versions archive from the following link: https://visualstudio.microsoft.com/vs/older-downloads/

Here you’ll probably be asked to login, and directed to VS Subscriptions page, where you should be able to search for “Visual Studio 2015”

Select “Visual Studio 2015 Update 3” option, and web installer download will begin. Once the download completes, run the set up…

Once the installer loads up, select the “Custom” option,

This is to select only the “Microsoft SQL Server Data Tools” option only, since that’s our primary requirement here…

Once you’re done with selection, proceed with the installation…

Once the installation finishes, we need to next download the SQL Server Data Tools version that we require for this set up…

Setting up SSDT 17.4!

So let’s go to this link: https://docs.microsoft.com/en-us/sql/ssdt/previous-releases-of-sql-server-data-tools-ssdt-and-ssdt-bi?view=sql-server-ver15 and download SSDT for VS2015 17.4

Launch the installer and make sure to select the following options…

And let the installation process complete…

Now the SSDT for VS2015 installation finishes, next we need to download the Microsoft Dynamics 365 Fetch Extension…

Setting up Dynamics 365 Report Authoring Extension – Version 9.0!

In this step we go to this link, https://www.microsoft.com/en-us/download/details.aspx?id=56973 and download Dynamics 365, version 9.0 Report Authoring Extension (with SQL Server Data Tools support)

This will download the CRM9.0-Bids-ENU-i386.exe file, up on running it will ask you to choose a folder to extract itself. So select the current folder path and create a new folder for the set up. Once the extraction completes, the set up will begin itself.

Select the recommended option and click Next…

The next step will check for the required components and prompt you to automatically install them as follows…

Click the “Install” button and wait for it to complete.

Then click next, which will run a quick system check.

Once that’s done, click Next, which will begin the installation as follows…

Let it complete, and you should see the following up on success! 😀

Now the final step is done, let’s try this out!

Let’s try it out!

So to begin, open up your Visual Studio 2015, and select Business Intelligence -> Reporting Services -> Report Server Project, create a new project here. Or if you already had a Reporting Project created before, then open that up…

Let’s add a new Report to our project…

The new Report will be added and it will open up the Data Source window as follows, where you can see the Microsoft Dynamics 365 Fetch option is now listed up.

So go ahead, add your Dynamics 365 source and set up your Report as you wish!

Yay Success! Well that wasn’t so bad was it eh! 😉

Conclusion!

Well I’m not sure this actually requires a conclusion though lol 😀 Although I still can’t figure out why Microsoft Dynamics 365 Report Authoring Extension, is not supported in any VS version beyond VS 2015.

So keep in mind the extension for Microsoft Dynamics 365 Fetch option in your Data Sources list, which added by Dynamics 365 Report Authoring Extension – Version 9.0 is only available via the set up of SQL Server Data Tools version 17.4 with Visual Studio 2015.

Anyhow I hope this step by step guide saved someone the time required to figure out this set up, by trial and error. 😉

Share the love! 😀 Cheers!

So I played around with Android Emulators in Visual Studio 2019!

Let me share some of my experience with playing around with the latest updated Android Emulators in Visual Studio 2019!

Microsoft had finally rolled out a full fledged Android Emulator set up (Xamarin Android Device Manager) that’s very stable and much easier to use with Xamarin mobile development, expiring the previously buggy always-out-dated VS Emulator set up that was shipped for Xamarin dev. Yeah seriously I hated that and had a lot of issues using those emulators.

Backstory…

So recently I got a little deep into the new Xamarin Android Emulator set up in Visual Studio 2019, where I had to build a whole bunch of custom Emulators for some experiments. I had to do a lot of fine tuning and customization for those Android Virtual Devices. Also I had to focus on Performance management as well, which was quite interesting to deal with given the HAXM and Windows Hyper-V separation.

It was a great learning experience, where I noticed a lot of new features and differences between the previous VS Emulator set up compared to this one.

So here I am sharing my experience…

Getting Started…

Here are some important articles that might be important for anyone to get started…

Managing Virtual Devices with the Android Device Manager
https://docs.microsoft.com/en-us/xamarin/android/get-started/installation/android-emulator/device-manager?tabs=windows&pivots=windows
Great step by step guide on how to update Device Manager, create new Virtual Devices, Customizing and Managing the performance further…

Editing Android Virtual Device Properties
https://docs.microsoft.com/en-us/xamarin/android/get-started/installation/android-emulator/device-properties?pivots=windows
Step by step guide for Editing Virtual Device Properties…

Troubleshooting
https://docs.microsoft.com/en-us/xamarin/android/get-started/installation/android-emulator/troubleshooting?pivots=windows
Basically this includes fixing HAXM issues, Hyper-V issues not configured up in BIOS, or not Enabled in Windows, etc.. It’s quite easy to miss those configurations so you might want to focus twice on those if you ever run into any issues.

The official documentation from Microsoft does a great job of explaining how to get started and all, so I won’t be repeating the same on my blog post, rather I would focus on the important bits that I experienced and issues I ran into which I eventually solved during my playing around! 😉

The adb binary is obsolete!?!

So this is the first weird issue I ran into when I tried out the Android Emulator on Visual Studio 2019, there is a reason why I call it weird though… lol

“The ADB binary found at C:\Program Files (x86)\Android\android-sdk\platform-tools\adb.exe is obsolete and has seriousperformance problems with the Android Emulator. Please update to a newer version to get significantly faster app/file transfer.”

Yeah notice the “seriousperformance” lol, no idea why they haven’t spell-checked the error message. Anyhow I kept on getting this warning message every time I launched my Android Emulators, I couldn’t really understand why, since I had VS 2019 updated to the latest version at the time. But later only I figured out that you need to manually update some other bits from your Android SDK Manager as shown in below steps…

Update Android Emulator!

You need to make sure to update your Android Emulator version, from the Android SDK Manager as shown below…

Go to the Tools tab, and expand the Android Emulator section, make sure you have installed the latest version as shown there. Most likely this won’t be updated by the usual VS Updater process, which was the issue in my case.

Also one more thing you need to do, since the “obsolete ADB binary issue” could be occurred from either one of these.

Update Android SDK Build Tools!

Go to Tool tab and expand Android SDK Build Tools section…

You need to make sure to have the latest version installed, and remove any older versions already installed of the Android SDK Build Tools as shown above. Because this could be causing the “obsolete ADB binary issue” that I mentioned earlier.

Intel HAXM vs Windows Hyper-V!

Now some devs seem to be getting confused about this, first think of it as this, you have an Android Emulator and you have these two different support systems that you can use to accelerate the performance of it. You can use only one of them, its either Intel HAXM or Windows Hyper-V, you cannot use both at the same time. Got it? 😉

Check out the docs: Hardware acceleration for emulator performance (Hyper-V & HAXM)
Well the documentation from Microsoft does a great job at explaining both these setups in great detail step by step.

I personally tried both of them separately in my Lenovo Windows Laptop, that’s running on Intel Core i7 Processor. Keep in mind, if you want to try Intel HAXM then you need to disable Windows Hyper-V and vise-versa, otherwise you’ll run into all kinds of issues.

Aha! Intel HAXM!

Intel’s Hardware Accelerated Execution Manager (HAXM). HAXM is a virtualization engine for computers running Intel CPUs. – Source

Check if your Intel Processor supports Virtualization Technology: https://www.intel.com/content/www/us/en/support/articles/000005486/processors.html

You development machine needs to be running on an Intel processor in order for HAXM to work, even in that case that processor needs to support Intel VT, you can check it from the link I shared above. This works on both Microsoft Windows and Apple Mac OS systems, as long as the hardware requirements are met.

Intel HAXM has always been there since long time back for accelerating the performances of Android Emulators, so it supports Emulators that are running older versions of x86-based virtual devices.

If you’ve successfully set up Intel HAXM, you can check status of HAXM set up as follows:

sc query intelhaxm

Microsoft recommends this option to be your default choice for setting up your Android Emulators. But if your dev set up doesn’t support Intel HAXM acceleration, next let’s see the second option…

Ooo! Windows Hyper-V!

Microsoft’s Hyper-V and the Windows Hypervisor Platform (WHPX)Hyper-V is a virtualization feature of Windows that makes it possible to run virtualized computer systems on a physical host computer. Source

As obvious as it is, this only works on Windows OS! This was introduced for Android Emulators quite recently, so you need to have the following set up for your local Android SDK and Tools:

  • Android Emulator package 27.2.7 or later
  • Android SDK Tools version is 26.1.1 or later

Also you need to have Microsoft Windows 10 Pro, Enterprise, or Education version installed. You can check if your system could support Windows Hyper-V as follows:

systeminfo

If all those values are shown as Yes, then you can go ahead and enable Windows Hyper-V on your machine 🙂

So, Intel HAXM or Windows Hyper-V!?!

Yeah, so which is better? given that you can ONLY think of if you’re development PC is compatible for both of them!

I’ve tried both of them, and to be honest I’ve seen much better performance with Intel HAXM Acceleration in my Windows 10 Lenovo Laptop, with Intel Core i7 processor. Since Microsoft docs also recommend this option, yes I would definitely recommend this be your primary choice as well for better performance.

FastBoot, Intel HAXM only!

Now this is something strange that I noticed during my try outs, FastBoot feature does not seem to be supported on Windows Hyper-V, during every launch it was executing a fresh cold boot. But with Intel-HAXM it works like a charm! So that’s probably something you need to keep in mind! 😉

If you’re not familiar with FastBoot, let me walk you through a little intro…

FastBoot vs ColdBoot!

You can see this configuration in the Properties from the Android Device Manager as following…

FastBoot allows you to directly boot your Android Emulator from a pre-saved snapshot state image, so you get a super fast boot and be able to deploy the apps faster when you launch directly from Visual Studio. Every time you close the Emulator it will save a snapshot of it’s current state, which will be used in the next boot.

So what is ColdBoot?

The opposite of FastBoot is ColdBoot, where during every launch the Android Emulator executes a fresh boot instance. ColdBoot is by default disabled as you can see in my previous screenshot, you need to tick on the fastboot.forceColdBoot in order to enable this. You should only use this if you need a fresh boot in each time your Emulator launches.

Now as obvious as it is, keep in mind you can’t use both of them at the same time, so make sure to tick on either forceColdBoot or forceFastBook as you prefer. 🙂

Maximum performance!

For maximizing the performance of your Android Virtual Device, I found utilizing on these three properties quite useful,

  • hw.gpu.mode – the GPU allocation set up of your Emulator
  • hw.cpu.ncore – number of Processor Cores allocated to your Emulator
  • hw.ramsize – amount of RAM size allocated to your Emulator

Now the higher values you set for those properties will definitely provide better performance in your Android Emulator, but it will require consumption of more resources from your development machine, so make sure to cross check against it when you tweak those up!

hw.gpu.mode -> host!

By default this property will be set to “auto” mode which will set the Emulator to decide whether to use device GPU processor to render the Emulator’s GPU processing or use Software GPU Emulation.

If you’ve got a dedicated powerful GPU in your development machine, I would say this should set the “host” option for the GPU emulation in the Emulator, which forces the Emulator to use the system GPU device, which in return provides great performance.

New Camera magic!

Since the latest update Android Emulators are now updated with an awesome Camera emulation feature which allows you to emulate a virtual 3D scene. You can enable this by setting the hw.camera.back property to virtualscene value.

This is such an awesome feature it allows you to navigate through an emulated virtual scene in a 3D space, with full 360 degree camera angle movements.

Now that’s some awesomeness eh! 😉

LCD Density!

You can set the density of the screen in your Android Emulator, to a list of custom values possible to set up the density-independent pixels for rendering.

Keeping in mind, setting hw.lcd.density to 160 value will cause the emulator to render each pixel in the device screen equivalent to your host machine’s physical screen pixels. You should be able to find the most suited screen density for the screen resolution you have set up for your emulator.

Here’s an example of screen resolution 1080×2160 with each lcd screen density option available from 160, 240, 213, 320, 420, 480, to 560 as follows…

Well well you can see how it clearly changes the UI rendered DPI based on the density settings you have set up… 😀

Custom Resolutions play!

So one tricky thing I got to play around was creating Android Emulators with custom screen resolutions, now this really requires a careful set up of the screen Density settings as well.

So for the fun of let me show you a custom Android Emulator that I build with the screen resolution equivalent to iPhone 11 which has height to width 1792×828 resolution…

So something to keep in mind is that, right on the first try you wouldn’t get screen density property compatible for the custom screen resolution, so you will need a few try outs to sort out the density property. Yes it took a few try outs for me as well! 😉

hw.lcd.height – screen height, hw.lcd.width – screen width, hw.lcd.density – screen density

Setting up skin.path value…

When you set up a custom resolution to your Emulator, you need to make sure to update the skin.path property value as well.

Set this value followed by the format resolution, widthxheight as shown here.

Not sure how this related to the custom resolutions, but if you miss this step your emulator screen will end up with the default resolution value set up here upon create. So make sure to set this value according to your custom screen resolution as well 🙂

Enabling on-screen Keys…

[ back | home | recent ] yes those on screen keys might not be available when you first create your custom emulator, to enable this you need to disable the hw.mainKeys property.

You should un-tick this property value to enable on-screen navigation keys.

And the resulting should be as straight as below… 😉

Well there you have it, working like a charm! and that’s pretty much it for all the tricks and lessons that I learned during my playing around with Android Emulators in Visual Studio 2019!

Conclusion

The latest updates to Android Device Manager allows you to create Android Virtual devices or emulators with incredible flexibility and easy to manage interface, with improved performances and enhancements unlike before. 🙂

The Microsoft documentations provide an incredible support for getting started step by step, and even customizing your Android emulators for Xamarin Development with ease.

I happened to be stumbled upon a great opportunity to learn a few tricks and lessons for complex use of the latest Android Virtual Devices for Xamarin Development, which I had shared in this article. 😉

Hope it helps any of you fellow devs out there!

Share the love! Cheers! 😀

Pushing the limits of Hybrid WebView in Xamarin.Forms!

Let’s push the possible limits of Hybrid WebView and build something awesome in Xamarin.Forms! 😀

Remember my last blog post, Building a bi-directional interop bridge with WebView in Xamarin.Forms! which is where I shared about building a bi-directional invoke bridge between Javascript and C# dotnet run time using Hybrid WebView.

So based on that I went on a little journey to push the limits of this Hybrid WebView and built some cool demos with it. So here I am sharing it all with yol! 😉

Pushing the limits!

BTW: This is going to be a continuation of my previous blog post, so better take a look at it first if you haven’t: Building a bi-directional interop bridge with WebView in Xamarin.Forms!

To put it into fancy words,

We built a bi-directional communication bridge, between completely different run times, with possibility of two way execution invoke on demand! Hybrid WebView…

So now, the question is, what can we do to push the limits of our Hybrid WebView? Sounds like something for the imagination to limit!

Behold the awesomeness!

Imagine, being able to load a Web page into you Xamarin.Forms WebView, and being able to access Device features such as Camera, GPS Location, Accelerometer, etc..

Basically we’re going access Device Native features through the WebView and retrieve data directly from C# .NET run time in our Xamarin.Forms app! You will be able to load any HTML content, either from a Web Hosted source or locally generated HTML source, it would work like a charm thanks to the Hybrid WebView!

In order to demonstrate this awesomeness, let’s try out the following feature for the demo implementation…

  • Capture Photos using Device Camera
  • Pick Photos from Device Gallery
  • Get Device Native information
  • Get Device GPS Location data

All those device features and data will be accessed from the Javascript running inside the Hybrid WebView! 😉

Like I mentioned before, we will have two HTML sources for this demo, a web hosted HTML source and a locally generated HTML source to make sure it works for either cases! 😀

Now here’s a bit about what will help us build this awesome demo..

– Bi directional bridge!
Being able to invoke executions directly between the Javascript environment and C# .NET Xamarin.Forms run time, is what is going to help us build this awesomeness!

Javascript <~> Xamarin.Forms (C# .NET)

So you can pass data from the Javascript that’s running inside the Hybrid WebView out into the C# .NET run time, as well as you can pass data directly into the Javascript that’s running inside the Hybrid WebView.

– Multiple parameters…
In my previous blog post I mentioned this at the end where you can extend the same implementation we did for our Hybrid WebView, into supporting multiple parameters, so here I will use this to demonstrate what we’re going to build!

Sneak Peak!

Now here’s some action on the go with this awesomeness… 😉

As usual I’ve hosted this whole demo project up on my github repo:

Code on github: https://github.com/UdaraAlwis/XFHybridWebViewAdvDemo

This is how we do it!

So let’s get right into it, but first let’s make sure some prerequisites.

– Basic Hybrid WebView implementation
Refer to my previous post and check out the implementation of the Hybrid WebView. Building a bi-directional interop bridge with WebView in Xamarin.Forms!

– Xamarin.Essentials set up to access the device native feature
You need to implement Xamarin.Essentials and set up all the device native features and their configuration for the features you wish to use. https://docs.microsoft.com/en-us/xamarin/essentials/

Multiple Parameters support!

Let’s begin with adding support for multiple parameters in our Hybrid WebView as follows…

public class HybridWebView : WebView
{
	private Action<string, string> _action;

	public void RegisterAction(Action<string, string> callback)
	{
		_action = callback;
	}

	public void Cleanup()
	{
		_action = null;
	}

	public void InvokeAction(string param1, string param2)
	{
		if (_action == null || (param1 == null && param2 == null))
		{
			return;
		}

		if (MainThread.IsMainThread)
			_action.Invoke(param1, param2);
		else
			MainThread.BeginInvokeOnMainThread(() => _action.Invoke(param1, param2));
	}
}

Code on github: /XFHybridWebViewAdvDemo/Controls/HybridWebView.cs

As you can see, I have defined Action property with two parameters, along side the setter method of it, RegisterAction() accepts Action instances with two parameters.

InvokeAction() which gets called from each native renderer level now accepts two parameters accordingly. As an addition I have added an enforced UI Thread execution using Xamarin.Essentials.MainThread feature, since we’re going to access IO heavy device features.

Following the same pattern you can add as many number of parameters as you wish! 😉

We need to add support for this in our Javascript implementation as well, so we create a pre defined separator (a pipe separator preferably “|”) that separates parameters in the data object we’re sending from javascript to Hybrid WebView’s Renderer’s script handler.

..
invokexamarinforms('PHOTO|CAMERA')
..

When our Hybrid WebView renderers receive the invoke from Javascript, we need to handle the incoming data object as follows by splitting it up using the separator we defined…

var dataBody = data;
if (dataBody.Contains("|"))
{
	var paramArray = dataBody.Split("|");
	var param1 = paramArray[0];
	var param2 = paramArray[1];
	((HybridWebView)hybridRenderer.Element).InvokeAction(param1, param2);
}
else
{
	((HybridWebView)hybridRenderer.Element).InvokeAction(dataBody, null);
}

Then we pass it on to the InvokeAction() event, for Xamarin.Forms level to handle whichever the Action has subscribed to it. This way you can handle as many parameters as you wish!

Launch invoke from HTML Javascript to C# .NET!

So here’s how we set up the simple implementation to call up the invokeXamarinFormsAction() method that we have defined in our Hybrid WebView platform Renderers. Well there’s not much different from what we implemented in my previous demo, but here we are passing multiple parameters into the javascript method upon the button click.

...

<script>
...
function invokexamarinforms(param){
    try{
        invokeXamarinFormsAction(param);
    }
    catch(err){
        alert(err);
    }
}
</script>

...

<button type="button" 
	onclick="invokexamarinforms('PHOTO|CAMERA')">
	Get from Xamarin.Forms</button>

...

This is something I’ve explained step by step in my previous blog post so I wouldn’t go into details in here. You can define as many onclick actions as you wish with the set of predefined parameters like “PHOTO|CAMERA” and “PHOTO|GALLERY”, even single parameters, “GPS” and “DEVICEINFO”, etc…

Next you need to handle those parameters in C# code to execute the specific action we’re targeting, as simple as a if-else block as follows, or even a switch statement would suffice.

...

private async void ExecuteActionFromJavascript(string param1, string param2)
{
	...	
	if (param1 != null && param1.Equals("PHOTO") && param2.Equals("CAMERA"))
	{
		var result = await _deviceFeaturesHelper.TakePhoto(this);
		if (result != null)
		{
			...
		}
	}
        ...
	else if (param1 != null && param1.Equals("DEVICEINFO"))
	{
		var result = await _deviceFeaturesHelper.GetDeviceData();
		if (result != null)
		{
			...
		}
	}	
	...
}

Based on the requested action we execute it in C#, in this case accessing Camera and Capturing a photo _deviceFeaturesHelper.TakePhoto() or even getting Device Native information _deviceFeaturesHelper.GetDeviceData() as shown above.

Let’s move to the next step of this chain…

Ping back from C# .NET to HTML Javascript!?

Now that we established pathway to call the C# .NET run time from Javascript, we’re able to invoke any action, but how do we get back the result data into the Javascript?

So in my previous blog article Talking to your WebView in Xamarin.Forms! which explains how easy it is to pass data into the Javascript rendered inside the WebView at run time, since our Hybrid WebView is an extension of the default WebView, we can use the same method here…

...
        var result = await _deviceFeaturesHelper.GetDeviceData();
        if (result != null)
        {
             await webViewElement
                   .EvaluateJavaScriptAsync($"setresult('{result}')");
        }
...

So we’re calling up on EvaluateJavaScriptAsync() with the Javascript function name that’s accepting to the results for this specific action. This function needs to be created inside the Javascript before hand, that is rendered inside the Hybrid WebView as follows…

...
<script>
...
	function setresult(value) {
		// - display the value in HTML
		// - send the data to server
	}
</script>
...

Once the data is passed into your Javascript function, You can do whaever you want with the data, be it display in the HTML, or send it up to a web server, your choice! 😉

Calling the Device Native!

Well this is quite simple if you know how to use Xamarin.Essentials to access device native features and other 3rd party plugins to access various features from Xamarin.Forms! But I’ll quickly walk through the code that I’m using in this demo.

I’ve basically created like a little Facade layer which handles all the device native features required as follows, and each method handles a given specific feature such as Camera and GPS features using their respective services of plugin calls…

public class DeviceFeaturesHelper
{
	public async Task<string> TakePhoto(ContentPage pageContext)
	{
		// launch Media Plugin to capture photos from camera
	
		...

		return imageAsBase64String;
	}
	
	public async Task<string> GetDeviceData() 
	{
		// launch Xamarin.Essentials to load device info

		return $"{nameof(DeviceInfo.Model)}: {device}<br />" +
			$"{nameof(DeviceInfo.Manufacturer)}: {manufacturer}<br />" + 
			$"{nameof(DeviceInfo.Name)}: {deviceName}<br />";
	}
}

Code on github: /XFHybridWebViewAdvDemo/DeviceFeaturesHelper.cs

So what you need to keep in mind is that we need to return a value that’s compatible to be displayed inside our WebView, based on HTML, that’s why you see I have modified some of those returned values accordingly, such as Image objects are returned as base64 strings and device information formatted as a text block with <br /> inline.

These methods are called from the Hybrid WebView’s Invoke action that we created before and results are returned to be pushed back into Javascript.

Handling Media Image objects…

Using Media Plugin for Xamarin.Forms, provides you with a MediaFile object which contains the Image object that you acquired either from Camera or Gallery, but how do we convert that into something that’s compatible to be pushed into Javascript-HTML environment?

The solution is,

MediaFile -> byte[] array -> Base64 string

We’re going to convert our MediaFile object into a byte[] array, then convert again into a base64 string, which makes it so much easier to transfer the data into the javascript run time and use that object for any purposes inside javascript itself. Here’s my code snippet for this…

public async Task<string> TakePhoto(ContentPage pageContext)
{
        ...
	var file = await CrossMedia.Current.TakePhotoAsync(...);

	// Convert bytes to base64 content
	var imageAsBase64String = Convert.ToBase64String(ConvertFileToByteArray(file));

	return imageAsBase64String;
}

private byte[] ConvertFileToByteArray(MediaFile imageFile)
{
	// Convert Image to bytes
	byte[] imageAsBytes;
	using (var memoryStream = new MemoryStream())
	{
		imageFile.GetStream().CopyTo(memoryStream);
		imageFile.Dispose();
		imageAsBytes = memoryStream.ToArray();
	}

	return imageAsBytes;
}

This is what you saw in the previous section which I have used in my /DeviceFeaturesHelper.cs
You can use this in the javascript functions as easy as below,

function setresult_takephoto(value) 
{
	document.getElementById("photoCamera_ResultElement").src 
                                             = "data:image/png;base64," + value;
}

Well that’s the entire set up of this awesome demo, so then let’s see it in action…

Fire it up!

Here’s the web page we’re loading: https://testwebpage.htmlsave.com/

Look at em on fire, Android, UWP and iOS side by side…

Code on github: https://github.com/UdaraAlwis/XFHybridWebViewAdvDemo

Conclusion…

This was just me pushing the limits of the Hybrid WebView to build awesome stuff with Xamarin.Forms! This will definitely come in handy whenever you get a scenario you need to implement an existing Web App into a Xamarin.Forms app, and you need to let the user use it as a Mobile App, with being able to access device native features.

Well that concludes it. Hope you find it useful!

Share the love! 😀 Cheers!

The step by step set up of Media Plugin for Xamarin.Forms!

Let’s properly set up Media Plugin (Xam.Plugin.Media) for Xamarin.Forms, harnessing the full capabilities with an optimized implementation! 😀

This is a continuation from my previous blog post, Behold the check-list of Media Plugin set up for Xamarin.Forms! where I shared the list of important bits you need to focus on when setting up the Media Plugin.

So here I’m building up on that and compiling a step by step guide implementation of the Xam.Plugin.Media for Xamarin.Forms, with the latest updates!

Backstory…

During my recent implementation with the Media Plugin for Xamarin.Forms, I realize that there are some new updates to this Plugin and its dependent Permission plugin that are not documented properly out there!

So I thought of writing up a new article with those updated bits and a better implementation with this library in a proper manner to harness the best of its performance and features without running into accidental bugs! 😉

Media Plugin – Xam.Plugin.Media!

Xam.Plugin.Media is the free Plugin Library by James Montemagno, that allows us to easily interact with Capturing Photos and Video and accessing them from the device Galley using Xamarin.Forms! So this library provides two main functionalities,

  • Capture Photos/Videos from Camera
  • Pick Photos/Videos from Gallery

Apart from that it allows you to Crop, Compress Photos, Set Custom Sizing and Quality, Save to Albums, and etc. It fully supports Android, iOS, UWP (Windows), and even Tizen device platforms. Quite an awesome library for sure!

Github: https://github.com/jamesmontemagno/MediaPlugin
Nuget: http://www.nuget.org/packages/Xam.Plugin.Media

This library internally depends itself on Permissions Plugin (Plugin.Permissions) for taking care of the Permissions that are required to handle in each Native platform to access Camera features and device Gallery features.

Step by Step!

Alright then let’s take a step by step walk through of setting up Media Plugin in your Xamarin.Forms project from scratch!

1. Let the set up begin!

Assuming you have already created your Xamarin.Forms project, let’s begin by adding the Xam.Plugin.Media into your Project from Nuget Package Manager.

Lets search for “Xam.Plugin.Media” in Nuget and install the library for all the project nodes in your solution, Xamarin.Forms Host project, Android, iOS, and UWP (Windows) platform nodes.

2. Initialize()!

Then you need to set up the Initialization of the Media Plugin in the Xamarin.Forms layer, by calling up the Initialize() method preferably at the start up of the App.

If you’re using a Service instance to be used with Media Plugin, then you should set this is up in the Constructor of it.

Now let’s set up the configuration for all the platform projects one by one…

Let’s set up Android!

Let’s begin with the Android bits, which is the longest set of configuration.

1. Permissions in AndroidManifest!

by adding the Permission bits that are required for the Media Plugin. Simply go to Android Project -> Properties -> Click on “Android Manifest” tab -> scroll down to “Required Permissions” section…

Simply select those two Permissions, for Reading and Writing data to the device storage, in terms of Capturing Photos and Videos and saving them during run time.

You could even add them manually in the AndroidManifest.xml file.

<?xml version="1.0" encoding="utf-8"?>
<manifest ... >
    <uses-sdk ... />
    <application ... >
    ...
	<uses-permission android:name="android.permission.WRITE_EXTERNAL_STORAGE" />
	<uses-permission android:name="android.permission.READ_EXTERNAL_STORAGE" />
    ...
  </application>
    ...
</manifest>

Then again, unless you’re going to saving your captured Photos or Videos then no need to add the “WRITE” permission. So make sure to decide on your requirement.

2. Permission Plugin – OnRequestPermissionsResult()

Next we need to set up the call back for the Permission Plugin on the OnRequestPermissionsResult() method in your MainActivity.cs class.

on github: /XFMediaPluginDemo.Android/MainActivity.cs

Visual Studio 2019 adds the override of this method automatically to your MainActivity class, but if its not there you need to set up as shown above.

3. FileProviderfile_paths.xml

We need to set up the FileProvider path values in the file_paths.xml, so go ahead create a new folder called “xml” in your “Resources” folder, and add a new XML file called “file_paths.xml” with the following content.

on github: /XFMediaPluginDemo.Android/Resources/xml/file_paths.xml

Oh, and make sure the Build Action of that file is set to “AndroidResource” in Properties.

4. FileProvider in AndroidManifest!

Then let’s add the FileProvider definition in the AndroidManifest.xml

on github: /XFMediaPluginDemo.Android/Properties/AndroidManifest.xml

This should be added inside the <application> node.

5. Plugin.CurrentActity set up…

We need to set up the Plugin.CurrentActivity plugin for Media Plugin to attach itself to the active Activity during the run time. Nuget Package Manager -> install Plugin.CurrentActivity, only into your Android project node.

Now that’s installed we need to set it up in the code as well.

6. Plugin.CurrentActity Initialization!

First we need to create the MainApplication.cs class set up that inherits from Android.App.Application base for initializing the CrossCurrentActivity Instance up on the Activity change at run time.

on github: /XFMediaPluginDemo.Android/MainApplication.cs

Next we need to set up the init() call on MainActivity.cs class as well.

on github: /XFMediaPluginDemo.Android/MainActivity.cs

Here also we’re calling the Init() method of CurrentActivity plugin but this time we’re forwarding the Bundle parameter that’s passed into the OnCreate() method.

7. Hardware Requirement filter!?!

Now this is an optional step, once your app is published, and you want to Google Play store to make your app available only for devices that has the following features, “Camera”, “Camera with Auto Focus”, etc, then you need to add the following “UsesFeatures” attributes to your AssemblyInfo.cs file.

That concludes the Android project set up.

Let’s set up iOS!

The iOS set up is much easier actually where we only have to set up the permissions.

1. Permissions in Info.plist!

On your iOS project, right click on the Info.plist file -> Open With -> select XML (Text) Editor option, which will open up in the XML editor window as follows.

on github: /XFMediaPluginDemo.iOS/Info.plist

You need to add Permissions as shown here, with an appropriate description, which will be used to show to the User when the Permissions are being requested at run time. You need to explain what those Permissions are used for in your app.

<plist version="1.0">
<dict>
    ...
    ...
    <key>NSCameraUsageDescription</key>
    <string>This app needs access to the camera to take photos.</string>
    <key>NSPhotoLibraryUsageDescription</key>
    <string>This app needs access to photos.</string>
    <key>NSMicrophoneUsageDescription</key>
    <string>This app needs access to microphone.</string>
    <key>NSPhotoLibraryAddUsageDescription</key>
    <string>This app needs access to the photo gallery.</string>
</dict>
</plist>

But here also I’m reminding, set up only the Permissions that are absolutely required by your app’s functionality.

That concludes the iOS project set up.

Let’s set up UWP!

Well in UWP (Windows) project is even more easier to set up

1. Permissions in Package.appxmanifest!

Simply open up the Package.appxmanifest file in your UWP project -> Go to “Capabilities” tab -> Tick on “Webcam” option from the Capabilities list.

on github: /XFMediaPluginDemo.UWP/Package.appxmanifest

That concludes the UWP project set up.

Let the Xamarin.Forms, coding begin!

Now this is where we’re going to set up our implementation to use the Media Plugin in our Xamarin.Forms project host.

Doesn’t matter whether you’re going to implement in Page code behind or MVVM heavy ViewModel, we should maintain a clean decoupled structure as much as possible.

Pre-requisites!

So each feature we access we need to perform the following,

  • Check for the availability of the feature (ex: Camera, Gallery)

    Media Plugin provides these bool properties which allows you to check for the availability of the features you want to access, such as Camera, and Gallery. If they return true then it is safe to proceed with the call.
...
if (!CrossMedia.Current.IsCameraAvailable ||
		!CrossMedia.Current.IsTakePhotoSupported)
{
	await DisplayAlert("No Camera", 
              "Sorry! No camera available.", "OK");
	return null;
}
...
  • Check for the status of the Permission required (ex: Camera, Storage)

    This is another safety layer that is also recommended, checking the Status of the Permission before you access those features from Media Plugin. Based on it you can perform requesting Permission from the User during run time using the Permission Plugin that’s already set up in your project.
...
var cameraStatus = await CrossPermissions.Current.
			CheckPermissionStatusAsync(Permission.Camera);
var storageStatus = await CrossPermissions.Current.
			CheckPermissionStatusAsync(Permission.Storage);
var photosStatus = await CrossPermissions.Current.
			CheckPermissionStatusAsync(Permission.Photos);
...

Those two check ups are recommended as safety layers for smooth experience for the user and to avoid running into unexpected issues. Once those two calls are satisfied, then we can access the feature we need. 😉

It is best to have separate methods for each specific action, such as Capture new Photo or Select a new Photo from Gallery and those methods should return the resulting ImageSource object or default failure value.

Camera Feature – TakePhoto()

Here’s the method implementation that you can use to Capture Photo using the device Camera and return an ImageSource upon success.

public async Task<ImageSource> TakePhoto()
{
	if (!CrossMedia.Current.IsCameraAvailable ||
			!CrossMedia.Current.IsTakePhotoSupported)
	{
		await DisplayAlert("No Camera", 
                    "Sorry! No camera available.", "OK");
		return null;
	}

	var isPermissionGranted = await RequestCameraAndGalleryPermissions();
	if (!isPermissionGranted)
		return null;

	var file = await CrossMedia.Current.TakePhotoAsync(new 
        Plugin.Media.Abstractions.StoreCameraMediaOptions
	{
		Directory = "TestPhotoFolder",
		SaveToAlbum = true,
                PhotoSize = PhotoSize.Medium,
	});

	if (file == null)
		return null;

	var imageSource = ImageSource.FromStream(() =>
	{
		var stream = file.GetStream();
		return stream;
	});

	return imageSource;
}

You can easily use this for a Page behind code implementation or a Service layer implementation for Capturing Photos.

StoreCameraMediaOptions provides you with a whole bunch of features you can easily use to customize and resize the captured Photo within the library itself. 😀

Gallery Feature – SelectPhoto()

Here’s the method implementation that you can use to Select Photo using the device Gallery and return an ImageSource upon success.

public async Task<ImageSource> SelectPhoto()
{
	if (!CrossMedia.Current.IsPickPhotoSupported)
	{
		await DisplayAlert("Photos Not Supported", 
                   "Sorry! Permission not granted to photos.", "OK");
		return null;
	}

	var isPermissionGranted = await RequestCameraAndGalleryPermissions();
	if (!isPermissionGranted)
		return null;

	var file = await Plugin.Media.CrossMedia.Current.PickPhotoAsync(new 
        Plugin.Media.Abstractions.PickMediaOptions
	{
		PhotoSize = Plugin.Media.Abstractions.PhotoSize.Medium,
	});

	if (file == null)
		return null;

	var imageSource = ImageSource.FromStream(() =>
	{
		var stream = file.GetStream();
		return stream;
	});

	return imageSource;
}

In both above methods we are first checking the availability of the feature, and then the status of the permission, before we make the call to Media Plugin.

You can see that upon successful execution completion we’re returning the retrieved ImageSource, otherwise in any case of failure we return null. Also you can remove DisplayAlert() set up, if you’re using a Service layer, instead just throw an Exception which you can handle at the point of execution. 😉

Permission Checkup!

As you can see we have a method call to RequestCameraAndGalleryPermissions() which checks for the Permission status for the features we need to access, which implements as follows.

private async Task<bool> RequestCameraAndGalleryPermissions() 
{
	var cameraStatus = await CrossPermissions.Current.
	CheckPermissionStatusAsync(Permission.Camera);
	var storageStatus = await CrossPermissions.Current.
	CheckPermissionStatusAsync(Permission.Storage);
	var photosStatus = await CrossPermissions.Current.
	CheckPermissionStatusAsync(Permission.Photos);

	if (
	cameraStatus != PermissionStatus.Granted || 
	storageStatus != PermissionStatus.Granted || 
	photosStatus != PermissionStatus.Granted)
	{
		var permissionRequestResult = await CrossPermissions.Current.
		RequestPermissionsAsync(
			new Permission[] 
			{ 
				Permission.Camera, 
				Permission.Storage, 
				Permission.Photos 
			});

		var cameraResult = permissionRequestResult[Permission.Camera];
		var storageResult = permissionRequestResult[Permission.Storage];
		var photosResults = permissionRequestResult[Permission.Photos];

		return (
			cameraResult != PermissionStatus.Denied &&
			storageResult != PermissionStatus.Denied &&
			photosResults != PermissionStatus.Denied);
	}

	return true;
}

We’re check for Camera, Storage, Photos access permission status, which are required for Camera and Gallery access from the User in all the platforms. As you can see based on the existing status we request the Permission from user, and return the results. This will prompt the user with the popups asking for Permission to access. 😀

A better, Permission Checkup!

Just to make it more cleaner and decoupled, here’s an improved Permission check up method where you can pass in the exact Permission you need to check and it will take care of it. Oh and this is very much reusable for any kind! 😉

private async Task<bool> RequestPermissions(List<Permission> permissionList)
{
	List<PermissionStatus> permissionStatuses = new List<PermissionStatus>();
	foreach (var permission in permissionList)
	{
		var status = await CrossPermissions.Current.
		CheckPermissionStatusAsync(permission);
		permissionStatuses.Add(status);
	}

	var requiresRequesst = permissionStatuses
                                 .Any(x => x != PermissionStatus.Granted);

	if (requiresRequesst)
	{
		var permissionRequestResult = await CrossPermissions.Current.
		RequestPermissionsAsync(permissionList.ToArray());
		
		return permissionRequestResult
			.All(x => x.Value != PermissionStatus.Denied);
	}

	return true;
}

You simply have to pass in the Permission you want to check for as follows,

public async Task<ImageSource> TakePhoto()
{
	...
	var isPermissionGranted = await RequestPermissions
	(new List<Permission>(){ Permission.Camera, Permission.Storage }); 
	if (!isPermissionGranted)
		return null;
	...
}

public async Task<ImageSource> SelectPhoto()
{
	...
	var isPermissionGranted = await RequestPermissions
	(new List<Permission>(){ Permission.Photos }); 
	if (!isPermissionGranted)
		return null;
	...
}

You can pass in any kind of Permission type for check and request for Granted status.

Exception Handle!

You can see I’m not handling exceptions in here, that I would leave to the execution point of these methods calls.

try
{
	var result = await SelectPhoto();
	if (result != null)
		viewPhotoImage.Source = result;
}
catch (Exception ex)
{
	// handle your exception
}

This I believe the best way to handle any exceptions that could occur, could be in your ContentPage code behind or ViewModel. 😀

Main Thread!

Unless you’re calling these features of Media Plugin from a code behind Event handler, then you need to make sure this is executed on the app’s Main Thread.

https://theconfuzedsourcecode.wordpress.com/2020/01/27/behold-the-check-list-of-media-plugin-set-up-for-xamarin-forms/#Run-on-UI-Thread

If you ever run into any issues, make sure you have gone through my previous blog post: Behold the check-list of Media Plugin set up for Xamarin.Forms! which will definitely help you tackle any issues easily!

Well that sums it up the whole set up and a bit of under the hood check up!

Fire up the Demo!

So just for this article I created a simple demo that reflects all of this recipe of better implementation of Media Plugin for Xamarin.Forms!

Check it on my github: github.com/XFMediaPluginDemo

Side by side on Android, iOS, and UWP!

Conclusion

Following this guide you can easily implement the Media Plugin for Xamarin.Forms with a proper maintainable architecture! Although setting up might seem a bit tedious, its actually quite straight forward. Like I’ve shown in the code you need to handle Async Await calls properly and up to the UI Thread and exception handling.

Some of those bits that I have shared here aren’t mentioned in the plugin docs yet, since they’re out of date. So I really hope this helps you fellow devs!

Share the love! 😀 Cheers!

Behold the check-list of Media Plugin set up for Xamarin.Forms!

Let me share a check list for easily implementing the Media Plugin (Xam.Plugin.Media) for Xamarin.Forms with a peace of mind! 😉

Here I’m sharing some important bits that you need to focus on to avoid running into any obnoxious issues during run time of your Xamarin.Forms app!

Backstory…

Recently I was implementing Media Plugin library (Xam.Plugin.Media) in one of my Xamarin.Forms projects, even though I had implemented this before, I ran into some missing bits that caused some problems, so I had to Google them out.

So after resolving my implementation I thought of writing up this article to sum up a check list that you need to go through to make sure you’ve set up your project properly for the Media Plugin to work, hassle free, giving you a peace of mind! 😉

Media Plugin – Xam.Plugin.Media!

Xam.Plugin.Media is the free Plugin Library by James Montemagno, that allows us to easily interact with Capturing Photos and Video and accessing them from the device Galley using Xamarin.Forms!

Github: https://github.com/jamesmontemagno/MediaPlugin
Nuget: http://www.nuget.org/packages/Xam.Plugin.Media

There’s a little intro to the Media Plugin, then let’s jump right in!

Behold the check list!

It is quite straight forward how to set up Media Plugin with the guidelines of the official docs in github repo, but there are a few bits that you need to focus on as follows…

1. On Android: CurrentActivity Plugin!

You need to install Android CurrentActivity Plugin using the Nuget package manager, and properly set up the MainApplication Class set up. This used to be automatically set up during the installation from nuget but it doesn’t seem to be doing that so far, so you need to manually set it up yourself.

#if DEBUG
[Application(Debuggable = true)]
#else
[Application(Debuggable = false)]
#endif
public class MainApplication : Application
{
    public MainApplication
      (IntPtr handle, JniHandleOwnership transer)
      : base(handle, transer)
    {
    }

    public override void OnCreate()
    {
        base.OnCreate();
        CrossCurrentActivity.Current.Init(this);
    }
}

Also you need to initialize CrossCurrentActivity.Current instance in MainActivity.OnCreate() method.

public class MainActivity : global::Xamarin.Forms.Platform.Android.FormsAppCompatActivity
{
    protected override void OnCreate(Bundle savedInstanceState)
    {
        ...
        
        base.OnCreate(savedInstanceState);

        CrossCurrentActivity.Current.Init(this, savedInstanceState);

        Xamarin.Essentials.Platform.Init(this, savedInstanceState);
        global::Xamarin.Forms.Forms.Init(this, savedInstanceState);
        LoadApplication(new App());
    }
    
    ..
}

2. On Android: Permission Plugin set up!

When you install the Xam.Plugin.Media it will come with the Plugin.Permissions library references inside it. For this to work properly on Android you need to make sure to set up its native handlers on Android in the MainActivity.OnRequestPermissionsResult() method override.

public override void OnRequestPermissionsResult(int requestCode, string[] permissions, [GeneratedEnum] Android.Content.PM.Permission[] grantResults)
{
    Xamarin.Essentials.Platform.
       OnRequestPermissionsResult
       (requestCode, permissions, grantResults);

    Plugin.Permissions.PermissionsImplementation.
       Current.OnRequestPermissionsResult
       (requestCode, permissions, grantResults);

    base.OnRequestPermissionsResult
       (requestCode, permissions, grantResults);
}

If you’re using Xamarin.Essentials already in your app or you’ve created your Xamarin.Forms Project recently with an update Visual Studio 2019, then OnRequestPermissionsResult() override should already exist in your MainActivity class. In that case just add the PermissionsImplementation.Current.OnRequestPermissionsResult(..) snippet to the method. Well I actually missed out on on this and I ran into some weird issues on Android.

3. On Android: FileProvider set up!

Make sure to set up the FileProvider in AndroidManifest along side the xml/file_paths.xml file in the Resources directory. One crucial point to keep in mind is that there are two ways you can set up the android:authorities value in the FileProvider.

  • android:authorities=”${applicationId}.fileprovider”
  • android:authorities=”com.example.android.fileprovider”

Sometimes it can be confusing when you are setting up this value, as shown above, either keep it as the first option as it is or the second option, with your app package name “<your app package name>.fileprovider” minted. For the clarity of it though I would suggest sticking to the first option as shown in the docs as well.

<?xml version="1.0" encoding="utf-8"?>
<manifest ... >
    <uses-sdk ... />
    <application ... >
    ...
    <provider android:name="android.support.v4.content.FileProvider"
                android:authorities="${applicationId}.fileprovider"
                android:exported="false"
                android:grantUriPermissions="true">
      <meta-data android:name="android.support.FILE_PROVIDER_PATHS"
                android:resource="@xml/file_paths"></meta-data>
    </provider>
    ...
  </application>
    ...
</manifest>

4. CrossMedia.Current.Initialize();

You need to make sure to initialize the Media Plugin before calling up any of its method functions. You can do this on Xamarin.Forms layer, or even in Platform Nodes, but preferably on the Page that you’re intending to use the plugin.

You should set it up on App.xaml.cs start up methods if you’re intending to use Media Plugin on multiple pages in your App.

public partial class App : Application
{
    public App()
    {
        InitializeComponent();

        Plugin.Media.CrossMedia.Current.Initialize();

        MainPage = new NavigationPage(new MainPage());
    }
}

If you’re abstracting it out to a Service instance, then you can call this up in the Constructor during instantiation as well.

5. Run on UI Thread!

Unless you’re calling up the Media Plugin’s functions in an Event Handler directly invoked by a UI Element, you need to make sure you’re running on UI Thread during the run time. Otherwise you could run into various kinds of issues since, since accessing Camera or Gallery relies heavily on Native IO operations.

Therefore make sure to run it on UI Thread, by either using default Xamarin.Forms UI Thread force invoke method, Device.BeginInvokeOnMainThread() as below,

Device.BeginInvokeOnMainThread(async () =>
{
	await Plugin.Media.CrossMedia.Current.TakePhotoAsync(...);
});

...

Or if you’ve got Xamarin.Essentials installed in your project, then you can use MainThread Helper it provides a neat way to check for the execution thread, and based on that force the execution on UI Thread,

if (!MainThread.IsMainThread)
{
    await Plugin.Media.CrossMedia.Current.TakePhotoAsync(...);
}
else 
{
    MainThread.BeginInvokeOnMainThread(() =>
    {
        await Plugin.Media.CrossMedia.Current.TakePhotoAsync(...);
    }); 
}

...

6. Perform Permission check up!

It is best perform a Permission availability check up for the features that you’re accessing from Media Plugin using the Permission Plugin, that’s referenced along with it. This is something that’s recommended in the Media Plugin’s docs as well, which you will find at the end though. But in my experience this is a crucial set up to have an extra assurance of the features you’re trying to access from Media Plugin.

Basically before each call to Capture or Pick any Photo/Video from the Media Plugin, you need to check for the availability of the Permission for Camera, Storage, and Photos. Initially as shown below…

private async Task<ImageSource> TakePhoto()
{
    ...
    
    var isAccessGranted = await RequestCameraAndGalleryPermissions();
    
    ...
}

private async Task<bool> RequestCameraAndGalleryPermissions() 
{
    var cameraStatus = await CrossPermissions.Current.
                CheckPermissionStatusAsync(Permission.Camera);
    var storageStatus = await CrossPermissions.Current.
                CheckPermissionStatusAsync(Permission.Storage);
    var photosStatus = await CrossPermissions.Current.
                CheckPermissionStatusAsync(Permission.Photos);
    ...

    // request access permissions

    ...
}

If they’re not Granted yet or denied you need to launch a request for them from the User during the run time. I must note that the github docs of the Permission plugin are outdated and doesn’t reflect the latest changes of the library. I will be sharing the full implementation of this code snippet later in this article.

7. Set up Required Permissions!

Some of those permission requirements you need to define in the device native configuration in Android -> AndroidManifest.xml, iOS -> Info.plist, and UWP -> Package.appxmanifest. This is well documented in the Media Plugin’s docs.

https://github.com/jamesmontemagno/MediaPlugin#important-permission-information

8. Set up Required Permissions! only!

Yes it’s better not to set up Permissions unless you absolutely need them, according to your requirement. Let’s say you’re only using the Media Plugin to access Gallery, then you don’t need to set up required Permissions for Camera, and data Write Access. This will also give an extra peace of mind for your Users as well. 😉

9. Re-usable code!

If your apps is going to be using Camera and Gallery usage all over the in multiple pages, then it’s better to implement a separate Service layer for it using the Media Plugin.

This will definitely come in handy when you’re dealing with a good MVVM architecture in your project solution. You can abstract out the required features into a Service instance, that’s best registered as a Singleton object in your IoC Container.

public MediaService : IMediaService
{
	public MediaService()
	{
		...
	}
	
	public async Task<ImageSource> CapturePhoto()
	{
		...
	}
	
	public async Task<ImageSource> SelectPhoto()
	{
		...
	}
	
	...
}

As an added extra you could have a Permission check up method, where you pass in the type of permissions you want to request from User unless already granted.

...
private async Task<bool> RequestPermissions(List<Permission> permissionList)
{
    ...
}
...

Well.. that’s basically the check list you need to go through when setting up Media Plugin in your Xamarin.Forms! 😉

Conclusion…

Even though its straight forward to set up the Media Plugin (Xam.Plugin.Media) for Xamarin.Forms, there’s a high chance you might miss something during the process and run into all kinds of weird issues during the run time, specially since there’s some platform specific bits to set up as well!

I’ve also shared some tips at the end for setting up the usage of it to cater for a better implementation. I might write up another post sharing a step by step guide for setting up all these bits in my next article! Until then, hope this helps!

Share the love! 😀 Cheers!

Building a bi-directional interop bridge with WebView in Xamarin.Forms!

Let’s build an advanced communication bridge into your Xamarin.Forms WebView, talk to it, and let it talk back to us at will!? 😉 lol Yes let me show you how to pass data from Javascript environment to C# .NET run time in the Web page rendered inside your Xamarin.Forms WebView!

I’m talking about building a bi-directional communication tunnel with HTML/Javascript inside your WebView in Xamarin.Forms yo! 😀 buckle up your seatbelts!

So in my previous article, Talking to your WebView in Xamarin.Forms! I talked about, how to build a uni-directional C# .NET to Javascript environment in Xamarin.Forms WebView.

WebView in Xamarin.Forms..

In this article I’m going to take another step forward and allow the same functionality to occur the other way around as well… We’re talking about a two-way invoking between .NET run time and javascript run time in a Xamarin.Forms WebView!

Unfortunately this cannot be done by default in WebView.

Behold, Hybrid WebView!

This right here is a bit more advanced extension of the WebView with a bit of Xamarin Native magic! 😉 In order to establish an invoke bridge directly from HTML Javascript sandbox that its running inside the WebView, out to the .NET runtime, we need something more natively handled in Xamarin!

Basically we’re going to implement a device native script handler for the WebView which is going to handle the bridging between the Javascript and the .NET runtime handshake, in return giving us the opportunity to invoke calls from javascript into the .NET run time the Xamarin.Forms is execution on! 😉

Well that’s a very simplistic explanation, but there’s a whole article about it on Microsoft Xamarin Docs, Customizing a WebView if you’re interested! Since its already there, I wouldn’t be going into complete details of it, rather I would be explaining the improved implementation I have done on top of it for the Hybrid WebView.

Over there it focuses on loading Embedded HTML content, but I will extend my implementation to support for dynamic HTML content, allowing you to handle javascript loaded from a Web Source and support even run time generated javascript.

Invoking C# from Javascript in the WebView!

In order to do this, in par with Xamarin.Forms WebView, we need to implement a Custom Renderer for WebView, which we will refer to as HybridWebView.

HybridWebViewRenderer will be created across all the native platforms we intend to use our HybridWebView, in Android, iOS and Windows native environments each equipped with its own javascript handler to build a bridge on to our .NET run-time. 😉

We access the native WebViewRenderer properties and basically implement a special handler to listen to a certain pre-defined Javascript method execution. In this method which we add into the javascript that is rendered inside the WebView, we will define the parameters we need to use, in that way we can pass any number of parameters and data types as we want.

We’re going to intercept the execution of this javascript method inside our Hybrid WebViewRender, and then redirect it on to the .NET method we’ve subscribed to. So in the Hybrid WebView definition we will have an Action method that we bind to in our Xamarin.Forms level which we will subscribe to wherever we’re using this magical bits! 😉

Let the coding begin!

Let’s begin with HybridWebView Control in Xamarin.Forms! Here we;re adding an Action that we will subscribe to in order to receive data from Javascript invokes inside the WebView rendered content.

HybridWebView

namespace XFWebViewInteropDemo.Controls
{
    public class HybridWebView : WebView
    {
        private Action<string> _action;

        public void RegisterAction(Action<string> callback)
        {
            _action = callback;
        }

        public void Cleanup()
        {
            _action = null;
        }

        public void InvokeAction(string data)
        {
            if (_action == null || data == null)
            {
                return;
            }
            _action.Invoke(data);
        }
    }
}


InvokeAction is the method that will be used by the Native Renderer object to direct the invokes from javascript executions. Using the RegisterAction we can dynamically register the Action we need to subscribe to.  You can add any number of parameters as you wish in here, but you need to make sure to handle them in the native renderer as well.

Native Renderers…

We’re going to build native renderers for each platform we’re targeting, Android, iOS, and UWP (Windows). Basically all the renderers follow the same basic concept as we discussed before, but each of their implementation is going to be different based on the platform.

We need to make sure to handle the subscribe and unsubscribe of the Element Native properties and events properly in the renderer’s OnElementChanged() event.

We’re going to inject the javascript method that we’re going to listen to in the renderers as following.

private const string JavaScriptFunction = "function invokeCSharpAction(data){....}";


We will be defining this in each renderer, according to the native platform. Every time a invokeCSharpAction() javascript method executes inside the WebView, it will get fetched by the Renderer and the following method call will occur.

((HybridWebView)Element).InvokeAction(value);


Up to the HybridWebView’s Action subscription on Xamarin.Froms run time, allowing our Action to fire up and retrieve the data coming in from javascript.

Alright now let’s get into details of each native renderer.

Android Renderer!

We’re going to use the Android’s WebViewRenderer to subclass our HyrbidWebViewRenderer.

github: /XFWebViewInteropDemo.Android/Renderers/HybridWebViewRenderer.cs

Like we discussed before for Android, we have the following script injection defined,

private const string JavascriptFunction = "function invokeCSharpAction(data){jsBridge.invokeAction(data);}";


For Android we need some extra bits of implementation, by creating a JavascriptWebViewClient that will set up listening to the execution of javascripts inside the WebView.

Then we have to create a JsBridge, which handles the interfacing with Javascripts, and fires up InvokeAction() method to redirect the execution flow up to the Xamarin.Forms level handlers.

Both those custom objects need to be set up in the HybridWebView in the renderer Element upon instantiation.

Control.SetWebViewClient
(new JavascriptWebViewClient($"javascript: {JavascriptFunction}"));
Control.AddJavascriptInterface
(new JsBridge(this), "jsBridge");


Once all that set up, and you build the Android project straight away, you might be getting a build error as following. (unless you’ve set this fix up before in your project)

Its caused by the JsBridge class we implemented with an Export attribute for the invokeAction method for our renderer, to export this into a native java method. So we need to add the Mono Android Export library.

You can fix this by going to Android Project -> References -> Add References -> Select Assemblies tab on the left panel -> tick on Mono.Android.Export Reference from the list of References.

Click Ok and rebuild, you’re all set! 😉

That’s pretty much it for the Android Renderer. Next on to iOS…

iOS Renderer!

For iOS we are going to use WkWebViewRenderer as the base renderer for our HybridWebView and in addition we have to implement IWKScriptMessageHandlder interface to handle the custom javascript execution monitoring that we target to handle.

github: /XFWebViewInteropDemo.iOS/Renderers/HybridWebViewRenderer.cs

We set up a WKWebViewConfiguration object in the constructor and we get access to the property WKWebViewConfiguration.UserContentController which allows us to set up our native bridge to Javascript execution firing up inside the WebView.

public HybridWebViewRenderer(WKWebViewConfiguration config) : base(config)
{
    _userController = config.UserContentController;
    var script = new WKUserScript(new NSString(JavaScriptFunction),
                   WKUserScriptInjectionTime.AtDocumentEnd, false);
    _userController.AddUserScript(script);
    _userController.AddScriptMessageHandler(this, "invokeAction");
}


Then for iOS, we have the following script injection defined using webkit API, accessing the invokeAction script that we attached and finally calling on the postMessage() method with the data parameter.

private const string JavaScriptFunction = "function invokeCSharpAction(data){window.webkit.messageHandlers.invokeAction.postMessage(data);}";


IWKScriptMessageHandler provides us with DidReceiveScriptMessage() method which we use to transfer the data up to the Xamarin.Forms level handler using, HybridWebView.InvokeAction(data).

Quite simple ans straight forward eh! next to Windows, or UWP as you might prefer.. 😉

UWP Renderer!

We use the Xamarin native WebViewRenderer for UWP or Windows platform.

github: /XFWebViewInteropDemo.UWP/Renderers/HybridWebViewRenderer.cs

The native default renderer grants us access to these two events NavigationCompleted and ScriptNotify. We need to make sure to subscribe to those events in our HybridWebViewRenderer in Windows as follows.

Control.NavigationCompleted += OnWebViewNavigationCompleted;
Control.ScriptNotify += OnWebViewScriptNotify;


NavigationCompleted, allows is to easily inject our javascript handler function, which is defined as follows for UWP or Windows,

private const string JavaScriptFunction = "function invokeCSharpAction(data){window.external.notify(data);}";


And then ScriptNotify, provides us the chance to redirect back the execution to Xamarin.Forms level handler using HybridWebView.InvokeAction(data).

Bingo, that completes the UWP or Windows Renderer!

Now that we’ve finished the setting up of our HybridWebView and its Native Renderer for Android, iOS and Windows, its time to consume it and taste it out! 😉

Let’s try it out!

Here’s we shall begin by consuming it in a XAML page in Xamarin.Forms!

<controls:HybridWebView
	x:Name="webViewElement"
	HorizontalOptions="FillAndExpand"
	VerticalOptions="FillAndExpand" />

github: /XFWebViewInteropDemo/HybridWebViewDemoPage.xaml

And then don’t forget to Subscribe to retrieve the data coming in from javascript inside our WebView using RegisterAction() method we created!

...
    // Subscribe for the data coming in from Javascript
    webViewElement.RegisterAction(DisplayDataFromJavascript);
}

private void DisplayDataFromJavascript(string data)
{
    Device.InvokeOnMainThreadAsync(() =>
    {
        ...
        // Do whatever you want with the data
        ...
    });
}
...

github: /XFWebViewInteropDemo/HybridWebViewDemoPage.xaml.cs

I’m just going to use the Main UI Thread’s help to execute any UI related stuff. And here’s a little demo HTML that I’m setting up in our Hyrbid WebView.

webViewElement.Source = new HtmlWebViewSource()
{
    Html =
        $@"<html>" +
        "<head>" +
            ...
            "<script type=\"text/javascript\">" +
                "function invokexamarinforms(){" +
                "    try{" +
                "        var inputvalue = 
document.getElementById(\"textInputElement\").value;" +
                "        invokeCSharpAction(inputvalue + '. This is from Javascript in the WebView!');" +
                "    }" +
                "    catch(err){" +
                "        alert(err);" +
                "    }" +
                "}" +
            "</script>" +
            ...
        "</head>" +

        "<body>" +
            "<div>" +
                "<input type=\"text\" id=\"textInputElement\" placeholder=\"type something here...\">" +
                "<button type=\"button\" onclick=\"invokexamarinforms()\">Send to Xamarin.Forms</button>" +
            "</div>" +
        "</body>" +

        "</html>"
};

github: /XFWebViewInteropDemo/HybridWebViewDemoPage.xaml.cs

As you can see I have a javascript function, invokexamarinforms() that will get invoked from a button call in the body. Once this method executes, it calls on the invokeCSharpAction() method that we defined in our Hybrid WebViews Native renderers.

In my javascript snippet I’m surrounding this call with a try catch in order to make sure the Native Renderer is properly implemented or not. Making sure this method is properly executes is a crucial step during debug if you run into any issues.

So let’s try out that sample code bits in action!

Time for some action! 😉

Hit that F5 yo! (well.. if you’re in Visual Studio! lol)

Side by side iOS, Android and UWP working like charm! 😉

As you can see in my simple Xamarin.Forms demo, I am demonstrating a simple C# .NET to Javascript call with data and Javascript to C# .NET call with data, a true bi-directional communication bridge!

Here we are typing some text in the Xamarin.Forms Entry element and sending it into the HTML inside the WebView. And then typing some text in the HTML Text Input element inside the WebView and click on HTML Button, and sending it to the Xamarin.Forms Label to be displayed, works like a charm!

I have shared the demo app code in my github as usual: github.com/XFWebViewInteropDemo

A little chat conversation between Javascript to C# and vise-versa! 😉

Yeah just a fun little demo I have added to the same repo in github! 😀

Extra tips!

Yep it’s that time, for some extra tips based on my experience with Xamarin.Forms Hybrid WebView! Although the extra tips that I already discussed in my previous article Talking to your WebView in Xamarin.Forms! still applies for this as well since we’re still extending from default Xamarin.Forms WebView, but apart from that…

Web Source, Embedded, Code HTML!? all same!

Doesn’t matter whatever the source of the HTML you’re setting in the Hybrid WebView, be it a web source directly from a URL, or loading an embedded HTML File, or even a code generated dynamic HTML content, it doesn’t make a difference.

The only thing that matters is the invokeCSharpAction() in your rendered HTML, so that the native renderers can pick it up and forward the execution to Xamarin.Forms .NET handlers!

Yes! extra parameters!

Even though I’m showcasing only a single parameter during this demo article, from javascript to C# .NET run time, you can easily extend this same implementation to pass any number of parameters as you wish! As I explained in the article make sure to define it in the following bits,

HybridWebView.InvokeAction(string data1, string data2)

Something to keep in mind is that you can only pass a single parameter into the invokeCSharpAction(data).  So in your javascript make sure to merge all the parameters into a single value and have a pipe delimiter (ex: |) like separator for them (ex: data1|data2) that you’re before to the invokeCSharpAction(data) method, which you will break it up on arrival in the native renderer and pass them up to the InvokeAction(data1, data2).

var dataBody = data;
var dataArray = dataBody.Split("|");
var data1 = dataArray[0];
var data2 = dataArray[1];

((HybridWebView)Element).InvokeAction(data1, data2);

Finally wire it all up, you’re good to go! 😉 I might share another article with some cool implementation with this in near future! 😀

Conclusion

You can easily build a communication bridge from C# .NET to javascript environment in Xamarin.Forms WebView! but the other way is not really possible out of the box!

That’s why we’re implementing this Hybrid WebView Control which allows us build a communication bridge from javascript to C# .NET environment directly during run time! 😉

So this concludes my bi-directional communication tunnel with HTML/Javascript inside your WebView in Xamarin.Forms yo!

Well that’s pretty much it!

Share the love! Cheers! 😀

Talking to your WebView in Xamarin.Forms!

Let’s build a communication bridge into your Xamarin.Forms WebView, and talk to it!? 😉 lol Yes let me show you how to pass data into the Web page rendered inside your Xamarin.Forms WebView!

I’m talking about building a uni-directional communication with Javascript inside your WebView in Xamarin.Forms yo! 😀 get your game face on!

WebView in Xamarin.Forms..

Xamarin.Forms provides a neat WebView that could render any Web HTML content efficiently similar to a browser inside your own Xamarin.Forms App.

Earlier there used to be a lots of issues that needed to be dealt with when to comes to rendering HTML content alongside Javascript inside the WebView, but with the recent update it has gotten far better with lots of features and facilities straight out of the box to be used! 😀

Invoking Javascript in the WebView!

Using the WebView straight out of the box, we can execute Javascript methods rendered inside the HTML content. Now I know this used to require a lot hacks and tricks, along side dealing with lot of run time exceptions.

But in the most recent updates of Xamarin.Forms, the WebView has gotten rock solid, and now even provides a dedicated method, EvaluateJavaScriptAsync() to invoking Javascript methods straight out of the box.

WebView.EvaluateJavaScriptAsync(String)


So now you can execute Javascript methods along with data parameters from you C# code in Xamarin.Forms using the default WebView control. EvaluateJavaScriptAsync() is an async method that lets you execute javascript and even await the call to response from the invoke as well.

var result = await webView
        .EvaluateJavaScriptAsync
            ("javascriptmethod('Hello world!')");


All you need to do is call the javascript method you’re targeting to invoke with or without the parameters you prefer using EvaluateJavaScriptAsync() in an asynchronous manner allowing you to await for a result back from the javascript into the .NET environment itself! Yep its that simple to talk to the HTML content in your WebView now! 😀

Let’s give it a try and establish a uni-directional communication with our WebView! 😉

Let the coding begin!

Here I have prepared a small demo where I’m loading some HTML content, along with a nice little javascript bits, into my WebView using HtmlWebViewSource as follows…

webViewElement.Source = new HtmlWebViewSource()
{
    Html =
        $@"<html>" +
        "<head>" +
            ...
            "<script type=\"text/javascript\">" +
                "function updatetextonwebview(text) {" +
                "    document.getElementById
                     (\"textElement\").innerHTML = text;" +
                "}" +
            "</script>" +
            ...
        "</head>" +

        "<body>" +
        ...
        ...
        "</body>" +

        "</html>"
};

Full code on github: /XFWebViewInteropDemo/DefaultWebViewDemoPage.xaml.cs

So here in my HTML content, I have a simple Javascript method, updatetextonwebview(text) where it takes in a value and set it to an HTML text element in the body. Pretty simple and straight forward.

string result = await webViewElement
        .EvaluateJavaScriptAsync
           ($"updatetextonwebview('{textEntryElement.Text}')");


And then I take a Text value from an Entry Element and pass it into the updatetextonwebview() javascript method using EvaluateJavaScriptAsync() of WebView.

Alright, let’s try it out!

Hit F5!

Well if you’re on Visual Studio, just hit F5 and watch the magic!

Side by side iOS, Android and UWP with Xamarin.Forms right out of the box! 😉

As you can see in my simple Xamarin.Forms demo, I have an Entry element which I type some text into and then I click on the Button which then going to pass that text data into the WebView’s javascript method. Then inside the javascript, it takes in the data and set it to a text label in the HTML body.

I have shared the demo app code in my github as usual: github.com/XFWebViewInteropDemo

No hacks, no work arounds, no custom renders, just straight out of the box in Xamarin.Forms! Works like a charm! 😉

Extra tips!

Yep it’s that time, for some extra tips based on my experience with Xamarin.Forms WebView!

-Track invoking of Javascript

Using WebView.EvaluateJavaScriptRequested event you can track the javascript invoke calls injecting into the WebView from your .NET code, basically an monitoring mechanism of all your javascript invokes from C# which will allow you to validate them or add extra details as you prefer on demand.

-Track Navigation inside the WebView

WebView provides a whole list of events to track the navigation now, along side back and forward navigation, redirects, and even refresh events.

WebView.Navigating

This event Triggers upon the beginning of the Navigation, allowing you to cancel it on demand. This event provides a WebNavigatingEventArgs object which provides you all the details about the navigation that is about to occur, direction, url endpoint and so on.

This also provides WebNavigatingEventArgs.Cancel property which allows you to cancel that navigation on demand. So yeah a lot of cool bits you can do with it!

WebView.Navigated

This event Triggers after a Navigation completes, providing you with the same details similar to Navigating event. In addition it gives WebNavigatedEventArgs.Result property which tells you whether the navigation was success or failure.

WebView.GoBackRequested | GoForwardRequested | ReloadRequested

Now these are some simplified events thats provided by WebView, allowing you to directly hook into GoBack, GoForward and Reload events when they occur. Although they do not provide facility to cancel those events like how we get in Navigating event. Just a quick easy way to monitor those events as they occur.

-Think Creative!

Most developers miss this point, if you can send a simple text string, then you can pass anything into the WebView’s javascript. Well… in disguise of a string of course!

  • Get device native data
  • Location GPS data
  • Proximity data
  • Internet Connectivity data
  • Captured File/Image data

Those are few examples, yes even an Image captured from the device camera can easily be sent as a byte array converted into a base64 string!  Imagination is the limit yo! 😉

Conclusion

Xamarin.Forms WebView has come a long way since the early days, into a complete mature sandbox environment to render any HTML Web Content inside your Xamarin.Forms app. And it provides lots of features to communicate, pass data back and forth, and even monitor and control the navigation happens inside itself.

This article basically focuses on uni-directional execution from C# .NET code to Javascript environment, while you can still await for the results from the javascript.

But there is no direct execution from Javascript environment to C# .NET yeah? So in my next article I’ll share how to build a bi-directional execution from C# .NET code to Javascript environment with Xamarin.Forms WebView. 😉

Well that’s pretty much it!

Share the love! Cheers! 😀

Xamarin.Forms Native HttpClientHandler for HttpClient…

Let’s make sure our Xamarin.Forms apps are properly configured with Native HttpClientHandler for optimum performance and better network security..

If you’re using the HttpClient for making Web API calls outside your app, you probably using the HttpClientHandler to set up various kinds of configuration for the HttpClient instance.

Now this HttpClient and Native HttpClientHandler applies directly for both Xamarin Native and Xamarin.Forms apps…

Although in this article I’m focusing on Xamarin.Forms, the same configuration set up can be used for any Xamarin Native apps as well.  By default in Xamarin you can use either the Managed HttpClientHandler which is fully maintained by .NET mono run time or the Native HttpClientHandler that maps itself to the Native run time configuration.

Why Native HttpClientHandler?

Thanks to the awesomeness of the Xamarin and the powerful Xamarin.Forms ability to map itself efficiently to the Native device environment, provides you with this facility to use the device Native Network Layer’s configuration in your Apps as well.

  • Using the Native HttpClientHandler provides you with a lot of advantages in terms of Network Communication Layer, which maps itself completely to the native properties and behaviors.
  • It provides your App with the in built default System native Security such as Transport Layer Security, TLS 1.2 features. This is basically built in for both Android and iOS system devices by default, which then we can leverage automatically on to our Xamarin.Forms app as well during run time.
  • This gives the user a peace of mind, in terms of the security of the network communication in the app while also giving the user the free of choice to let the app inherit itself the system configured security settings.
  • Defaulting to the Native Network configuration we can make sure our app is fine tuned for Security and Performance on the device native level and you do not have to spend extra time managing those bits manually.
  • Another great advantage is not needing to manually handle device Proxy Settings, allowing your Xamarin.Forms app to communicate through the device’s default network tunnel.

Well that’s pretty much a good list of reasons to make sure to set up our Xamarin.Forms apps to use the Native HttpClientHandlers eh! 😉

So what are they?

So below are the Native HttpClientHandlers available in Xamarin run time for each Platform, which applies for Xamarin.Forms as well.

AndroidClientHandler -AndroidClientHandler is the new handler that delegates to native Java code and Android OS instead of implementing everything in managed code. This option has better performance and smaller executable size.

NSUrlSessionHandler -The NSURLSession-based handler is based on the native NSURLSession framework available in iOS 7 and newer. This options has better performance and smaller executable size, supports TLS 1.2 standard.

WinHttpHandler -WinHttpHandler is implemented as a thin wrapper on the WinHTTP interface of Windows and is only supported on Windows systems. Provides developers with more granular control over the application’s HTTP communication than the default HttpClientHandler class.

So here as you can see, using the device native HttpClientHandlers provides you with the best of performance and security for your app compared to opting to use the Managed HttpClientHandler where you have to manually handle those optimizations yourself.

Although I must make a note here, in Windows or UWP Xamarin apps the default set up is the .NET Managed HttpClientHandler because the underlying native environment is Windows itself. But opting to use WinHttpHandler provides arguably better advantage according to many documentation, and also it’s in the same .NET stack! 😉

What no to do?

So before we get into “the how?”, let’s first make sure the bits not to do in our app project!

– not use “Managed”

So when it comes to Xamarin.Forms, by default when you create your project in Visual Studio the Native project nodes Properties are set up to use the Native HttpClient Handlers already. You can see this in both Android and iOS Project settings,

  • Android project node -> Properties -> Android Options -> Click “Advanced”
  • iOS project node -> Properties -> iOS Build

Do not set it to option to “Managed” HttpClientHandler in either of those settings, which will opt you out of Native HttpClientHandler.

– not use “new HttpClientHanlder()” 

If the above Settings check success, the next thing to consider is not instantiating HttpClientHanlder on its own as below,

HttpClientHandler httpClientHandler = new HttpClientHandler();
...
// setting up httpClientHandler settings
...
...
HttpClient httpClient = new HttpClient(httpClientHandler);


This is something you should not do, which will override your Native project property set up regarding the HttpClientHandler, and opt your HttpClient to use Managed HttpClientHandler instead, resulting you losing all the native goodness!

Next let’s see what to do?

What to do?

Here are the things you need to make sure to do instead.

– not using HttpClientHandler!?

Consider not using HttpClientHandler at all with your HttpClient, then you’re basically good to go, as long as you have set it up in your App Project Native settings. Not a joke though! lol 😛

Just use plain HttpClient instance out of the box! but make sure to do the following as well.

– set Native HttpClientHandler!

Go to the following settings in each of your Xamarin.Forms Native project nodes,

  • Android project node -> Properties -> Android Options -> Click “Advanced”

  • iOS project node -> Properties -> iOS Build

Make sure to set the Native Android and NSUrlSessionHandler those settings, to opt to use AndroidClientHandler and iOS NSUrlSessionHandler for your HttpClientHandler by default.

Well UWP or Windows project nodes doesn’t have such settings as it by defaults use .NET Managed HttpClientHandler.

A little demo!

Now if its all good, you should be able to see the following behaviors in action,

So this is a little Xamarin.Forms demo that I prepared to demonstrate the behaviors of Native HttpClientHandlers on Android, iOS and Windows UWP.

Here I’m demonstrating the Network access (blue color access granted and red color access blocked in run time) for a list of scenarios,

Now you can see how each device Native environment handles those endpoint calls, basically only allowing access to trusted secure web endpoints in the native network tunnel to go through.

Well that was quite simple eh! but we all know the real life requirements wouldn’t be so simple, what if we need to use the HttpClientHandler in code?

Yes we need access to the Native HttpClientHandler in code!

So then let me walk you through handling an advance implementation of the native HttpClientHandler with more customization added in code! 😉 

How to? Advanced set up of Native HttpClientHandler!

Yes as you can see in the Project Settings, it doesn’t really give you much options to customize your Native HttpClientHandler settings, or even override some of its behaviors at all. In a real life scenarios you would definitely need some more access to your HttpClientHandler use in code.

Compared to the Managed .NET HttpClientHandler where you easily have access to all its properties and behaviors.

But it is crucial for us to stick to the Native HttpClientHandler, so the solution would be to implement an access to the Native HttpClientHandler in our Xamarin.Forms code.

– Under the hood!?

Thanks to the awesomeness of Xamarin we have full access to those Native HttpClientHandlers in code as well, so that we can use them as however as we like. Let’s take a look under the hood of these Native bits shall we,

Android:

iOS:

Windows:

Now you can see that all these Native Handlers are extending from either HttpClientHandler or the HttpMessageHandler,

Drilling down further into HttpClientHandler we can see that its extending itself from HttpMessageHandler.

– Using em in code!

Let’s start by using our AndroidClientHandler in code to be used with HttpClient instance.

var androidClientHandler = new AndroidClientHandler();
... 
// setting up native httpClientHandler settings
...
...
HttpClient httpClient = new HttpClient((HttpMessageHandler)androidClientHandler);


And for iOS with the NSUrlSessionHandler.

var iosClientHandler = new NSUrlSessionHandler();
... 
// setting up native httpClientHandler settings
...
...
HttpClient httpClient = new HttpClient((HttpMessageHandler)iosClientHandler);


Then for Windows or UWP, opt to our WinHttpHandler.

var uwpClientHandler = new WinHttpHandler();
... 
// setting up native httpClientHandler settings
...
...
HttpClient httpClient = new HttpClient((HttpMessageHandler)uwpClientHandler);

On Windows or UWP make sure to install nuget package: System.Net.Http.WinHttpHandler to use WinHttpHandler which is a far better native option than default HttpClientHandler.

As you can see we’re casting them to HttpMessageHandler as a common ground object, since they all inherit from that base.

Now that we’ve got access to them in code, we can access all their properties and behaviors, and even override to customize them as we wish to.

– build the bridge to Xamarin.Forms!

Since the above bits are not directly accessible from Xamarin.Forms, we need to build the bridge that will allow us to access the Native HttpClientHandler instance in Xamarin.Forms environment directly.

Since I already created a common ground instance across all the native environments with the casting to HttpMessageHandler, this is much easier. Now there are plenty of ways leverage the access to this object up towards Xamarin.Forms layer, but here I’m going to showcase rather a simple implementation.

code on github repo: XFNativeHttpClientHandler/Services/HttpClientService.cs

Here I have a simple Service implementation in Xamarin.Forms where it maintains a Singleton object of itself, which contains a HttpClient object and HttpClientHandler object.

Given the HttpClientHandler is provided, I am instantiating my HttpClient() on demand during the run time as you can see below.

private HttpClientService()
{
    HttpClient = HttpClientHandler != null ?
        new HttpClient((HttpMessageHandler)HttpClientHandler) 
      : new HttpClient();
}

public static HttpClientService Instance
{
    get
    {
        lock (Padlock)
        {
            return _instance ?? 
                  (_instance = new HttpClientService());
        }
    }
}


So the setting up of the HttpClientHandler property happens in the each Native level’s execution start up point.

On Android: MainActivity.cs

protected override void OnCreate(Bundle savedInstanceState)
{
    ...
    
    var androidClientHandler = new HttpClientHandler();
    Services.HttpClientService.HttpClientHandler =               
                                     androidClientHandler;
    
    ...
}


On iOS: AppDelegate.cs

public override bool FinishedLaunching(UIApplication app, NSDictionary options)
{
    ...
    
    var iosClientHandler = new NSUrlSessionHandler();
    Services.HttpClientService.HttpClientHandler = iosClientHandler;

    ...
}


On Windows (UWP): MainPage.xaml.cs

public MainPage()
{
    ...

    var uwpClientHandler = new WinHttpHandler();
    Services.HttpClientService.HttpClientHandler = uwpClientHandler;

    ...
}


That’s it for the set up, then let’s use it in Xamarin.Forms code:

var result = await HttpClientService.Instance.
		HttpClient.GetAsync("https://google.com/");


Now this should provide you with a Xamarin.Forms Solution allowing you to be able to access all the Properties and Behaviors of Native HttpClientHandlers!

Yay! Access in Code!

So the whole point of access these Native HttpClientHandlers in code was to be able to customize their settings and behaviors according to our requirements eh! 😀

Go ahead and access those properties and behaviors that you wish to use…

Here’s me demonstrate a simple scenario, how to override HTTPS Certificate Validation while using our Native HttpClientHandlers!

Full gist: https://gist.github.com/UdaraAlwis/0787f74796d22c294b91be81ff162347

Things Keep in mind!

So when you’re accessing the Native HttpClientHandlers in code there are some things you need to absolutely keep in your mind, to make sure the performance and security is not compromised.

– Custom bits, only Native level!

All the custom configuration that you need to do should be done in Native Xamarin level code, accordingly to native properties and behaviors.

– One time init() only!

You should instantiate your Native HttpClientHandler instances from Native level only once, and they shouldn’t be altered later for consistency during run time across your app.

– HttpMessageHandler, keep it as it is!

Keep the HttpMessageHandler instance that we up-cast from the Native HttpClientHandler instances as it is after instantiation, to make sure you’re not overriding any native properties and behaviors that we set up or inherited prior.

– Release Build, watch out!

When you’re using the Xamarin Platform specific Project Settings, make sure those settings are propagated to Release mode as well. In .csproj file has separate configurations for Debug and Release build configurations, so make sure keep an eye out for those configuration during Release builds as well.

Conclusion

Whenever you need to use the HttpClientHandler along side HttpClient, in your Xamarin.Forms or Native Xamarin Apps, its best to use the Native HttpClientHandler. This can be easily configured in each Native Project Settings or we can even instantiate them in code to be used across our Xamarin.Forms app environment as I’ve explained in this article.

I have shared the demo app code in my github as usual: github.com/XFNativeHttpClientHandler

Well that’s it! 😉
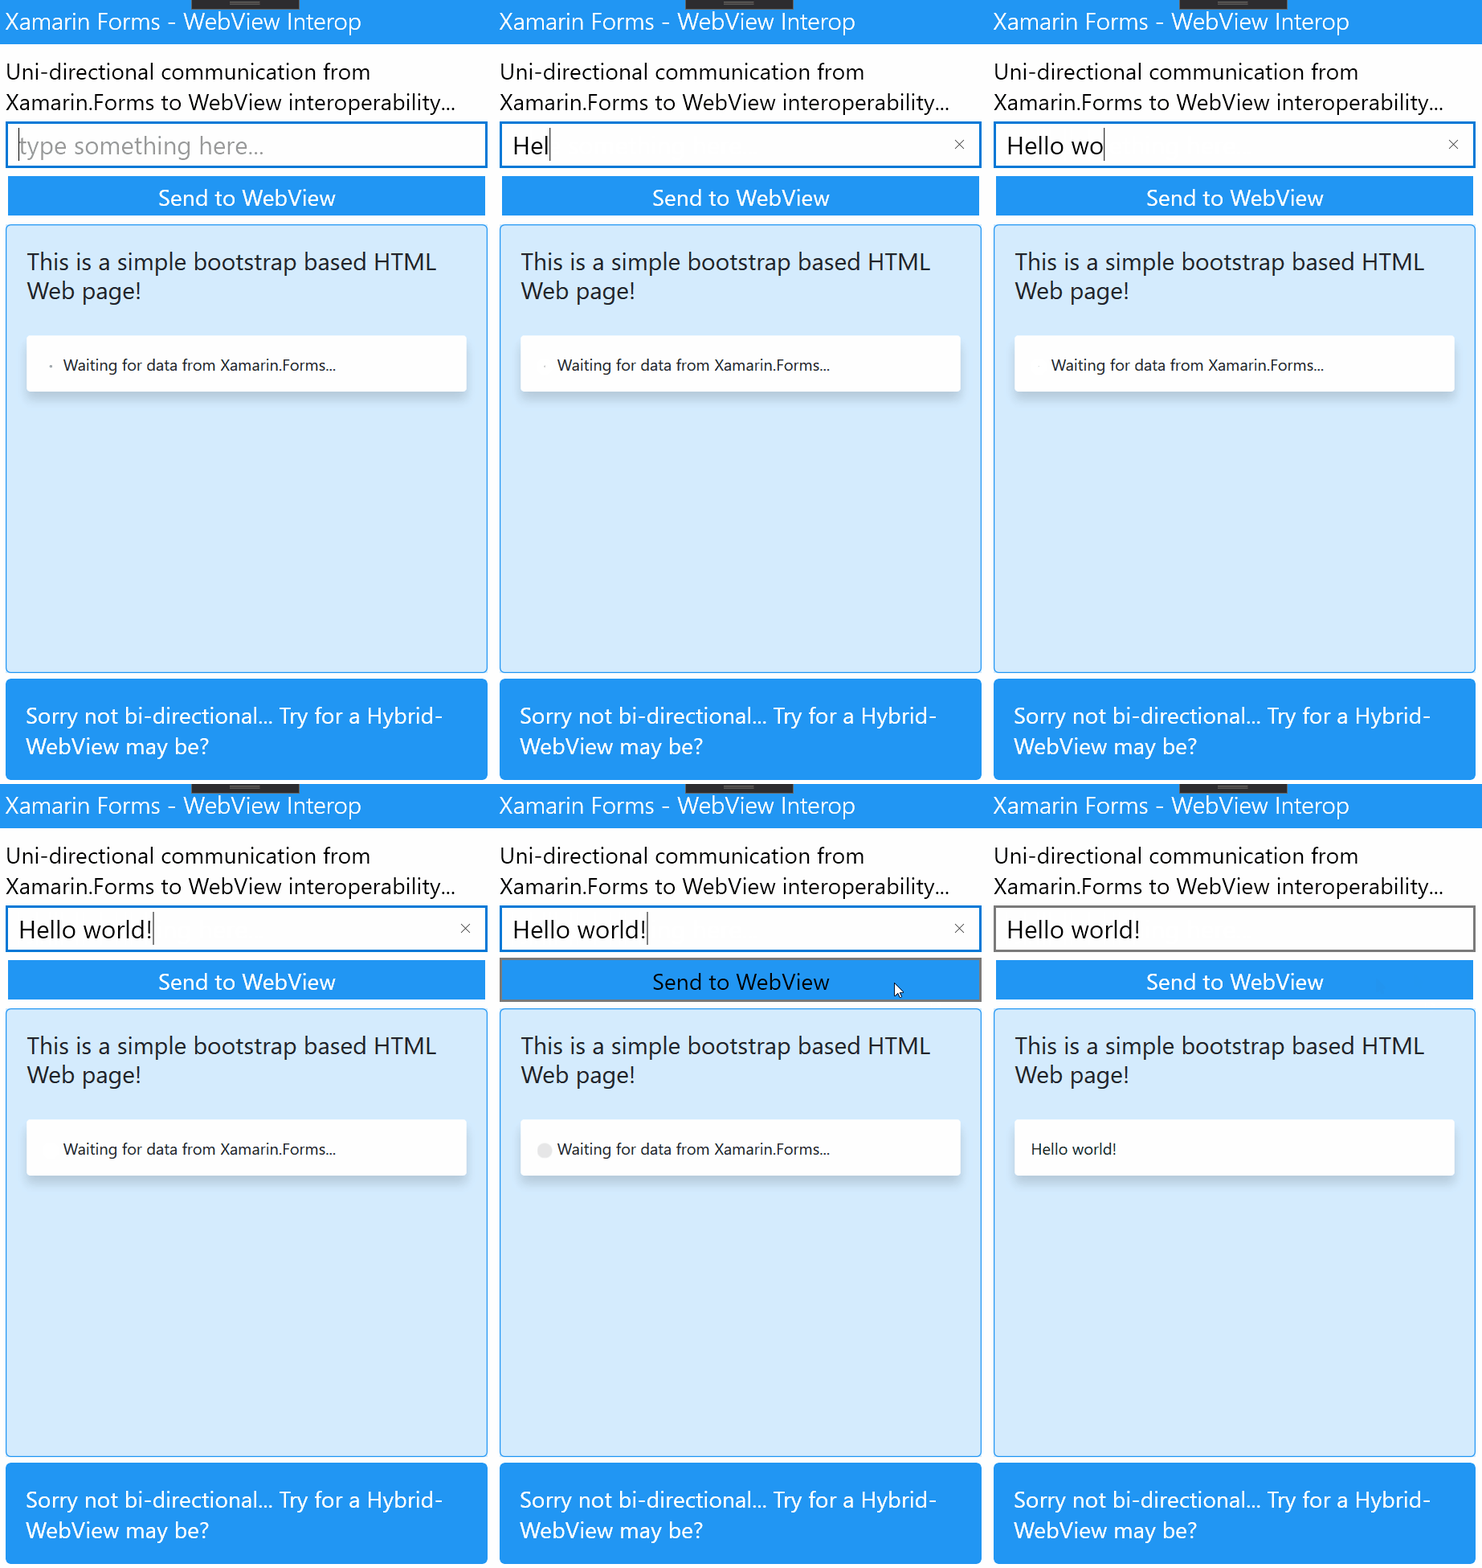
Share the love! Cheers!